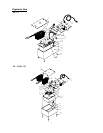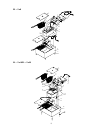
Note that there are 6 parts to the fryer:
* Fryer Body
* Oil pan
* Element and control box
* Element guard
* Basket
* Lid
Place the oil pan into the fryer body; then place the element and control box into the pan. Be sure to clip
the rear of the control box to the fryer body. Place the guard over the element at the bottom of the pan.
The fryer can now be filled with the appropriate cooking oil.
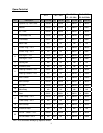
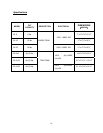
Please consult the specification chart in this manual (page 10) for the correct power supply for your
model fryer. Supply the appropriate power, and connect to power supply. Your fryer is now ready to
operate.
Operation
Once the fryer has been installed correctly, please consult the specification chart (page 10) for the
required volume of cooking oil.
Turn the thermostat dial towards the “ON” position; the amber light will activate to confirm, and adjust
the dial to the required setting.
Allow time for oil temperature to reach the required setting; while oil is heating the red light will activate;
once the oil has reaches the required temperate, the red light will switch off. As the oil fluctuates in
temperature, the thermostat will operate to maintain set temperature. The light will continue to indicate
when the fryer is heating or has reached the required temperature.
A temperature setting of between 325º F and 358º F will be sufficient for general cooking. This could
vary for particular food types or individual requirements.
3


