


3
INSTALLATION REQUIREMENTS for ICAP1 B LD and WHIPPER B:
THIS EQUIPMENT IS TO BE INSTALLED TO COMPLY WITH THE APPLICABLE FEDERAL, STATE, OR LOCAL PLUMBING CODES
HAVING JURISDICTION. IN ADDITION:
1. A QUICK DISCONNECT WATER CONNECTION OR ENOUGH EXTRA COILED TUBING (AT LEAST 2X THE
DEPTH OF THE UNIT) SO THAT THE MACHINE CAN BE MOVED FOR CLEANING UNDERNEATH.
2. AN APPROVED BACK FLOW PREVENTION DEVICE, SUCH AS A DOUBLE CHECK VALVE TO BE INSTALLED
BETWEEN THE MACHINE AND THE WATER SUPPLY.
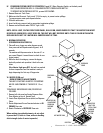
INSTALLATION:
1. Flush inlet water line thoroughly before connecting. If pipe sealant is necessary, teflon tape is commended.
2. Connect water line to the 1/4” flare fitting located at rear of the unit. A shutoff valve in the water supply line is advisable.
3. Check that heater switch is in the OFF position. Switch is located below DOOR ASSEMBLY lower right side corner.
4. Turn on water. Check water line and fittings for leaks.
5. Plug the power cord into a grounded 120 volt, 60 Hz 15 Amp outlet, Single use. Press and hold Rinse Button until water
flows through mixing chamber. It will take 2 to 4 minutes to fill the tank.
6. Fill hopper with DRY* powdered cocoa mix or cappuccino product. See filling instructions.
7. Turn heater switch on and allow 10 to 15 minutes for water to heat.
8. Push on Dispensing Button and check the operation of the hopper. A grinding noise will be heard if not properly engaged.
Go to Troubleshooting Guide.
9. Push on Dispensing Button and check the operation of the mixing chamber (for ICAP1 & Whipper ).
A scratching noise will be heard if whipper blade is not properly aligned. Go to Troubleshooting Guide.
10. Push Dispensing Button and check drink taste.
If adjustments are needed, see “Adjustments”.
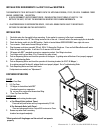
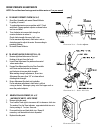
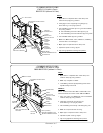
DISPENSER OPERATION
FILLING
1. Open Front Door.
2. Lift Top Cover.
3. Fill hopper to desired level with DRY*
Powdered cocoa mix or cappuccino.
Do not overfill or pack product down when filling.
4. Close Top Cover and Door.
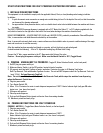
DISPENSING
1. Place cup under mixing chamber spout.
2. a) For Manual Units (without Timer):
Press and hold push button until cup is approximately 2/3 full.
b) For Automatic Units (with Timer):
Press and release push button. Cup will fill to size set on Timer.
3. Remove cup when flow from mixing
chamber has stopped completely.
*Moist product will clog hopper and the unit will not operate
properly.
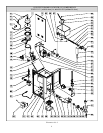
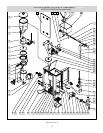
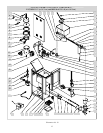
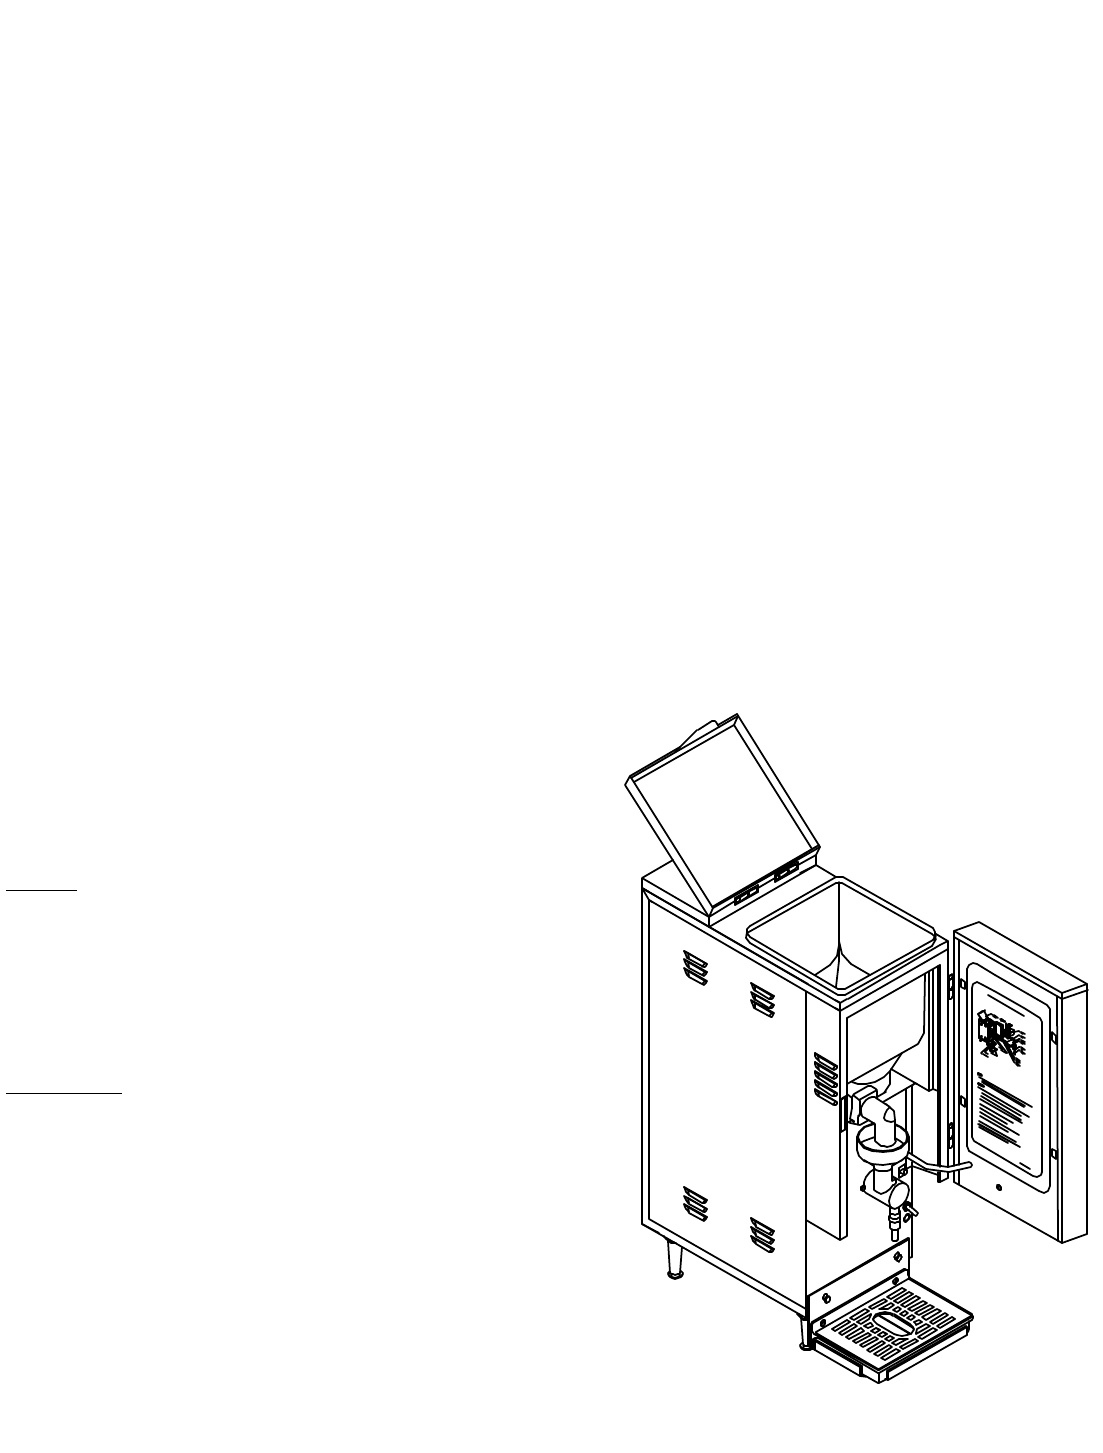
Illustration No. 2 – (ICAP 1 B LD & WHIPPER B shown)