


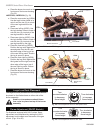
10 10004894
LHEDV Series Direct Vent Insert
FP1280
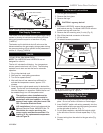
RHEDV
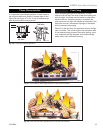
vent termination
1/03
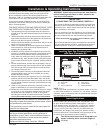
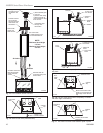
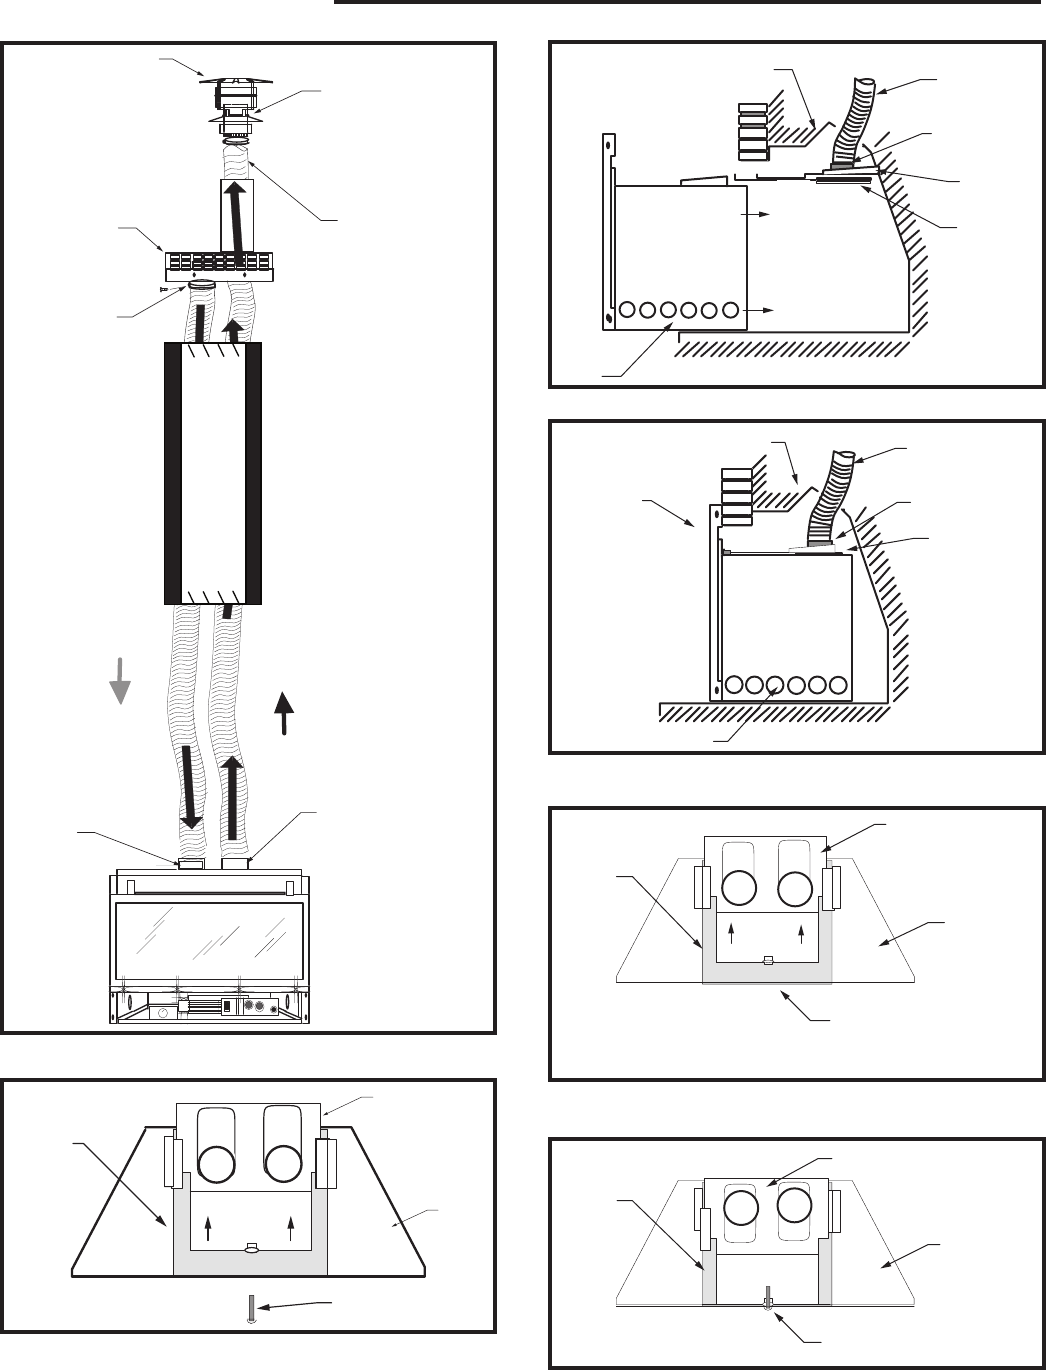
Flue gas exits
through the vent
termination rain
cap
1) Attach flexible pipe
to rain cap
2) Secure with clamp
3) Attach raincap to
vent termination using
three screws
Pull flexible pipe
through vent
termination
Outside combus-
tion air enters
through the lower
level of the vent
termination
Secure with
clamp and
three screws
Air Intake
Exhaust
A or B Vent with
7" Inside Minimum and
14" Outside Maximum
NOTE:
Minimum Vent Height
- 12 feet
Maximum Vent Height
- 35 feet
Exhaust collar se-
cured with clamp and
three screws
Air intake collar with
label secured with
clamp and three
screws
FP1280b
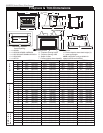
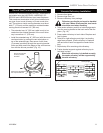
Fig. 12 Liner installatin with A or B vent.
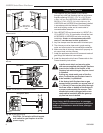
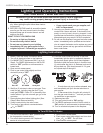
FP1281
Flue collar plate
1/03
Flue Collar
Plate
Fastener
Plate
Cabinet
Top
10/24" x 1¹⁄₂"
Machine Screw
FP1281
Fig. 13 Remove flue collar plate assembly.
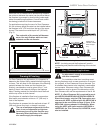
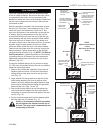
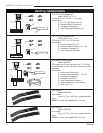
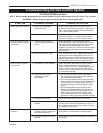
FP1282
flue collar seal
1/03
Damper
3" Flex Vent
Two Pieces
Clamps &
Screw
Fastener
Plate
Gasket
Unit
FP1282
Fig. 14 Apply high temperature sealant to end of collar.
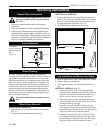
FP1283
unit in place
1/03
Front
Frame
Damper
3" Chimney Liner
Two Pieces
Clamps &
screw
Flue Collar
Plate
Unit
FP1283
Fig. 15 Fasten with two clamps, adjust fastener plate all the
way back.
FP1284
RHEDV flue collar
plate in place
1/03
Flue
Collar
Plate
Fastener Plate
Cabinet
Top
Make sure the flue collar
plate is in contact with the
back edge of the cabinet
top
FP1284
Fig. 16 The flue collar plate must be completely in contact
with back edge of cabinet top.
FP1285
flue collar plate
in place
1/03
Fastener Plate
Cabinet
Top
Machine Screw After
Fastened
Plate Flue
Collar
FP1285
Fig. 17 Use machine screw to bolt fastener plate in place.