HOW TO USE
RICE COOKING:
1. By using the measuring cup provided in the package, measure and
wash rice. Transfer rice to the inner pot. Do not use the inner pot to wash
the rice.
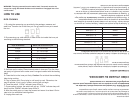
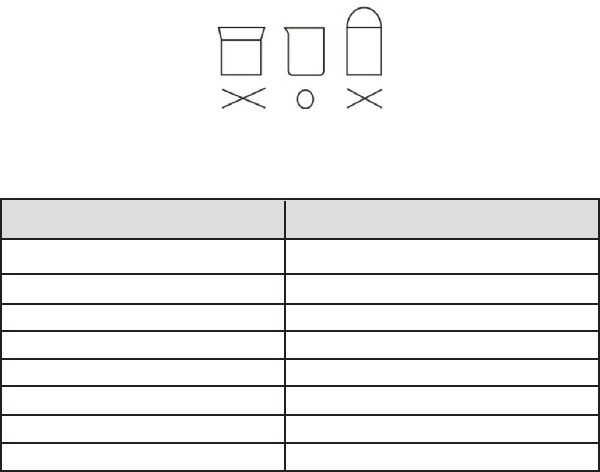
Cups of Raw Rice
Water add to the line on pot
15 cups
14 cups
12 cups
10 cups
8 cups
6 cups
4 cups
2 cups
15 – 15 1/2 cups
14 – 14 1/2 cups
12 – 12 1/2 cups
10 – 10 1/2 cups
8 – 8 1/2 cups
6 – 6 1/2 cups
4 – 4 1/2 cups
2 – 2 1/2 cups
2. By measuring cup, add amount of water to the rice inside the inner pot
according to the following standard:
3. Set inner pot in cooker. Place rice and water in inner pot. Turn the inner
pot gently to right and left to make sure it has good contact with the heating
plate.
4. Close the lid on the inner pot firmly. Caution: Do not block the ventilating
hole during cooking.
5. Plug in power cord. Do not plug in until ready to cook. Otherwise, rice
may be spoiled. If pot is not in cooker, cooking will not begin.
6. Press the switch. “COOK” indicator lamp will be lit.
7. Once cooking is done, the switch will pop up. “COOK” indicator lamp will
be off and the “WARM” indicator lamp will be lit.
8. After the switch pops up, keep the covered unit warm for at least 15 min-
utes to let rice with better cooking effect.
9. Unplug after each use.
CÓMO UTILIZAR SU ARROCERA
COCINANDO ARROZ:
1. Utilizando el medidor incluido en el empaque, mida y lave el arroz.
Añada el arroz dentro de la olla de cocción. No utilice el recipiente remov-
ible para lavar el arroz.
2. Utilizando el medidor, añada la cantidad necesaria de agua al arroz den-
tro de la olla de cocción de acuerdo a los siguientes parámetros:
Tasas de arroz crudo
Agua a añadirse hasta la línea
15 tazas
14 tazas
12 tazas
10 tazas
8 tazas
6 tazas
4 tazas
2 tazas
15 – 15 1/2 tazas
14 – 14 1/2 tazas
12 – 12 1/2 tazas
10 – 10 1/2 tazas
8 – 8 1/2 tazas
6 – 6 1/2 tazas
4 – 4 1/2 tazas
2 – 2 1/2 tazas
3. Coloque la olla de cocción en la base. Coloque el arroz y el agua en la
olla de cocción. Gire la olla con cuidado hacia la derecha e izquierda para
asegurase de que exista un buen contacto con la base calentadora.
4. Cierre la tapa del recipiente firmemente. Advertencia: No tape el agu-
jero de ventilación durante la cocción.
5. Conecte al tomacorriente. No enchufe hasta estar listo para efectuar la
cocción. De lo contrario, el arroz puede estropearse. Si la olla no se en-
cuentra dentro de la base, no se podrá llevar a cabo la cocción.
6. Presione el botón de encendido. La luz indicadora de “COOK” (cocción)
señalará que la cocción se ha iniciado.
WARNING: The plug removed from the mains lead, if severed, must be de-
stroyed as a plug with bared flexible cord is hazardous if engaged into a live
socket outlet.
acaba de terminar.
5. Coloque la tapa sobre la olla durante el proceso de cocción. Mantenga la tapa en
su lugar después de servir para evitar que el arroz se seque o pierda el color.
6. Mantenga la parte inferior de la olla de cocción y la superficie de la placa de
calentamiento libre de cualquier objeto extraño para prevenir desperfectos.
ADVERTENCIA: Si el enchufe se encontrara dañado, éste debe ser
desechado ya que un enchufe con un cordón expuesto puede resultar
ser peligroso si se conectara a un tomacorriente.


