5
HELPFUL REMINDERS
• Once the cover is in position, additional ingredients can be
added during blending by simply lifting the measured pour
lid, adding ingredients, and replacing the measured pour lid.
• Cover should always be in place while the unit is on.
• Warning: Do not place blender jar onto base while motor
is running.
• Do not twist locking ring off blender jar when removing blender jar
from base. Simply lift blender jar from motor base.
• Boiling liquid or solid frozen foods (with the exception of ice cubes
or 1/2 inch [1.3 cm] pieces of frozen fruit) should never be placed
in the blender jar.
• Do not place ice, frozen foods or very cold liquids into a blender
jar which has come directly from a hot dishwasher.
• Do not place very hot liquids or foods into a blender jar which has
come directly from the freezer. Boiling liquids should cool for
5 minutes before being placed in blender jar.
• Follow “Cleaning and Maintenance” instructions on page 6, prior
to your first use.
OPERATION
1. Place the motor base of your Cuisinart
®
SmartPower Basics
™
Blender onto a flat, sturdy surface. It is important that the
surface be clean and dry. Assemble the blender by following
the assembly instructions. Once the jar is assembled and is in
position on the motor base, plug the Cuisinart
®
SmartPower
Basics
™
Blender into an electrical outlet.
2. Add all necessary ingredients to the blender jar, and replace
the cover. You may add more ingredients by lifting the
measured pour lid and dropping ingredients through the fill
area. Replace the measured pour lid after adding ingredients.
Do not place hands into blender jar with blender
plugged in.
Note: Add liquid ingredients first, then follow with solid ingredients.
This will provide more consistent blending and prevent unnecessary
stress on the motor.
Note: To remove blender jar cover, lift edge of cover upwards.
Lifting measured pour lid will not remove cover.
QUICK REFERENCE GUIDE
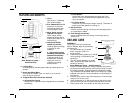
ToActivate Blender Press ON- The blender is in ON mode.
To Begin Blending Press desired speed button.
To Change Speeds Press desired speed button.
To Pulse
In ON mode press PULSE, then press and
release desired speed button as needed.
To Crush Ice In ON mode, press and release
ICE CRUSH button as needed.
To Stop Blending Press OFF button.
(and Deactivate Blender)
To Stop Blending Release button.
(in Pulse or Ice Crush Mode)
SPEED SELECTION GUIDE
Refer to this guide to choose the best speed for your desired result.
Ingredient/Recipe Speed Result
Reconstituting frozen juice 8 - 12 Smooth and full-bodied
concentrates
Mayonnaise 10 - 12 Thick and Creamy
Salad Dressings 10 - 14 Completely blended and
emulsified
Nuts (shelled, 1/2 cup or less 2 - 6 Coarse to fine
at a time) pulse to chop
Heavy or whipping cream 2 - pulse Thick creamy topping
Bread, Cookies or Crackers 12 - pulse/blend Coarse to fine as
(1/2 – inch pieces, 1 cup or desired
less at a time)
Grating/chopping citrus zest 12 - Uniformly fine
(add 1 – 2 tsp. Sugar or salt pulse/blend
from recipe)
Smoothies, shakes, health drinks 14 - 18 Smooth, creamy and thick
Baby foods/fruit and vegetable 14 - 16 Smooth and creamy
purées
Frozen cocktails 16 - 18 Thick and slushy
Hard cheeses 12 - pulse/blend Coarse to fine
Spices 12 - 18 Coarse to fine
pulse/blend
Ice Ice Crush, Coarse crush to snowy
pulse or
continuous
02CU13208 CB-18 Series IB 9/18/02 11:59 AM Page 5


