3
INTRODUCTION
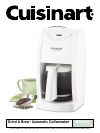
Congratulations. You’ve just purchased a
coffeemaker that will make you want to retire
your alarm clock! Wake up, instead, to the rich
aroma of freshly ground, just brewed coffee,
with the Cuisinart
®
Grind & Brew
™
Automatic
Coffeemaker. One of the Premier Series,
this deluxe 12-cup model offers the best of
Cuisinart’s expert coffeemaking technology
to deliver unsurpassed ease of use and rich
full-bodied coffee flavor. With streamlined
European styling and a graceful carafe,
it’s a beautiful addition to any kitchen.
The Grind & Brew
™
Coffeemaker features a
separate grinding assembly and filter chamber
to make beans easy to add and used grounds
easy to remove. A convenient “grind off”
control turns the grinder off when preground
coffee is used.
Fully programmable, this is the ultimate
user-friendly coffeemaker. Simply add beans
and water, set the flavor control to 1-4 or 5+
cups, and program start time up to 24 hours in
advance. An auto-shutoff feature even lets you
set the unit to turn off up to 4 hours after the
brew cycle ends.
A charcoal water filter and a permanent
commercial-style gold tone coffee filter allow
only pure coffee flavor to flow through, and the
popular Brew Pause
™
feature lets you sneak a
cup before the cycle is finished.
Dishwasher safe parts. Separate grind and
filter chambers for easy cleanup. The freshest
tasting coffee outside of a coffee bar.
What more could a coffee lover ask for?
TABLE OF CONTENTS
Important Safeguards . . . . . . . . . . . . Page 1
Unpacking Instructions . . . . . . . . . . . Page 3
Introduction. . . . . . . . . . . . . . . . . . . . Page 3
The Quest for the
Perfect Cup of Coffee . . . . . . . . . . . . Page 4
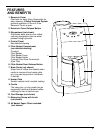
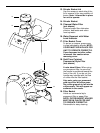
Features and Benefits . . . . . . . . . . . . Page 5
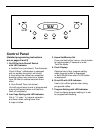
Control Panel . . . . . . . . . . . . . . . . . . Page 7
Programming Your Coffeemaker . . . . Page 8
Setting the Time . . . . . . . . . . . . . . . . Page 8
Programming the Auto On. . . . . . . . . Page 8
Programming the Variable Auto Off . . Page 8
Changing the Water Filter . . . . . . . . . Page 9
Making Coffee. . . . . . . . . . . . . . . . . . Page 9
Cleaning and Maintenance . . . . . . . . Page 11
Warranty . . . . . . . . . . . . . . . . . . . . . . Page 12
IMPORTANT UNPACKING
INSTRUCTIONS
1. Place the box on a large, sturdy flat surface.
2. Remove theinstruction book and any
other literature.
3. Turn the box so that the backside of the
coffeemaker is down and slide the
coffeemaker from the box.
4. After the coffeemaker has been removed,
place the box out of the way and lift off the
top polyfoam insert.
5. Remove cardboard insert off carafe handle.
6. Remove the cardboard insert between the
carafe lid and Brew Pause mechanism by
sliding it out of the unit.
7. Grasp the carafe by its handle, remove it from
the heater plate and remove the polybag.
8. Remove the polybag covering the coffeemaker.
We suggest you save all packing materials
in the event that future shipping of the
machine is needed. Keep all plastic bags
away from children.


