


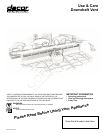
2
2
RV Model Only
To operate the RV raised vent system, press
and release the Up/Down pushbutton when the
vent intake is in its lowered position. The intake
will take approximately ten (10) seconds to
reach its uppermost position, where it will stop.
The blower will then turn on automatically
and run on the High speed setting. The
blower speed may be adjusted by pressing
and releasing either the Medium or Low
pushbuttons. The fan speed may be changed
whenever desired, as long as the vent intake is
in the fully raised position. The blower will not
operate if the intake is in any other position.
The blower may be turned off in one of two
ways: First, the user may press and release the
Off pushbutton, which will shut off the blower.
The intake may then be lowered by pressing
and releasing the Up/Down key. Alternatively,
the user may press and release the Up/Down
key only, which shuts off the blower and also
lowers the vent intake.
NOTE
1. Activate the blower a few minutes before
starting to cook to establish an airflow
pattern in the room.
2. Adjust the fan speed according to the
volume and weight of the cooking exhaust.
3. Reduce the fan speed if the flame on a
gas cooktop is being drawn by the vent
system. Drawing of the flame is a normal
occurrence with these powerful vent
systems, especially when installed with
short duct runs.
4. Always raise the vent intake and activate
the blower whenever using the cooktop.
5. Eliminate air currents in the vent vicinity
by shutting nearby windows and doors,
turning off ceiling fans and closing adjacent
heating and air conditioning outlets.
6. Place your largest frying pans, skillets and
stock pots on the rear burners whenever
possible, as the draft is strongest closest to
the vent intake.
WARNING:
1. Do not operate the vent system without the
grill and filters in place or with dirty, grease-
laden filters.
2. Do not raise or lower the vent without first
verifying that pot handles or other objects
will not interfere with the moving vent
intake.
3. Do not set hot cookware, utensils or any
other objects on the vent top cap.
4. Do not leave the vent intake in the down
position when using the cooktop.
The blower may be turned off by pressing the
Up/Down switch once, which shuts off the
blower and also lowers the vent intake.
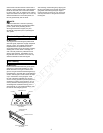
Variable
Speed Control
Countertop
Top Cap
Filter
Screen
Up/Down Switch
Securing the Electronic Keypad
RV Model Only
In order to prevent accidental raising or lowering
of the vent, the electronic keypad may be
secured so that the pushbuttons do not function.
This is especially helpful when young children are
present or when cleaning the top cap, end caps
and electronic keypad.
While the vent is in the fully lowered or fully
raised position, press the High and Low keys
simultaneously and hold for approximately one
second. This will secure the electronic controls,
making all pushbuttons inoperative. The High
and Low indicating lights will illuminate to indicate
that the controls have been secured. The keypad
may be reactivated by again pressing the High
and Low buttons simultaneously and holding for
approximately one second. After reactivation,
the Up/Down key and all other pushbuttons will
become functional once again.
Top Cap Cleaning
NOTE:
The top cap should be cleaned while the vent
intake is in the lowered position.
The top cap and end caps feature painted
finishes that will scratch or stain if cleaned with
abrasive materials or harsh chemicals. Gently
wipe them with a sponge or soft cloth moistened
in a mild detergent solution whenever they
becomes soiled. Avoid introduction of moisture
into the electronic keypad area
Filter Cleaning
NOTE:
The vent intake must be in the up position to
allow for filter cleaning.
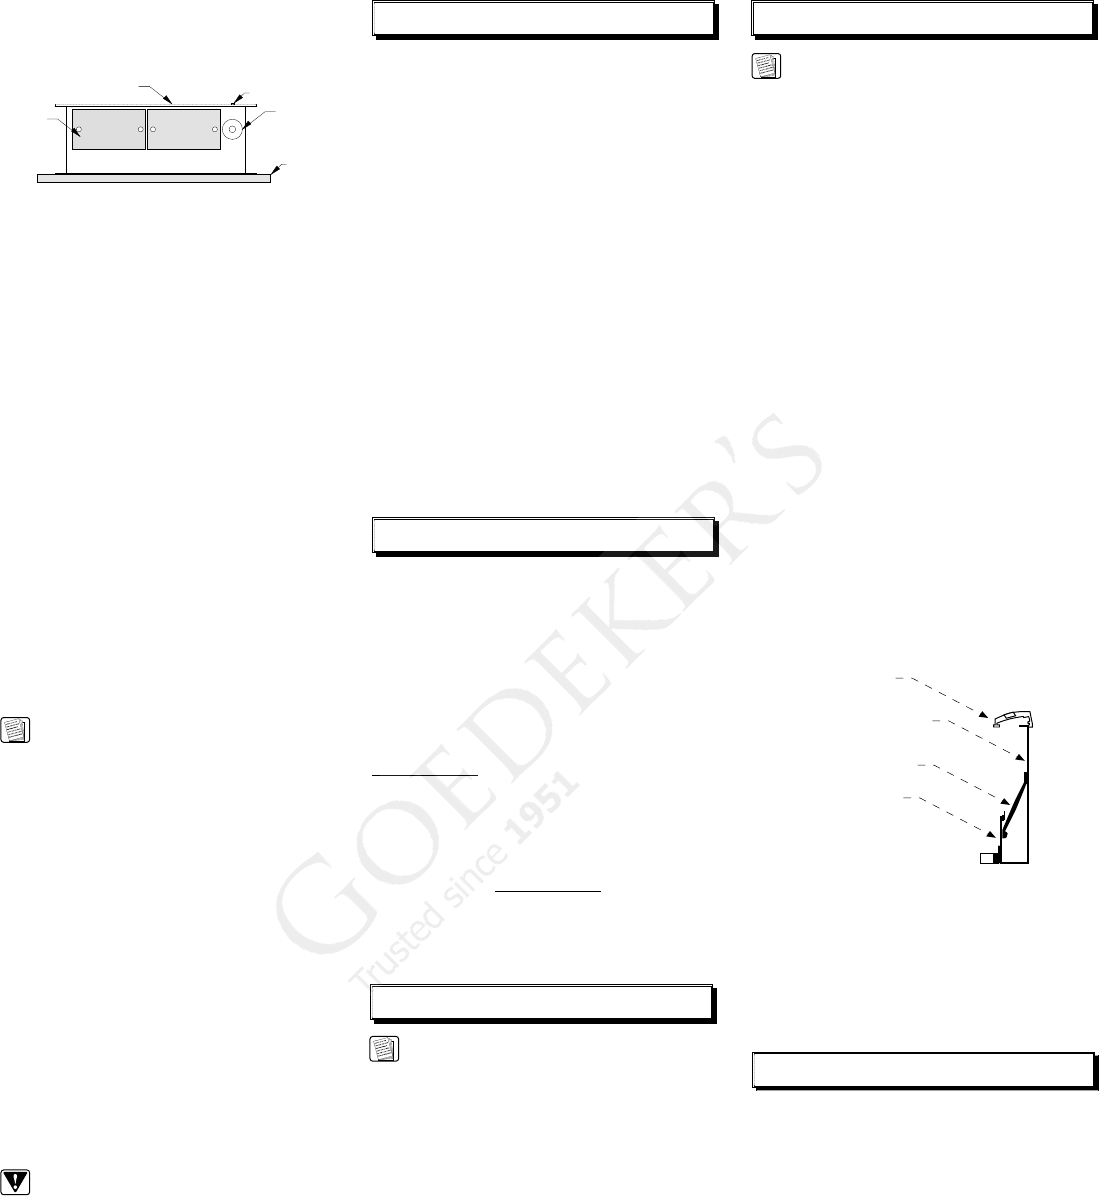
Features
(ERV Shown)
ERV/PRV Models Only
To remove the intake filter, gently grasp the
filter on both ends and push down, then pull
the top of the filter out of the upper groove.
The filter should be cleaned regularly by
hand-washing in hot water with mild detergent
solution. Dry the filters completely before using
them again.
RV Model Only
The filters must be cleaned regularly. The
Clean Filter indicating light will illuminate after
40 hours of blower usage to remind you to
clean the filters. However, the filters may need
to be cleaned more often based upon the type
and amount of cooking. Check the filters at
regular intervals.
To gain access to the filters, remove the
grill as described below. The two filters are
positioned side by side within the vent intake.
When properly situated, the tops of the filters
lean against the rear intake panel and the filter
bottoms rest in a slot attached to the front
intake panel. Remove one filter at a time by
gently grasping the top center of the filter and
lifting.
Using Delay Off
RV Model Only
When the cooking process is complete, the user
may select the Delay Off feature to remove any
residual exhaust by pressing and releasing the
designated key. After choosing this function, the
blower will continue to run at the selected fan
speed for five (5) minutes, then automatically
turn off. The vent intake will remain in the
fully raised position after the blower shuts off.
The intake may be lowered by pressing and
releasing the Up/Down key at your convenience.
While the blower is operating in Delay Off
mode, the blower speed may be adjusted to set
the desired blower speed and corresponding
noise level. Simply press and release the High,
Medium or Low key at your discretion.
To manually cancel the Delay Off function at any
time, press and release the Off key or the Up/
Down pushbutton. This will shut off the blower,
and, in the case of pressing the Up/Down
button, also cause the vent intake to retract.
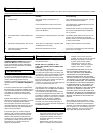
Top Cap
Rear Intake Panel
Grasp Filter & Lift
Front Intake Panel
The filters may be cleaned by hand-washing in
hot water with a mild detergent solution or by
placing them in an automatic dishwasher. Dry
the filters completely before using them again.
After cleaning, reinstall the filters carefully.
Removing the Filters
(RV Shown)
Intake Panel Cleaning
ERV/PRV Models Only
The anodized aluminum intake panels
accumulate grease over time and should be
cleaned whenever the filters are washed.
After removing the grill and filters, wipe all
external and internal aluminum surfaces
with a sponge or cloth moistened with a
mild detergent. Rinse off with water, then
remove all moisture by wiping with a soft, dry
polishing cloth. Always wipe in the direction
of the grain.
RV Model Only
The anodized aluminum intake panels
accumulate grease over time and should be
cleaned whenever the filters are washed.
After removing the grill and filters, wipe all