


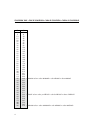
6
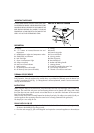
A. Display
B. “-/+” buttons to increase/decrease time and
temperature
C. MODE button to select time/temperature modes
D. START/STOP on/off button
E. Red "ON" light
F. Green "at temperature" light
G. Safety microswitch
H. Min/max oil level indicator
I. Basket support
J. Oil drain tap (not on all models)
K. Oil drain tap cover (not on all models)
L. Casing
M. Handle
N. Control unit guides
O. Cover with handle
P. Viewing window
Q. Filter (if present)
R. Removable bowl
S. Basket with folding handle
T. Heating element
U. Guides for attaching the control unit
V. Cord storage compartment
Z. Thermal cut-out device reset button
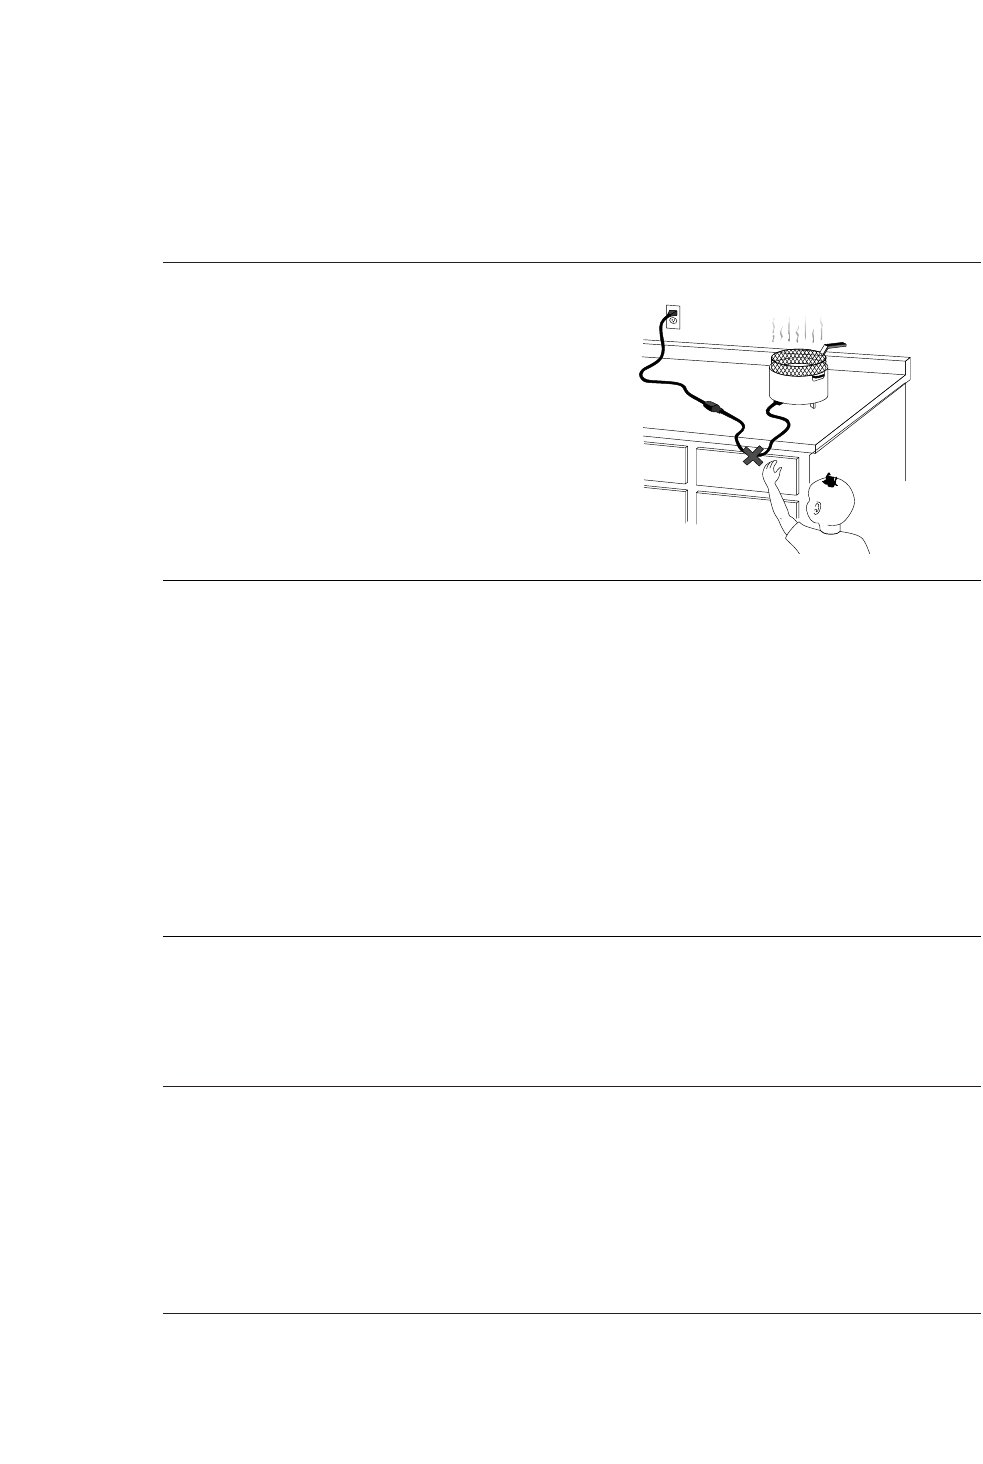
A DEEP FRYER FALLING FROM A HIGH PLACE MAY
CAUSE SERIOUS BURNS. NEVER LEAVE THE CORD
HANGING FROM THE EDGE OF THE SURFACE THE
DEEP FRYER IS RESTING ON WHERE IT COULD BE
GRASPED BY A CHILD OR GET IN THE WAY OF THE
USER. DO NOT USE EXTENSIONS CORD.
IMPORTANT SAFEGUARD
KEEP OUT OF REACH OF CHILDREN
DESCRIPTION
THERMAL CUT-OUT DEVICE
The appliance is fitted with a thermal cut-out device which interrupts heating in the event of incorrect use or
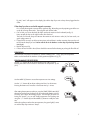
faulty operation. Once the appliance has cooled down, use a toothpick to delicately press the thermal cut-
out device reset button (Z) (see fig. 1). If the appliance is still not operational, contact a service center autho-
rized by the manufacturer.
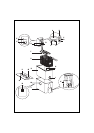
INSTRUCTIONS
Before using the deep fryer for the first time, clean the basket, bowl and cover thoroughly with hot water and
detergent. The control unit with power cord and heating element can be cleaned with a damp cloth. Check
that water does not enter into the control unit and that there is no water left in the bottom of the removable
bowl. Dry all parts thoroughly.
Make sure the control unit is correctly fastened to the deep fryer body. The safety micro-switch (G) will pre-
vent the appliance from operating unless the control unit is correctly positioned in the guides (N).
The deep fryer is now ready for use.
FILLING WITH OIL OR FAT
• Remove the cover (O), lifting it by the handle. Turn the basket handle until it locks into place (pos. 2, fig.
2). Remove the basket (S) by pulling upwards.
• From the cord storage (V), pull out the length of cord required to connect the appliance to the outlet (see