Using Your Dishwasher Installation
Page 9
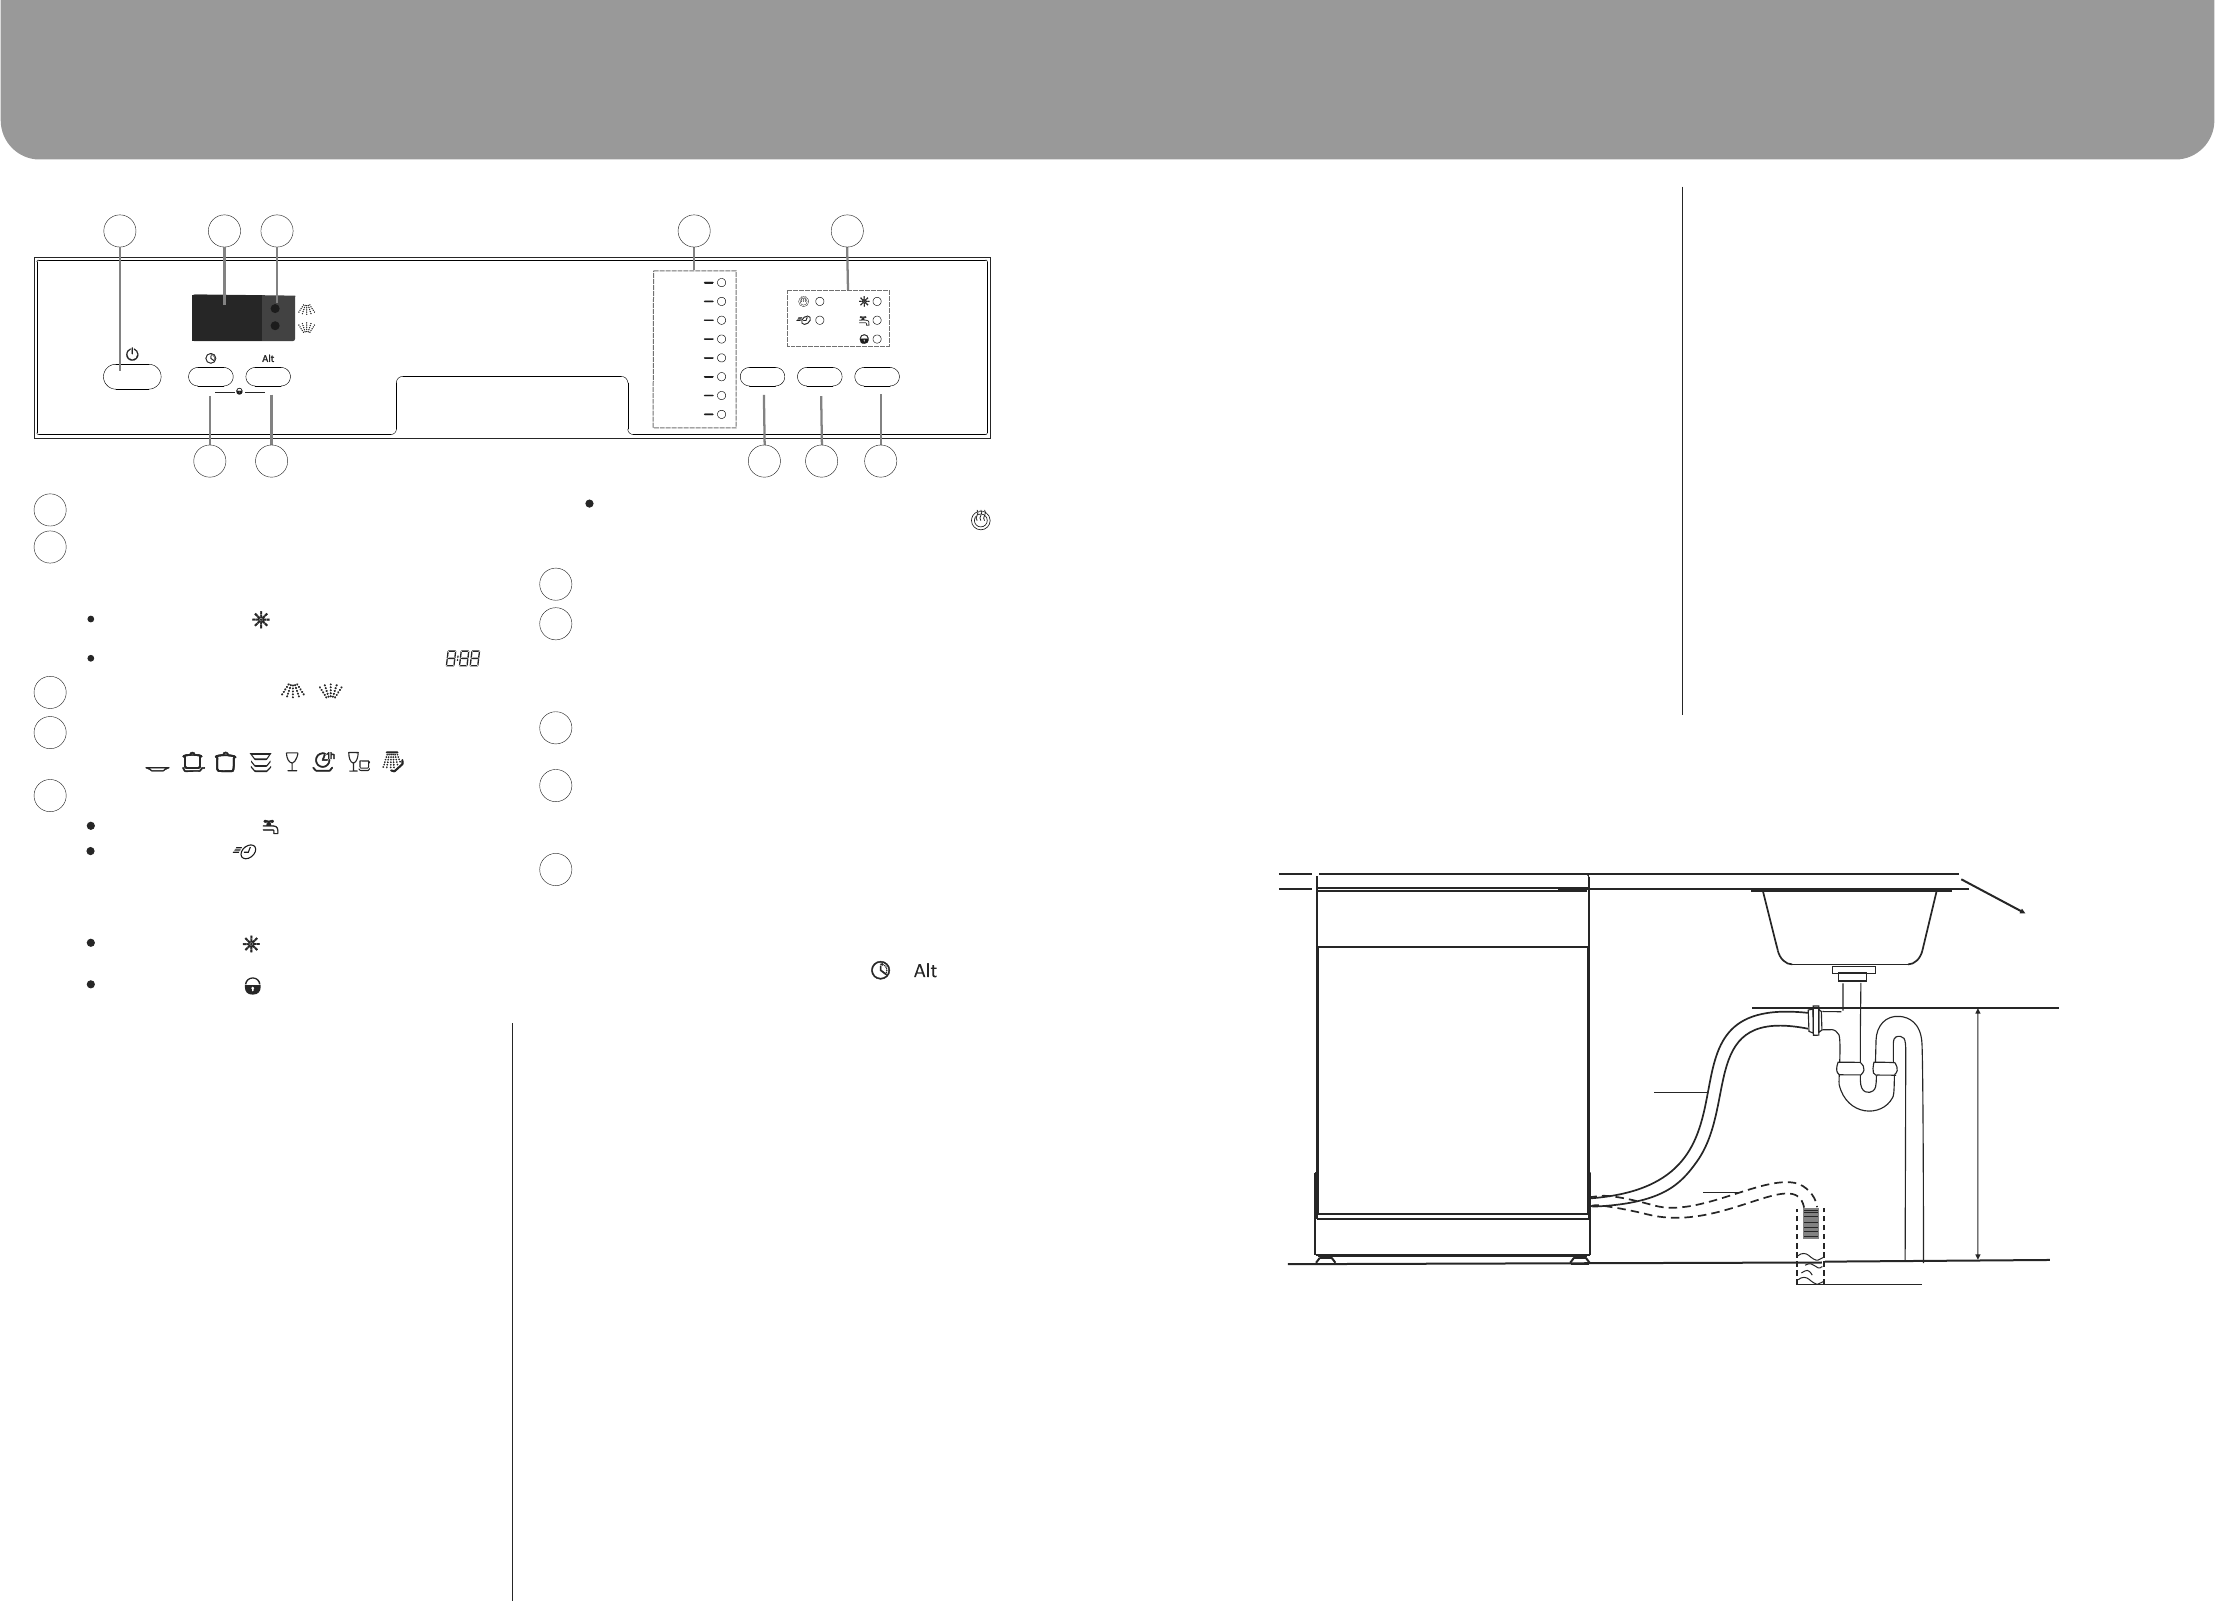
CONTROL PANEL
4
3
2
1
Power button: To turn on/off the power supply.
Display screen: to show the remaining
time and the state(running state, delay
time,error codes etc )
Alt function indicator:
Program indicators:
5
Other indicators:
TURNING ON THE APPLIANCE
Starting a wash cycle:
1. Draw out the lower and upper basket, load the
dishes and push them back. It is recommended to
load the lower basket first, then the upper one (see
the section entitled “Loading the Dishwasher”).
2. Pour in the detergent (see Page 14).
3. Insert the plug into the socket. The power supply is
220-240 VAC /50 HZ, the specification of the
socket is 10A 250VAC. Make sure that the water
supply is turned on to full pressure.
4. Close the door, press the ON/OFF button to switch
on the machine.
5. Press the program button to select your desired
program, when the program is selected, the
response icon will light, then press the Start/Pause
button, the dishwasher begins to start.
NOTE: When you press the Start/Pause button to
pause during washing, the running indicator will stop
blinking and the dishwasher will sound every minute
unless you press the Start/Pause button to start.
CHANGE THE PROGRAM
Premise:
1. A cycle that is underway can only be modified if it
has only been running for a short time. Otherwise,
the detergent may have already been released, and
the appliance may have already drained the wash
water.
2. Press the Start/Pause button, the machine will be in
standby mode, then press the program button
more than 3 seconds then you can change the
program to the desired cycle setting (see the
section entitled " Starting a wash cycle. . .").
NOTE:
If this is the case, the detergent dispenser must be
refilled (see the section entitled "Adding
Detergent").
If you open the door during a wash cycle ,
the machine will pause. The program light will
stop blinking and the buzzer will sound every
minute until you close the door. After
you close the door, the machine will keep on
working after 10 seconds.
Page 20
10
Start /Pause button: To start the selected
washing program or pause the washing
program when the machine is working.
Delay Button: Press to delay the wash
6
Rinse Aid indicator:
Indicates when the dispenser needs to be refilled.
Delay time, Remain time ,or error codes indicator:
Auto
Intensive
Glass
Heavy
1 Hour
Normal
Rapid
Soak
Start/PausePrograms
Option
2
3
1
6
7
4 5
8 9 10
AUTO
Rinse Aid indicator:
Indicates when the dispenser needs to be refilled.
Child lock indicator:
Water faucet indicator:
Express indicator:
This function can reduce the running time, water and
energy consumption are slight increased. (This function
can only be used with programmes Intensive, Heavy,
Normal and Glass ).
Extra drying: An increased temperature during the final rinse
to improve drying. Slight increase in energy consumption.
(This function can only be used with programmes Intensive,
Heavy, Normal, Glass and 1 Hour).
Alt Button: Dual zone wash function, press
the button to select either upper basket or
lower basket loaded, and the response
indicator.
7
Program Button: Press to select the
appropriate program.
8
Express and Extra Drying function
Button: Press to select the express and
extra drying function.
9
Drain Hose Connection
Insert the drain hose into a drain pipe with a
Ÿ
minimum diameter of 40mm, or let it run into the
sink, making sure to avoid bending or crimping it.
The top of the hose must be at a height less than
1000mm. The free end of the hose must not be
immersed in water to avoid back flow.
Syphon Connection
Insert the drain hose into a drain pipe with a
Ÿ
minimum diameter of 40mm, or let it run into the
sink, making sure to avoid bending or crimping it.
The top of the hose must be less than 1000mm.
How to Drain Excess Water from Hoses
If the sink is more than 100cm higher than the floor,
Ÿ
the excess water in the hose cannot be drained
directly into the sink. It will be necessary to drain
excess water from the hose into a bowl or suitable
container that is held outside and lower than the
sink.
MAX 1000mm
A
Counter
Front
Drain pipe
NOTE
The top of the hose
must be less than
1000mm.
¦40mm
B
Water Outlet
Connect the water drain hose. The drain hose must
Ÿ
be correctly fitted to avoid water leaks. Ensure that
the water drain hose is not kinked or squashed.
Extension Hose
If you need a drain hose extension, make sure to
Ÿ
use a similar drain hose.
It must be no longer than 4 metres; otherwise the
Ÿ
cleaning effect of the dishwasher could be
reduced.
Attention:
Child lock function: press two buttons( + )
simultaneously to lock the program.


