


Using Your Dishwasher
As the rinse aid diminishes, the size of the black dot
on the rinse aid level indicator changes, as illustrated
below.
BEFORE STARTING THE DISHWASHER
The following things should be checked before
starting the dishwasher.
1. That the dishwasher is level and fixed properly.
2. That the inlet valve is open .
3. That there is no leakage at the connections of the
conducts.
4. The wires are tightly connected and the power is
switched on.
5. That the inlet and drain hoses are not knotted or
kinked.
6. All packing materials should be taken out of the
dishwasher.
PRIOR TO USING FOR THE FIRST TIME
Before using your dishwasher for the first time:
Fill the Rinse Aid Dispenser
The rinse aid is released during the final rinse to
prevent water from forming droplets on your dishes,
which can leave spots and streaks. It also improves
drying by allowing water to roll off the dishes. Your
dishwasher is designed to use liquid rinse aids. The
rinse aid dispenser is located inside the door next to
the detergent dispenser. To fill the dispenser, open the
cap and pour the rinse aid into the dispenser until the
level indicator turns completely black. The volume of
the rinse aid container is about 140ml.
Function of the Rinse Aid
Rinse aid is automatically added during the last rinse,
ensuring thorough rinsing, and spot and streak free
drying.
WARNING!
Only use branded rinse aid for dishwasher. Never fill
the rinse aid dispenser with any other substances
(e.g. Dishwasher cleaning agent, liquid detergent).
This would damage the appliance.
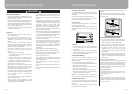
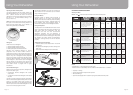
When to refill the Rinse Aid Dispenser
If there is no rinse-aid warning light in the control
panel, you can judge the amount of rinse-aid by the
color of the optical level indicator "C” located next to
the cap. When the rinse-aid container is full, the whole
indicator will be dark. As the rinse-aid diminishes, the
size of the dark dot decreases. You should never let
the rinse aid get below 1/4 full.
Page 9
Full
3/4 Full
1/2 Full
1/4 Full
(Should refill to
eliminate spotting)
Empty
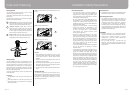
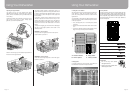
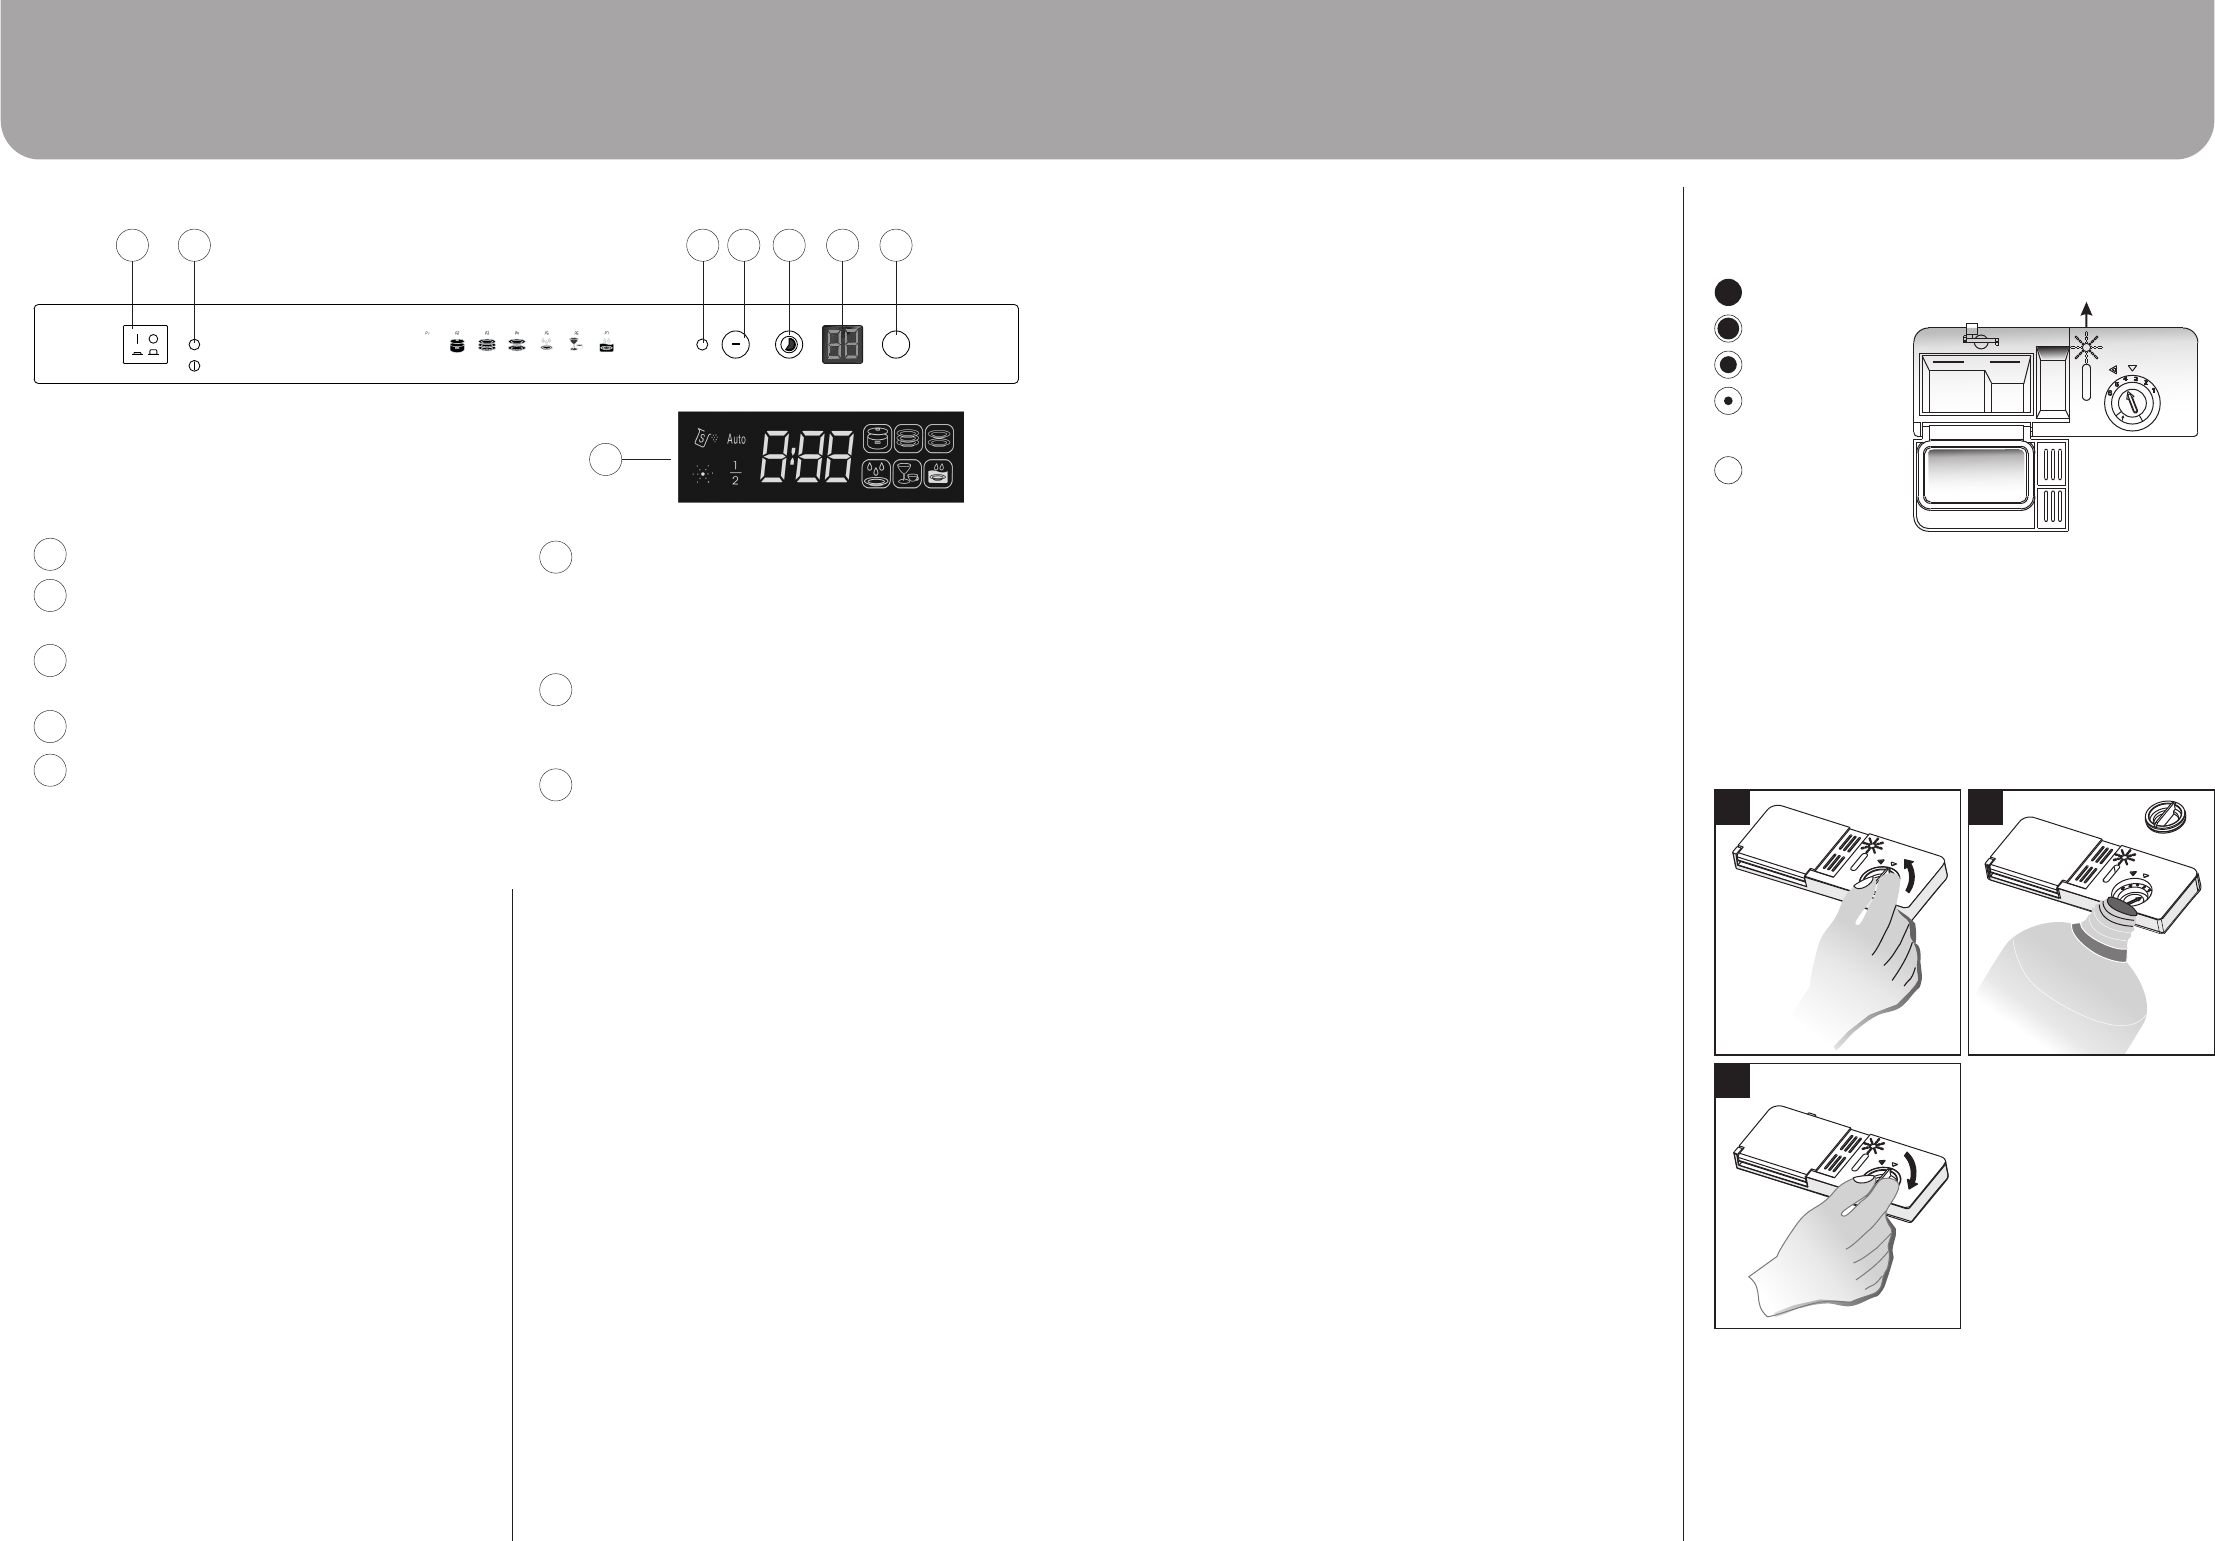
How to fill the Rinse Aid Dispenser
1. To open the dispenser, turn the cap to the "open"
(left) arrow and lift it out.
2. Pour the rinse aid into the dispenser, being careful
not to overfill.
3. Replace the cap by inserting it aligned with
"open" arrow and turning it to the closed (right)
arrow.
Be careful not to overfill the dispenser, because this
could cause over sudsing. Wipe away any spills with a
damp cloth. Don't forget to replace the cap before
you close dishwasher door.
ATTENTION! Clean up any rinse aid split during filling
with an absorbent cloth to avoid excess foaming
during the next wash.
Page 16
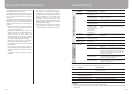
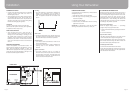
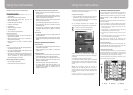
CONTROL PANEL
2
3
1
5
4
2
1
Power switch: To turn on/off the power supply.
Power indicator light: Becomes lit when the
ON/OFF button is pressed down.
Half Load light: Indicates a Half load wash.
Half Load Button: To select Half load functions.
(Half load function means that the lower spray
arm does not run, so you should load the upper
basket only).
8
7
6
Delayed Start Button: Press this button to set
the delayed hours for washing. You can delay
the start of washing up to 24 hours. One press
on this button delays the start of washing by half
an hour.
Display window: Delay time and fault codes
and P1 to P7 will be displayed here, P1 to P7
correspond to the 7 programs.
Program Button: Press this button to select the
desired washing program.
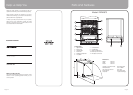
TURNING ON THE APPLIANCE
Starting a wash cycle:
1. Draw out the lower and upper basket, load the
dishes and push them back. It is recommended to
load the lower basket first, then the upper one (see
the section entitled “Loading the Dishwasher”).
2. Pour in the detergent (see Page 10).
3. Insert the plug into the socket. The power supply is
220-240 VAC /50 HZ, the specification of the
socket is 10A 250VAC. Make sure that the water
supply is turned on to full pressure.
4. Open the door, press the ON/OFF button, and the
ON/OFF light will turn on.
5. Press the program button to select your desired
wash cycle, then close the door, the dishwasher
will start after 10 seconds.
The display window shows the state of the
dishwasher:
a) LED shows '-:--' -- Stand by
b) LED shows 'H:MM' and not blinking--Being paused
c) LED shows 'H:MM' and blinking--Running
Using Your Dishwasher
PROG.
1
2
Intensive
Heavy
Normal
Rapid
Rinse
Soak
AUTO
AUTO
4 5 6 7 8
3
Display window: Program remaining time,
delay time, running indicator, fault codes etc.
CHANGE THE PROGRAM
Premise:
1. A cycle that is underway can only be modified if it
has only been running for a short time. Otherwise,
the detergent may have already been released, and
the appliance may have already drained the wash
water.
If this is the case, the detergent dispenser must be
refilled (see the section entitled "Adding
Detergent").
2. Open the door, press the PROG. button more than
three seconds to cancel the program, then you can
change the program to the desired cycle setting.
Then, close the door.
NOTE:
If you open the door during a wash cycle, the machine
will pause. The LED Display Window will stop blinking
and the buzzer will sound every minute unless you
close the door. After you close the door, the
dishwasher will continue working after 10 seconds.
If display window shows error codes after a warning
sound (see page 21 for “ERROR CODES"), that
indicates the machine is out of order, please turn off
the main power and water supply before calling for
service.
C (Rinse-Aid indicator)
MIN
MA
X
1 2
3