Installation Using Your Dishwasher
Cold Water Connection
Connect the cold water supply hose to a threaded
Ÿ
3/4(inch) connector and make sure that it is
fastened tightly in place.
If the water pipes are new or have not been used for
Ÿ
an extended period of time, let the water run to
make sure that the water is clear. This precaution is
needed to avoid the risk of the water inlet getting
blocked and damaging the appliance.
WARNING!
In order to avoid water staying in the inlet hose,
please close the hydrant after using. (Not applicable
to appliances without aqua-stop.)
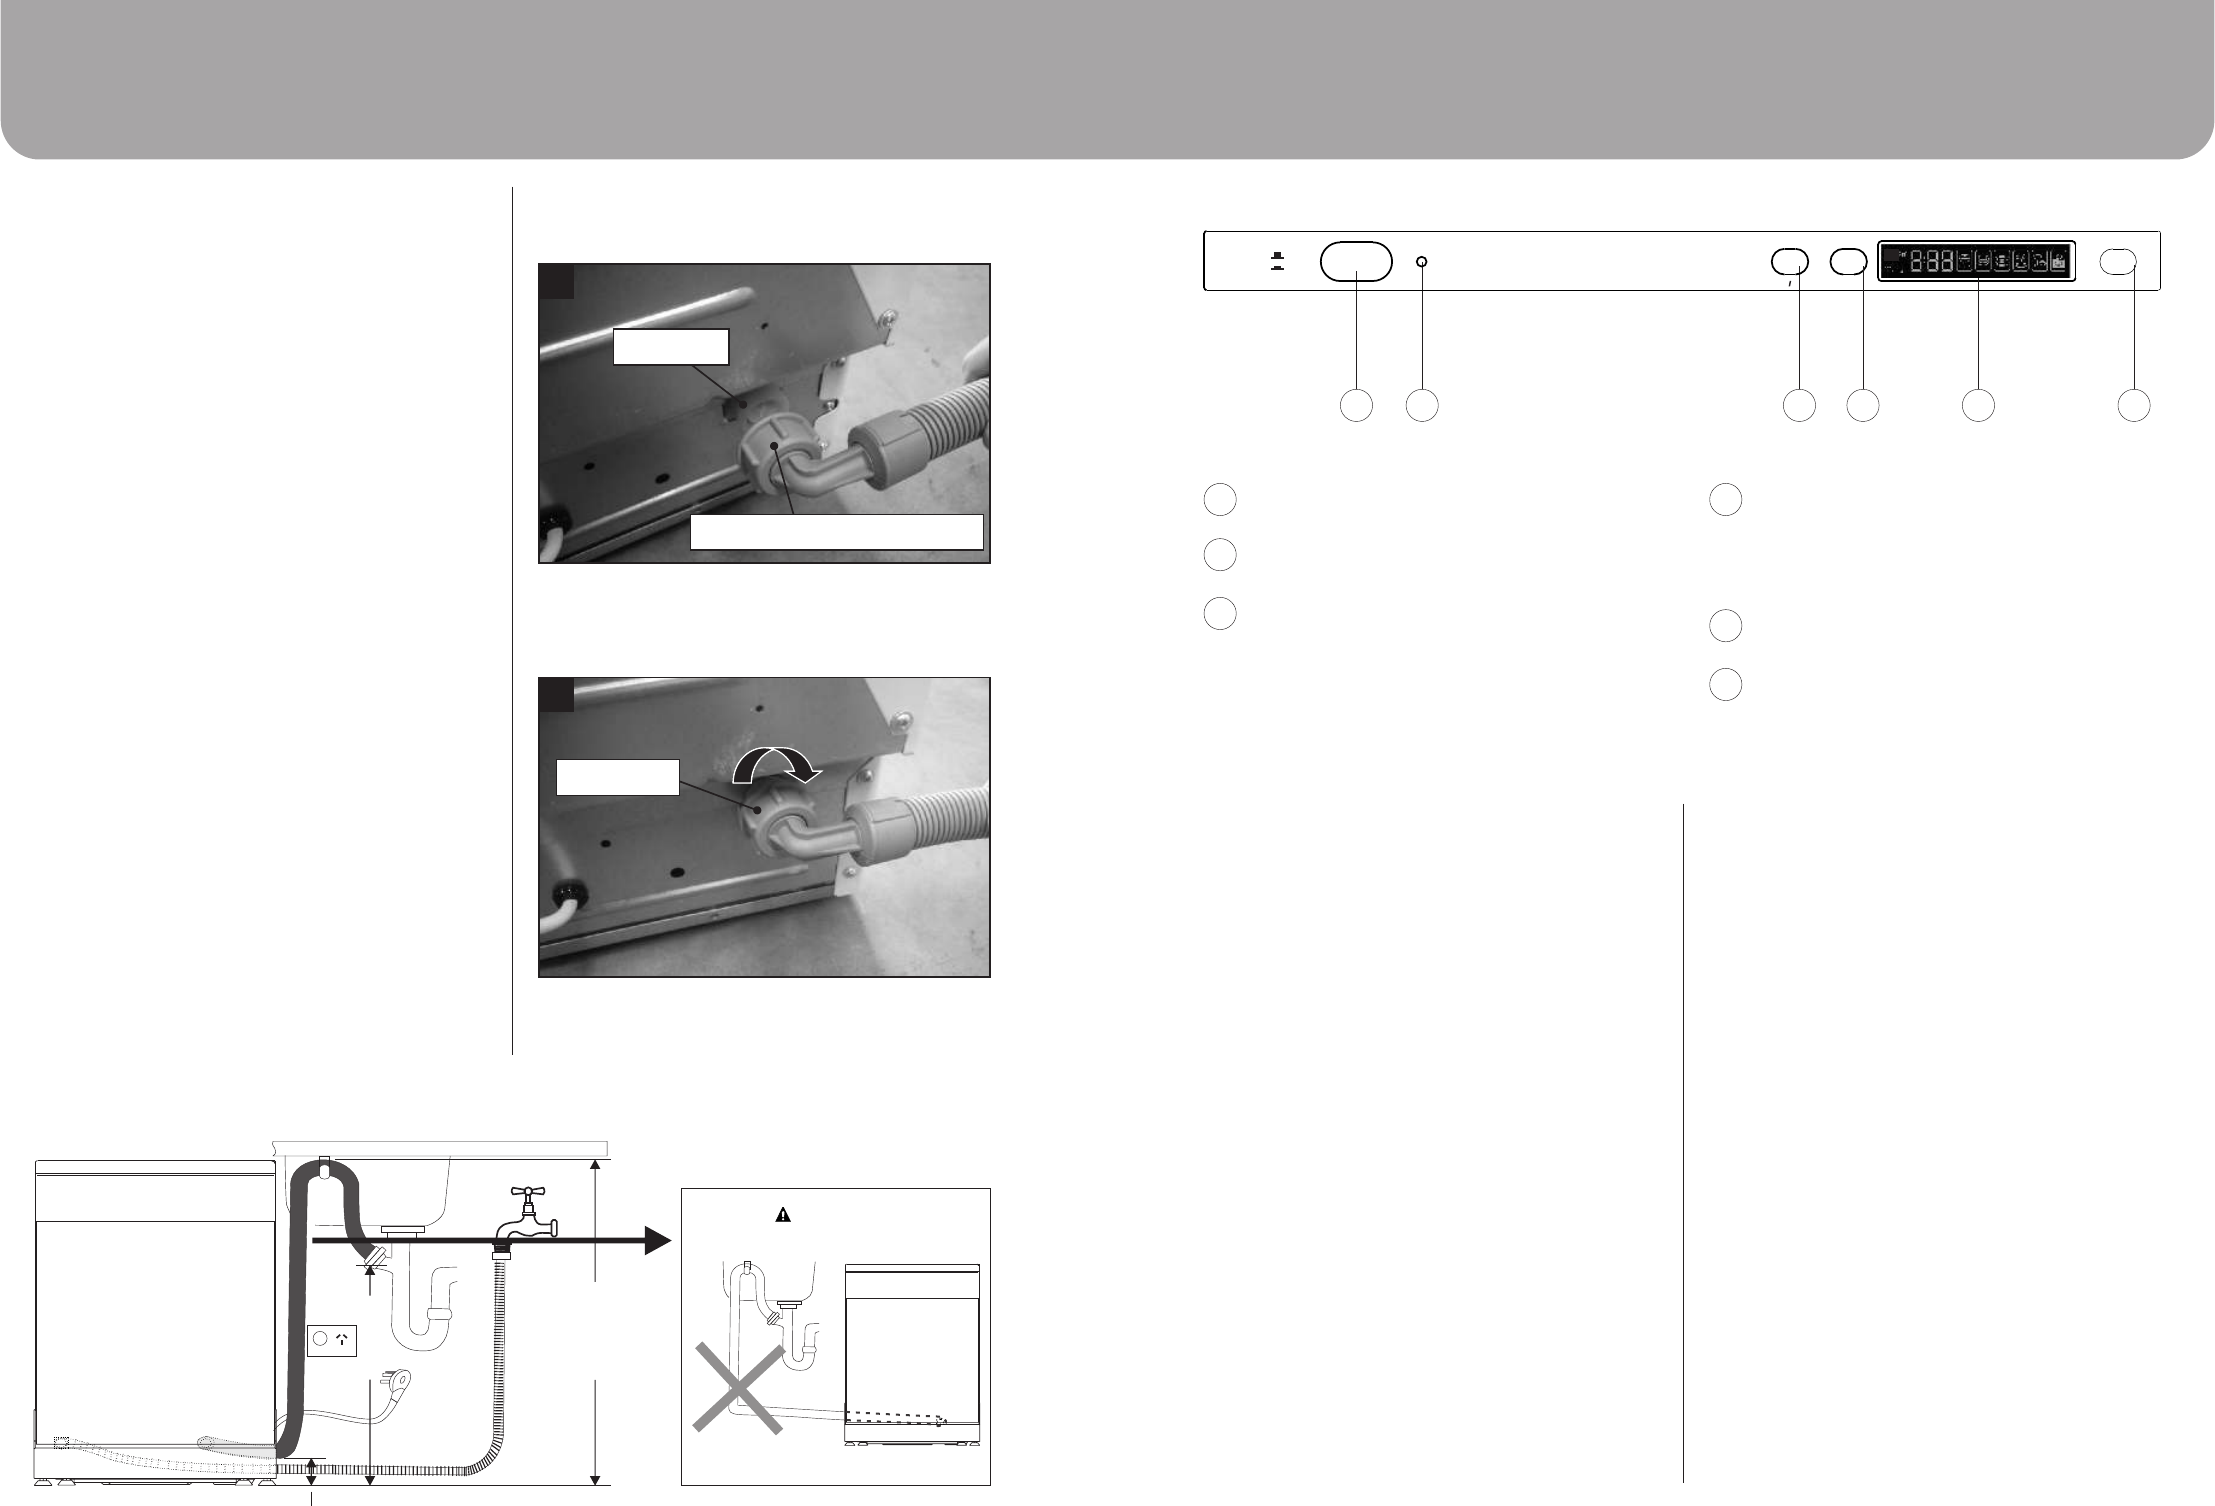
Drain Hose Connection
Insert the drain hose into a drain pipe with a
Ÿ
minimum diameter of 4cm, or let it run into the sink,
making sure to avoid bending or crimping it. Use
the special plastic support that comes with the
appliance . The top of the hose must be at a height
between 40 and 100cm. The free end of the hose
must not be immersed in water to avoid the back
flow of it.
Page 23Page 10
Max 1000mm
Min 400mm
Inlet pipe
connector
Min 100mm
Drain pipe
connector
DISHWASHER
SINK
WARNING!
DO NOT BEND IN ANY WAY!
FRONT VIEW
POWER
OUTLET
CONTROL PANEL
2
3
1
3
2
1
ON/OFF Button: To turn on/off the power
supply.
Power on light: Becomes lit when the Power
ON/OFF button is pressed down.
Half Load Button:
(Half load function means that the lower spray
arm does not run, so you should load the upper
basket only).
To select Half load functions.
6
5
4
Delayed Start Button: Press this button to set
the delayed hours for washing. You can delay
the start of washing up to 24 hours. One press
on this button delays the start of washing by
one hour.
Display window Display the delay time,
running indicator, fault codes and etc.
: s
Program Button: Press this button to select the
desired washing program.
TURNING ON THE APPLIANCE
Starting a wash cycle:
1. Draw out the lower and upper basket, load the
dishes and push them back. It is recommended to
load the lower basket first, then the upper one (see
the section entitled “Loading the Dishwasher”).
2. Pour in the detergent (see Page 13).
3. Insert the plug into the socket. The power supply is
220-240 VAC / 50 HZ, the specification of the
socket is 10A 250VAC. Make sure that the water
supply is turned on to full pressure.
4. Open the door, press the ON/OFF button, and the
ON/OFF light will turn on.
5. Press the program button to select your desired
wash cycle.
6. Close the dishwasher door with a little force to
ensure the door is closed properly. A click can be
heard when the door is closed perfectly.
7. When the washing cycle is complete, you can shut
off the switch by pressing the ON/OFF button.
CHANGE THE PROGRAM
Premise:
1. A cycle that is underway can only be modified if it
has only been running for a short time. Otherwise,
the detergent may have already been released, and
the appliance may have already drained the wash
water.
If this is the case, the detergent dispenser must be
refilled (see the section entitled "Adding
Detergent").
2. Open the door, press the PROG. button more than
three seconds to cancel the program, then you can
change the program to the desired cycle setting.
Then, close the door.
NOTE:
If you open the door during a wash cycle, the machine
will pause. The LED Display Window will stop blinking
and the buzzer will sound every minute unless you
close the door. After you close the door, the
dishwasher will continue working after 10 seconds.
If display window shows error codes after a warning
sound (see page 29 for “ERROR CODES"), that
indicates the machine is out of order, please turn off
the main power and water supply before calling for
service.
PROG.DELAY
1 2
ON
OFF
4 5 6
How to install the mechanical Aqua Stop Hose
Mechanical Aqua Stop Hose preparation.
Ÿ
Snap-fit the inlet valve and rotate the clamp ring to
Ÿ
fix the hose.
1
2
Inlet valve
Mechanical Aqua Stop hose
Clamp ring


