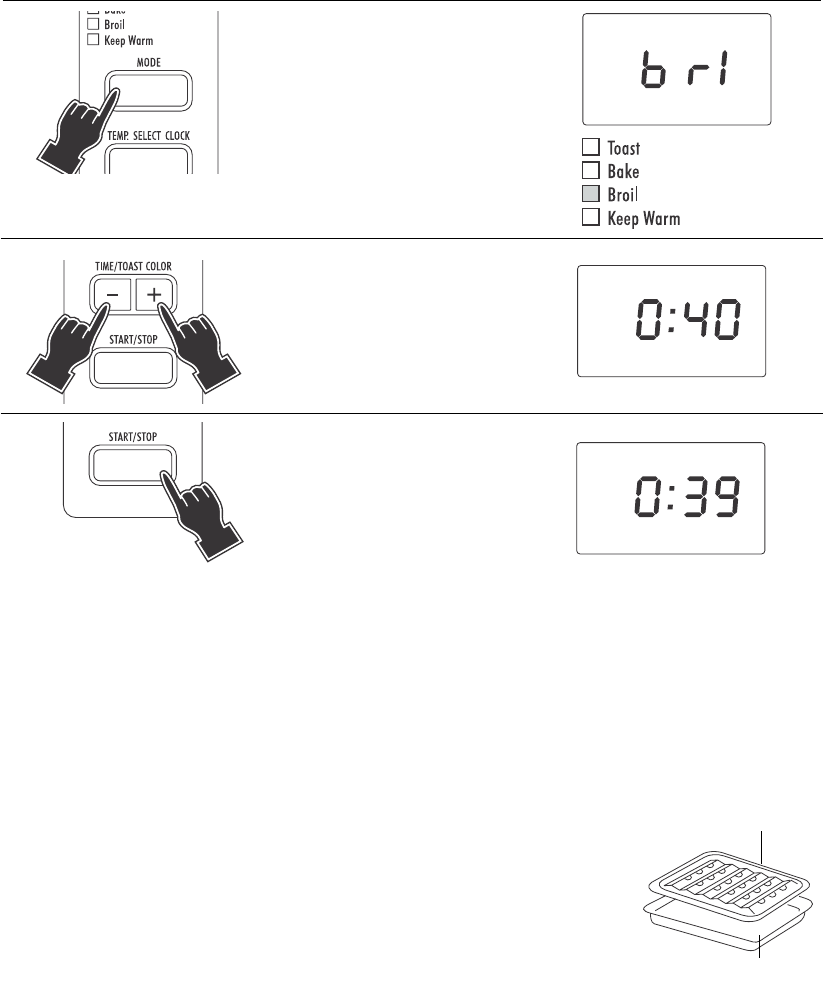
NOTES:
• If the cooking time is not set (skipping point 2), the display will show the countdown starting from the
default duration of 15 minutes.
• If the START/STOP button (9) is not pressed within 3 minutes from the previous setting, the control will
return to stand-by.
TIPS FOR GOOD RESULTS:
•
The oven should not be preheated.
• Place the food on the broiling rack set in the bake pan as shown in the figure.
Place the wire rack (D) in the upper guide (G).
• Always use the broiling rack.
• For easier clean-up, the bake pan can be lined with foil. Be sure not to cover
the broiling rack or let foil extend beyond the edges of the pan.
• Turn the meat halfway through cooking.
• Be careful when turning food or removing the pan. Use pot holders and avoid
spilling drippings.
• Never cover heating elements with foil.
• To top-brown casseroles with cheese toppings, place the dish directly on the wire rack in the upper guide. Close
the door and watch carefully to avoid burning the toppings.
• The cooking process can be stopped in any moment by pressing the START/STOP button (9).
10
2.3 - BROIL MODE
1 Press the MODE button (6)
until the BROIL indicator light
(4) is on. The display will
show the message
b r l
.
2 Set the cooking time (max 1
hour) by pressing the
TIME/TOAST COLOR buttons
(8).
3 Press the START/STOP button
(9). The oven will start the
countdown. At the end of the
set time the control will emit 3
“beeps” and the display will
show
e n d
.
BROIL RACK
BAKE PAN


