5
USING THE CONTROLS
Thermostat dial (A)
Select the desired temperature, as follows:
• To defrost (*) (see page 14): . . . . . . . . . . . . .Thermostat dial in the “•” position.
• To keep food warm (see page 14): . . . . . . . . .Thermostat dial in the “60°C” position.
• For convection oven cooking (*) or traditional
oven cooking (see page 14-15): . . . . . . . . . .Thermostat dial from “60°C” to “220°C”.
• For all types of grilling (see page 16): . . . . . .Thermostat dial in the “▼▼▼” position.
Timer dial (B)
• To program the cooking time: . . . . . . . . . . . .Turn the dial clockwise to the desired time
(max. 120 minutes); when the set time has
elapsed, an audible signal (*) will be emitted
and the oven will automatically switch off.
• To switch the oven off: . . . . . . . . . . . . . . . . .Turn the dial to the “0” position
To set times less than 20 minutes, first turn the dial all the way round, then back anti-clockwise
to the desired time.
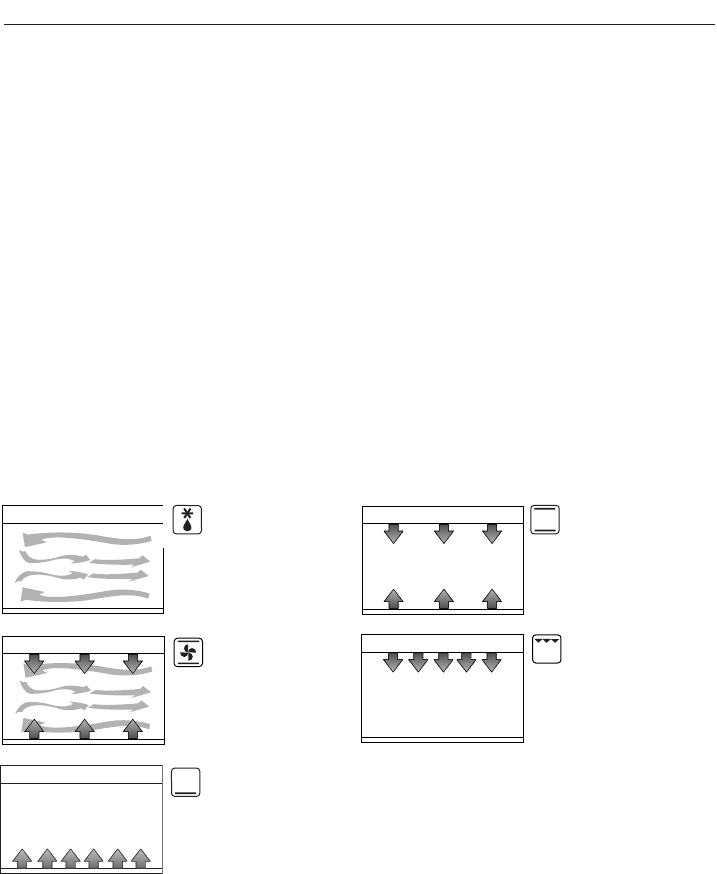
Function selector dial (D)
This dial is used to select the cooking functions available, that is:
DEFROSTING (*)
(ventilation only)
TRADITIONAL
OVEN COOKING,
KEEPING FOOD WARM
(top heating element and
bottom heating element on)
CONVECTION
OVEN COOKING (*)
(top heating element, bottom
heating element and ventila-
tion on)
GRILLING
(top heating element on
at maximum power)
DELICATE
COOKING
(bottom heating element
on)
Indicator light (C)
The light on means that the oven is on.
Inside light (N) (*)
When the oven is on, the light inside the oven is always on. To replace the bulb, proceed as fol-
lows: unplug the appliance from the power socket, unscrew the glass cover and replace the
burnt-out bulb with a new one of the same type (resistant to high temperatures) and then replace
the glass cover.
(*) only on some models


