www.desatech.com
117190-01B
7
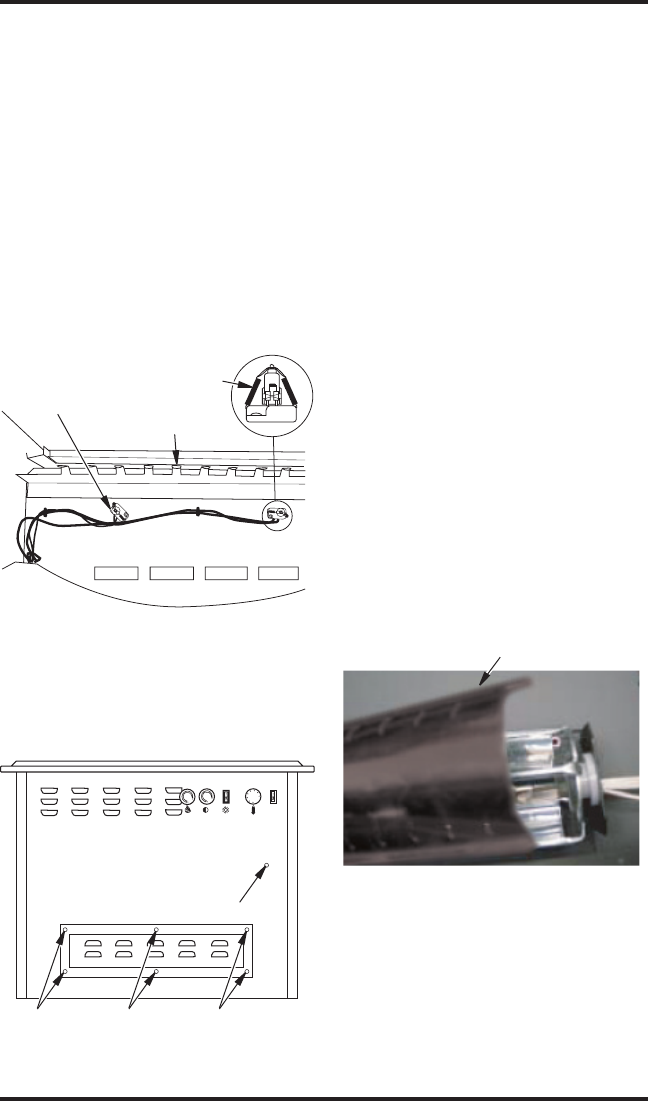
Figure 7 - Ember Bed Bulb Replacement
(Looking in from Top of Unit)
Figure 8 - Locating Flame Generation
Cylinder
Log Grate
Bulb with
Spring Clip
Bulb with
Spring Clip
Screws Screws Screws
Grounding
Connecting Screw
Flame Cylinder Drum
Figure 9 - Flame Generation Cylinder
Drum
Replacing Log Set Ember Bed Bulbs
1. Carefully remove mirror from unit by lift-
ing it gently from the stove. Store in a safe
place or lay it face down on the carpet.
2. From the bottom, lift up the log set ember bed
and remove it from the unit (do not pull up on
logs).
3. Remove spring clip from bulb. Hold socket
and pull out old bulb.
4. Hold socket and push in new bulb. Replace
spring clip.
5. Repeat steps 2 and 3 for the second bulb.
CLEANING AND
MAINTENANCE
Continued
Replacing Flame Generation Bulbs
1. Unscrew the 6 screws from back of stove
shown in Figure 8. Remove metal plate.
AVOID STRESS TO THE WIRES.
2. Locate the flame generation cylindrical drum.
It is constructed of two removable halves; ei
-
ther of which can be removed from the unit.
2. Squeeze half of drum cylinder until it's top
edge clears the top drum track. Remove bot
-
tom edge of cylinder drum from bottom drum
track. This will give you access to the light
bulbs. Note: Do not exert excessive pressure
on drum cylinder as this may cause damage.
3. Remove spring clip. Hold socket and pull out
old bulb.
4. Hold socket and push in new bulb (DO NOT
exceed wattage). Replace spring clip.
5. Repeat steps 5 and 6 for second bulb.
6. Insert bottom edge of removed cylinder half into
bottom drum track. Gently squeeze drum cylin
-
der until it's top edge fits into top drum rack.
7. Replace the metal plate with screws.
8. Replace the log set ember bed.
9. Replace the mirror. Note: Before replacing, clean
mirror of any dust or fingerprints. Make sure the
mirror side is toward the front of the unit.
10. Replace the top contrasting light housing.
Note: The contrasting light should be placed
at the mid point of the mirror edge.
11. Replace the metal plate and 4 screws. Replace
the top of the unit by sliding the top forward
until the clips reconnect.
12. Secure the top to the back frame by reattach
-
ing screws.


