


6
INSTALLING REFRIGERATOR IN
ENCLOSURE
NOTE: DO NOT install the appliance directly on
carpeting. Carpeting must be removed or
protected by a metal or wood panel beneath
the appliance, which extends at least full
width and depth of the appliance.
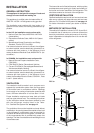
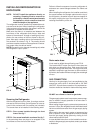
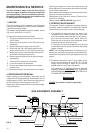
The refrigerator must be installed in a substantial enclo-
sure and must be level. When installing the refrigerator
in the enclosure, all areas within the recess in which the
refrigerator is installed must be sealed.
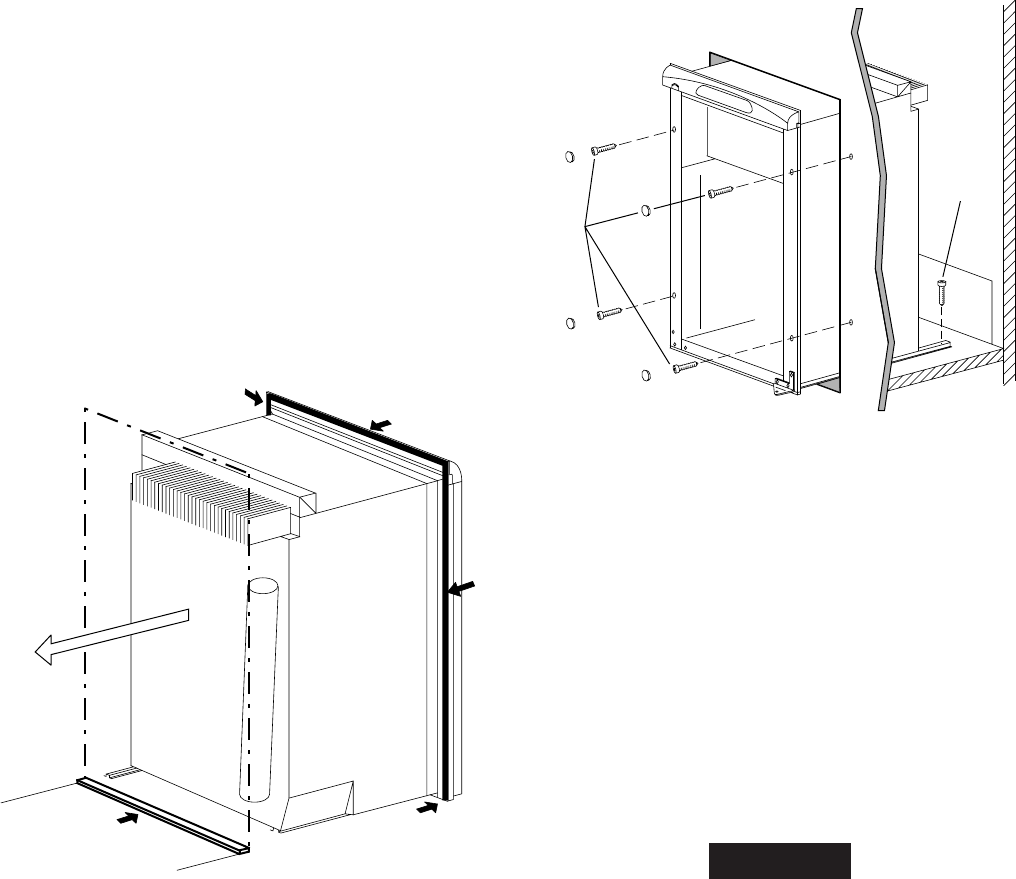
Make sure that there is a complete seal between the
front frame of the refrigerator and the top, sides and
bottom of the enclosure. A length of sealing strip is ap-
plied to the rear surface of the front frame for this pur-
pose. Also apply a sealing strip to the foremost floor of
the enclosure as shown in fig. 6. The sealing should
provide a complete isolation of the appliance’s combus-
tion system from the vehicle interior.
NOTE: Be careful not to damage the sealing strip when
the refrigerator is put in place.
Failure to follow the sequence in securing refrigerator in
enclosure can cause leakage between the frame and
cabinet.
When installing the refrigerator, the installer must block
the space between the storage cabinet and the top of
the refrigerator, otherwise heat will become trapped in
this space, making the top of the refrigerator hot, thus
reducing the efficiency of the unit.
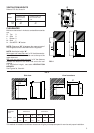
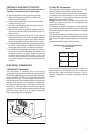
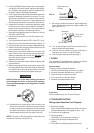
Securing the Refrigerator
After the refrigerator is put in place, (insuring a combus-
tion seal at the front frame), the refrigerator is to be se-
cured in the enclosure with five screws (not included).
The screws have to be installed in the following order:
STEP 1: Four screws installed through the front
frame. See fig. 7.
STEP 2: One screw installed in rear base. See fig. 7.
In the parts bag there are plugs to be snapped in the
front frame to cover the four screw heads.
Drain water hose
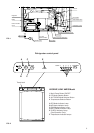
A hole must be drilled through flooring see FIG. 8.
The installer MUST make sure that the hose does not
kink when run through the floor. Seal around the hose
that goes through the drilled hole. If a longer hose than
supplied is required to get the water to drain outside of
the vehicle, the installer will have to supply the extra length
of hose.
GAS CONNECTION
Hook up to the gas supply line is accomplished at the
manual gas valve, which is furnished with a 3/8" SAE
(UNF 5/8" -18) male flare connection. All completed con-
nections should be checked for leaks with soapy water.
DO NOT use a flame to check for gas leaks.
The gas supply system must incorporate a pressure regu-
lator to maintain a supply pressure of not more than 11
inches water column.
When testing the gas supply system at test pressures in
excess of 1/2 psi, the refrigerator and its individual shutoff
valve must be disconnected from the gas supply piping
system.
When testing the gas supply system at pressures less
than or equal to 1/2 psi, the appliance must be isolated
from the gas supply piping system by closing its indi-
vidual manual shutoff valve.
In case detailed instructions on the installation and con-
nection to the gas supply are required, contact your dealer
or distributor.
FIG. 6
2
1
FIG. 7
! WARNING