


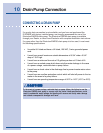


9
1 Make certain the unit is not plugged into an electrical
outlet.
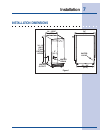
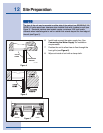
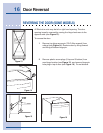
2 Carefully push the power cord grommet through the hole
in the back panel. See Figure 2.
3 Remove 12 screws and back panel.
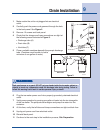
4 Check that the clamps and hose connections are tight at
the following areas illustrated in Figure 3:
• Discharge tube (A)
• Drain tube (B)
• Vent tube (C)
5 Place a suitable container beneath the pump’s discharge
tube. (Container must be able to hold a
minimum of one gallon of water.)
6 Plug the ice maker power cord into a properly grounded, polarized electrical
outlet.
7 Verify pump operation by pouring one gallon of water into the ice storage bin
of the ice maker. The pump should energize and pump the water into the
container.
8 At this time, verify that all tube and clamp connections are tight and leak free.
9 Unplug unit power cord from electrical outlet.
10 Reinstall back panel.
11 Continue to the next step in the installation process, Site Preparation.
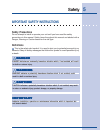
!
WARNINGWARNING
WARNINGWARNING
WARNING
Back panel serves as a guard. DO NOT put your hands inside the ice maker cabinet or
attempt to touch any components except the discharge tube during testing. Failure to
follow this warning could result in serious personal injury or death.
UL184-2
BACK VIEW SIDE VIEW
A
C
BB
Figure 3
Figure 2
Drain Installation