


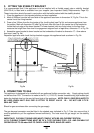
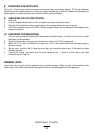
5. FITTING THE BATTERY
1
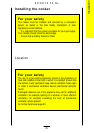
. The battery is located on the left hand side of the front plinth and can be viewed through a slot in the
bottom left hand corner of the front frame( Fig 4.)
2. To gain access to the battery, pull the appliance forward, raise and support the front by a few (2-3)
centimetres).
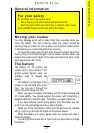
3. Fit the battery AA size ensuring the positive + terminal is on the right hand side as shown in the
diagram. The battery may be pushed out of the holder by using a blunt implement, such as a spoon
handle through the slot in the front frame if necessary.
4. Lower the appliance and push it back into place.
Fig.3
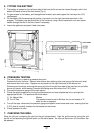
6. PRESSURE TESTING
1 The oven injector is used as a pressure test point.
Remove the oven furniture. Remove oven burner box retaining clips (one spring clip from each side)
and remove box front cover. Replace one clip back into the right hand side of the burner box.
Remove oven burner by removing the spring clip from the right hand side of the oven burner and slide
burner off injector, whilst easing it forward and taking care not to strain the F.S.D. phial.
2. Connect the pressure gauge to the oven injector.
3. Check the supply pressure by turning the thermostat on and one hotplate tap full on and light the
appropriate burner. The pressure should be either:-
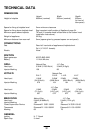
(i) For Natural Gas 20mbar
(ii) For LP.Gas The pressure must be set to 28 mbar for use on butane or 37
mbar for use on propane.
4. Turn off the taps, disconnect the pressure gauge and replace oven burner and cover, ensuring that the
F.S.D. phial is correctly located into the bracket on the burner.
5. Check operation of oven.
7. CHECKING THE GRILL
Place the grill pan containing the grid into the grill compartment. Light the grill burner by turning the grill
tap full on and pressing the ignition button on the fascia panel. As soon as the burner is lit the button can
be released.
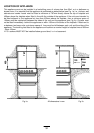
37
200
400
650
250
Fig.4