OPERATING INSTRUCTIONS
Page 10 62.9680.01_UL
III . OPERATING INSTRUCTIONS
1. GENERAL
The Pasta Cooker is used for boiling pasta of all types, rice,
noodles, dumplings, vegetables and soups. The desired
temperature can be adjusted between 50 and 100 °C.
The water trough has a capacity of 40 litres and is operated by
a 13 kW output bar burner.
In the front part of the water trough there is a standing surface
for parking and draining off the baskets. Excess water or foam
can run off through a water overflow under the standing
surface.
The water trough is seamlessly integrated into the appliance
cover. Sharply rounded corners and edges facilitate easy
cleaning. All parts of the appliance are made of corrosion-
resistant stainless steel.
Recommended accessories:
- rectangular baskets, 1 x GN 1/1, 2 x GN 1/2 or
3 x GN 1/3
- round baskets, 3
- Base insert to stand round baskets on.
-Cover
2. OPERATION
D Turn on main gas tap (1/Fig.9).
0 = Off
1 = On
D For liquid gas operation also open the bottle or tank valve.
D Switch on gas burner (Chapters 2.1 and 2.2)
D Turn on the water supply tap (4/Fig.9) until the trough is
full.
D Switch on trough heating (Chapters 2.3 and 2.4).
D Water loss in the trough can be replaced by turning on the
tap (4/Fig.10).
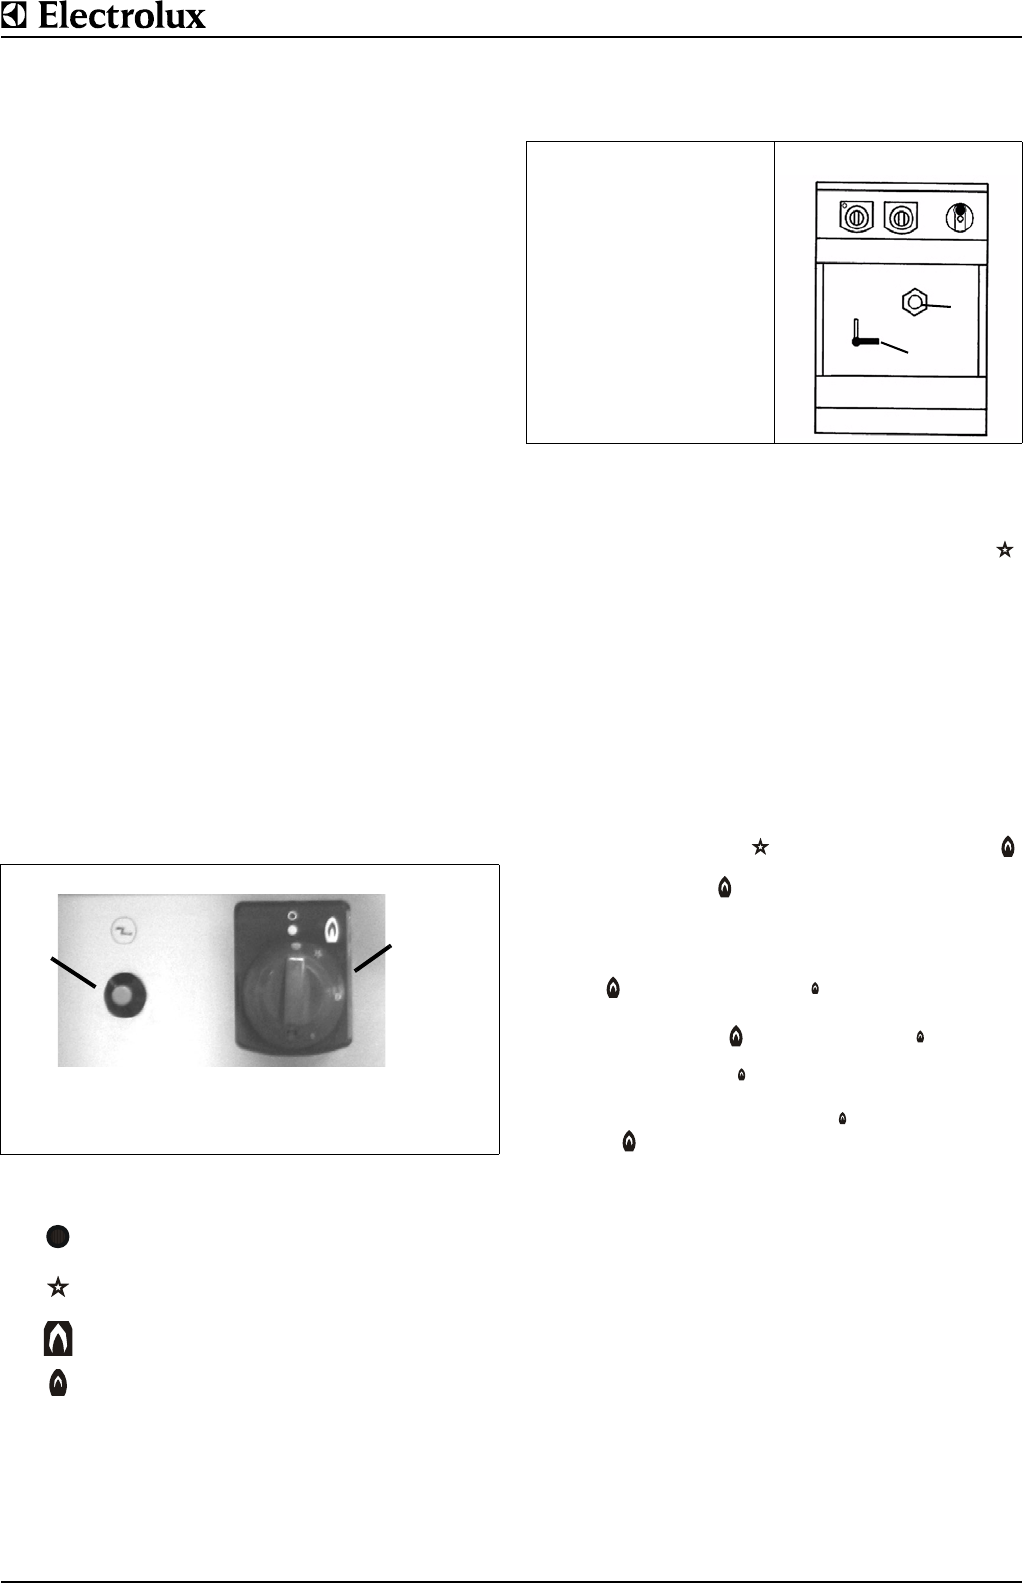
The knob (2/ Fig.9) has four main settings:
2.1 IGNITING THE PILOT BURNER
D Push the knob (2/Fig.9) fully in.
D Turn it anti-clockwise to the pilot burner ignition ( )
position.
D Hold the knob (2/Fig.9) fully pressed in.
D At the same time, ignite the gas escaping at the pilot
burner with the piezo ignition device. The burner is ignited
by turning the knob (3) clockwise or anti-clockwise.
D After lighting the pilot burner, keep the rotary switch
pushed in for about 15 seconds.
It is only after this period of time that the pilot light will burn
after the rotary switch is released.
D If the pilot light extinguishes, repeat the whole process.
2.2 IGNITING THE MAIN BURNER
D Press the knob (2/Fig.9) in lightly and turn it from the pilot
burner ignition position ( ) anti-clockwise to the high ( )
position.
The high position ( ) equates to the maximum burner
power or rated thermal load.
2.3 TEMPERATURE SELECTION
The intensity of the flame can be adjusted between the "high
position" ( )and the "low position" ( ).
D Push the knob (2/Fig.9) fully in and turn it anti-clockwise
from the high setting ( ) towards the lowest ( ) setting.
The flame becomes smaller and smaller.
In the lowest setting ( ) the main burner has the lowest
output.
D To return from the lowest setting ( ) towards the highest
setting ( ), push the knob (2 / Fig.9) fully in and turn it
clockwise.
Note:
Do not switch on the trough heating or leave it switched on, if
the water level falls below the marking on the trough wall. Non-
observance of these instructions can cause severe damage to
the boiling trough and the appliance operating elements.
2.4 INITIAL OPERATION
Before initial operation of the appliance, the trough and the
baskets must be thoroughly cleaned of the protective industrial
grease by carrying out a boiling procedure without food and
with the addition of neutral soap.
2.4.1 STANDBY
The water must always be at the correct level, clean and
always able to be kept at the boil.
Check before each use:
D The water trough overflow must not be blocked.
D The operating elements must not be damaged.
1 Knob
2 Switch, Piezo ignition device
Fig.9 Control panel
Off
Igniting the pilot burner
High setting
Low setting
1
2
4 Water supply tap
5 Water drain valve
Fig.10 Front view
4
5


