9
Maintenance
Removing Your Refrigerator
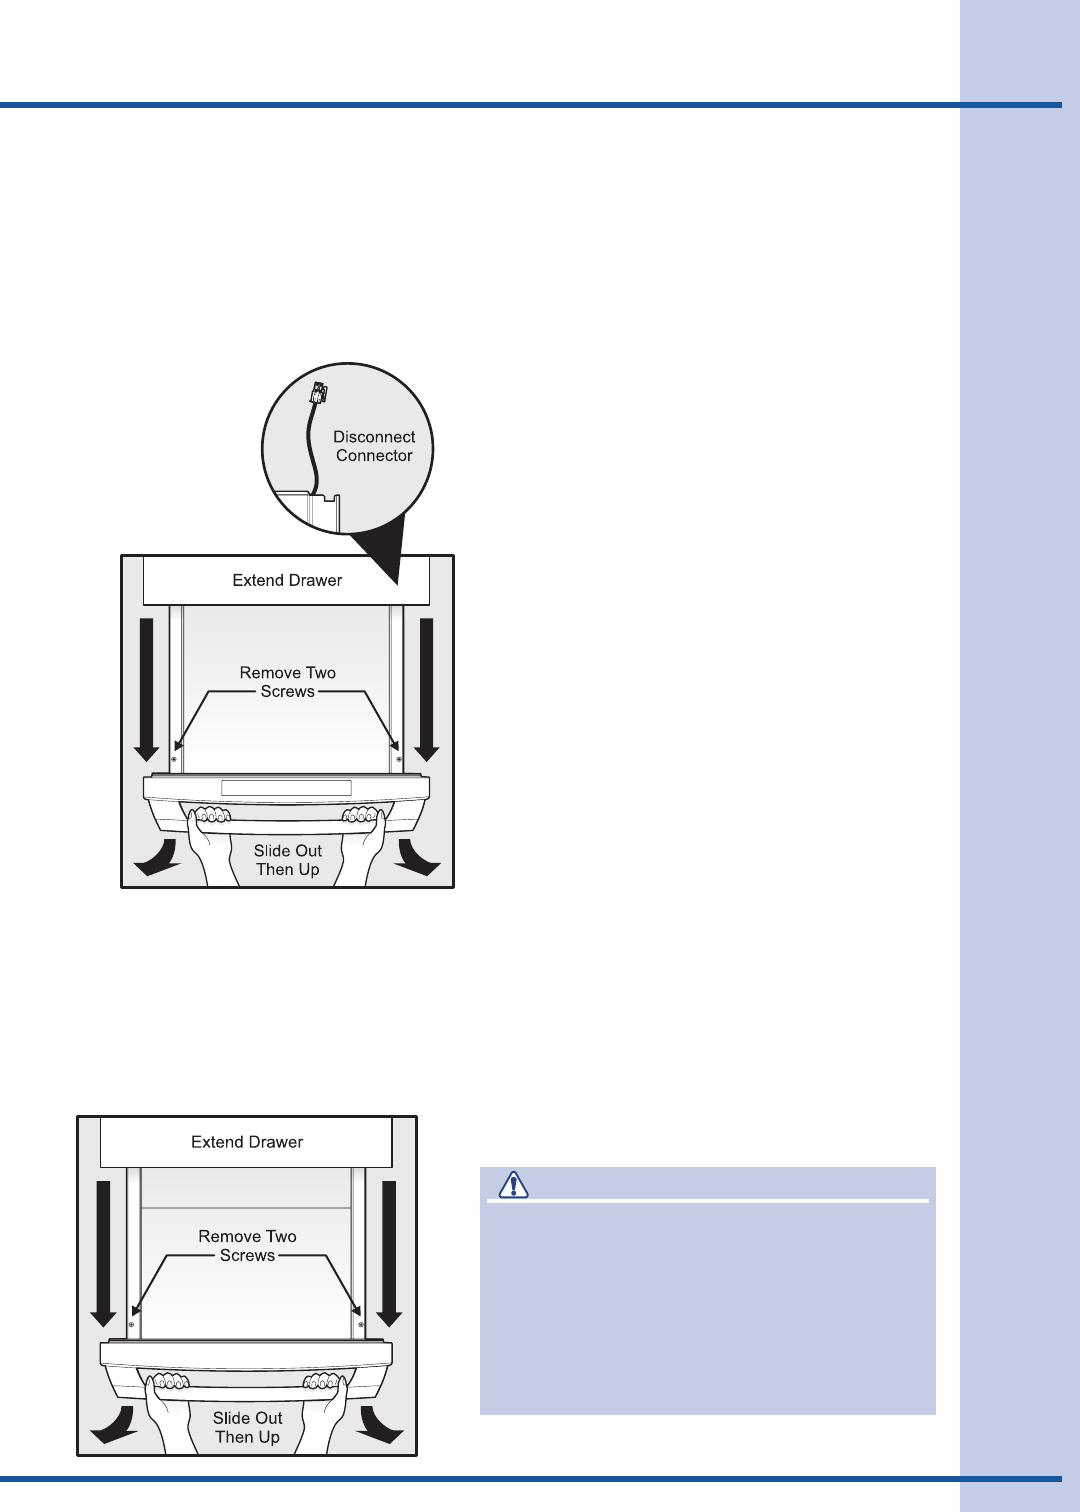
Drawers
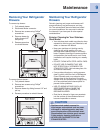
To remove top drawer:
1. Fully extend drawer.
2. Disconnect Molex connector.
3. Remove two screws using Phillips
®
screwdriver.
To remove bottom drawer:
1. Fully extend drawer.
2. Remove two screws using Phillips
®
screwdriver.
3. Remove drawer by sliding forward 1/2” and
pull up.
4. Reverse procedure to reinstall drawer.
Maintaining Your Refrigerator
Drawers
Periodic cleaning and proper maintenance will
ensure efficiency, top performance, and long
life. The maintenance intervals listed are based
on normal conditions. You may want to shorten
the intervals if you have pets or other special
considerations.
Exterior Cleaning for Your Stainless
Steel Model
• Yourstainlesssteelmodelmaydiscolorwhen
exposed to chlorine gas, pool chemicals, salt
water, or cleaners with bleach.
• Keepyourstainlessunitlookingnewby
cleaning with a high quality, all-in-one
stainless steel cleaner/polish on a monthly
basis. Frequent cleaning will remove surface
contamination that could lead to rust. Some
installations will require cleaning on a weekly
basis.
• DONOTCLEANWITHSTEELWOOLPADS.
• DONOTUSECLEANERSTHATARE
NOT SPECIFICALLY INTENDED FOR
STAINLESS STEEL (this includes glass, tile
and counter cleansers).
CAUTION
• Stainlesssteelmodelsexposedto
chlorine gas and moisture such as areas
with spas or swimming pools, may have
some discoloration of the stainless steel.
Discoloration from chlorine gas is normal.
Follow exterior cleaning instructions.
• NEVERUSECHLORIDETOCLEAN
STAINLESS STEEL.
• Ifanysurfacediscolorsorrustingappears,
clean it quickly with Bon-Ami or Barkeepers
Friend Cleanser and a non-abrasive cloth.
Always clean in the direction of the grain.
Always finish this process with a high quality,
all-in-one stainless steel cleaner/polish to
prevent further problems.
• USEOFABRASIVEPADSSUCHAS
SCOTCHBRITE WILL CAUSE THE
GRAINING IN THE STAINLESS TO
BECOME BLURRED.
• Rustthatisallowedtolingercanpenetrate
into the surface of the stainless steel and
become impossible to remove.
4. Remove drawer by
sliding forward 1/2”
and pull up.
5. Reverse procedure
to reinstall drawer.


