


8
Interior Accessories
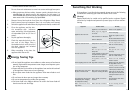
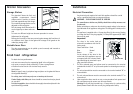
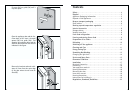
Storage Shelves
The glass shelf above the fruit and
vegetable compartment should
always remain in position, to ensure
fruit and vegetables stay fresh longer.
The remaining storage shelves can be
adjusted to various heights:
Pull the storage shelf forward until it
can be tipped up or down and remo-
ved.
To insert at a different height use the same procedure in reverse.
Adjustment for tall goods:
Remove the front half of the two-part vario glass storage shelf and insert it
at a different level. Space is thus gained for storage of tall goods on the
underlying storage shelf.
Variable Inner Door
The door compartments can be pulled up and removed, and inserted at
other positions as needed.
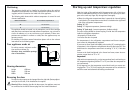
Fresh food refrigeration
To obtain the best performance:
• do not store warm food or evaporating liquid in the refrigerator
• do cover or wrap the food, particularly if it has a strong flavour.
• Position food so that air can circuiate freely round it.
Useful hints:
Meat (all types): wrap in polythene bags and place on the glass shelf above
the vegetable drawer(s)
For safety, store in this way only one or two days at the most.
Cooked foods, cold dishes, etc: these should be covered and may be placed
on any shelf.
Fruit and vegetables: these should be thoroughly cleaned and placed in the
special drawer(s) provided.
D338
17
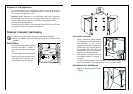
Installation
Electrical Connection
Any electrical work required to install this appliance should be carried
out by a qualified electrician or competent person.
WARNING – THIS APPLIANCE MUST BE EARTHED
The manufacturer declines any liability should these safety measures not
be observed.
Before switching on, make sure the electricity supply voltage is the same as
that indicated on the appliance rating plate. The rating plate is inside, on the
left.
The appliance is supplied with a 13 amp plug fitted. In the event of having
to change the fuse in the plug supplied, a 13 amp ASTA approved (BS 1362)
fuse must be used.
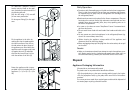
Important!
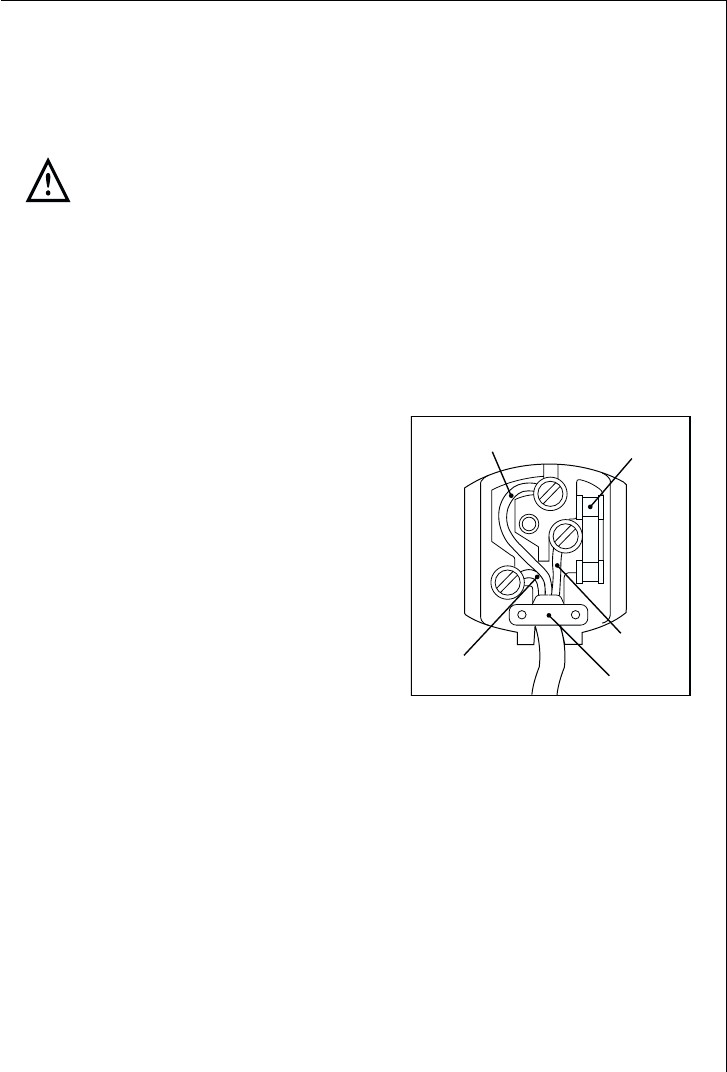
The wires in the mains lead are
coloured in accordance with the fol-
lowing code:
Green and Yellow Earth
Blue Neutral
Brown Live
As the colours of the wires in the
mains lead of this appliance may not
correspond with the coloured mark-
ings identifying the terminals in your
plug, proceed as follows:
1. The wire coloured green and yellow must be connected to the terminal
marked with the letter “E” or by the earth symbol or coloured green and yel-
low.
2. The wire coloured blue must be connected to the terminal marked “N” or
coloured black.
3. The wire coloured brown must be connected to the terminal marked “L” or
coloured red.
4. Upon completion there must be no cut, or stray strands of wire present and
the cord clamp must be secure over the outer sheath.
Warning! A cut-off plug inserted into a 13 amp socket is a serious safety
(shock) hazard. Ensure that the cut-off plug is disposed of safely.
D207
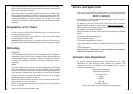
GREEN & YELLOW
13 AMP. FUSE
BROWN
CORD CLAMP
BLUE
13 AMP