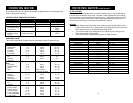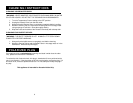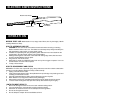
BEFORE USING YOUR OVEN..
1. Remove all packaging materials such as cardboard and Styrofoam
2. Wash all the removable parts in hot, soapy water. Rinse thoroughly and dry.
3. The exterior of the oven can be cleaned with a soft damp cloth and warm
soapy water. Dry thoroughly. Do not use abrasive materials or cleaners.
DO NOT IMMERSE THE ROASTER OVEN BODY in water!
Note: Due to the manufacturing process, some smoke and odor may be noticed
during the first use. This should disappear after the first heating of the Roaster Oven.
****IMPORTANT POINTS WHEN USING YOUR ROASTER OVEN****
• Always use the Main Cooking Pan inside the Roaster Oven when cooking.
• Warning: Never put food or liquids directly into the Roaster Oven Main Body.
• Avoid the steam vents during the cooking process or when removing or lifting the
lid from the body of the roaster oven.
• Always take care to lift the lid at an angle away from you so any hot steam is
directly in the other direction.
• Avoid frequent removal of the lid to check on the cooking process or to stir the
food. Significant amount of heat is released whenever the lid is lifted, therefore
the cooking time may need to be extended.
USING YOUR ROASTER OVEN ..
1. Make sure the roaster oven is plugged.
2. Make sure the Temperature Control Switch is set to the OFF position.
3. Place the Main Cooking Pan into the Roaster Oven.
4. Plug power cord into working outlet.
5. Preheat the Roaster Oven for 15-20 minutes by turning the Temperature
Control to the desired temperature.
6. Place the Roasting Rack into the bottom of the cooking pan. Put food onto
the rack. Cover Roaster Oven with lid.
Note: Some foods or recipes to not require the use of the roasting rack.
7. When the cooking cycle is complete. Turn the Temperature Control to the
OFF position and unplug the Roaster Oven from the outlet.
8. Remove the lid carefully using oven mitts.
9. Remove the Roasting Rack with the food.
10. Remove food from rack and complete any other preparations to the food and
serve.
USING THE BUFFET SERVER:
1. Wash all the parts to the Buffet Server with warm soapy water. Dry
thoroughly.
2. Place the Main Cooking Pan into the oven. Fill with enough water to fill up
approximately half way.
WARNING: Never add water to the Roaster Oven body directly.
5
3. Place the Buffet Server Frame onto the Cooking Pan. Make sure the frame
is secure and balanced.
4. Insert the three serving dishes into the frame. Make sure they are also
secure and balanced.
5. Place lid on and plug the roaster oven into a working outlet. Preheat at
350°F for 30 minutes or until the water inside is very hot.
6. Remove lid carefully and add hot, cooked food into the individual serving
dishes.
7. Place cover back on and set the temperature to 250°F to keep the food
warm. If necessary, the temperature can be adjusted.
8. Stir the food occasionally and keep food covered to maintain the
temperature.
9. Check periodically and carefully add more hot water if necessary.
****IMPORTANT POINTS WHEN USING THE BUFFET SERVER****
Note: When keeping food warm, temperatures should always be maintained above
150°F or above.
• Make sure that all three serving trays need to be in place when using the
Buffet Server.
• Use the Buffet Server only to keep food warm.
• Do not use the Serving Dishes, and the Buffet Server Frame on the stove
top, in an oven or in a microwave oven.
• It is recommended to spray the inside of the Serving Dishes with a non-stick
cooking spray or wipe the inside with a dab of oil if you will be serving foods
that have the tendency to stick.
6


