


Read all the sections of this booklet and follow all the instructions carefully.
3
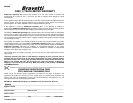
Whisk:
The whisk is used to beat air into
mixtures such as egg whites, yolks or
cream. To insert whisk: There is only
one whisk provided. Hold whisk at stem
end and insert into one of the holes
until it clicks into place. DO NOT PUSH
WHISK IN FROM THE WIRE END AS
WIRES MAY BE DAMAGED.
OPERATING INSTRUCTIONS
Before using your Bravetti Power Mixer
for the first time, wash the beaters, dough
hooks, whisk and glass bowl in warm,
sudsy water. Rinse and dry thoroughly.
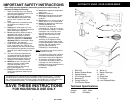
Warning: To avoid injury when inserting
or removing beaters, dough hooks or
whisk always set the speed selector on
”0" and unplug the appliance.
Warning: The unit is designed for
intermittent use. The maximum operating
time on settings “1-3” in the "Lo" range
is 10 minutes non-stop with beaters,
dough hooks, or whisk. The maximum
operating time on settings “1-3” in the
"Hi" range is 30 seconds non-stop with
beaters, dough hooks, or whisk.
Beaters, Dough Hooks, Whisk:
Select the attachment according to the
type of mixing required. Make sure that
the mixer is unplugged from power
source and speed selector is set on ”0"
before inserting or removing beaters,
dough hooks or whisk
.
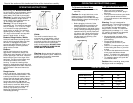
Beaters:
Use for liquid mixes such as creams,
egg-whites, confectionery dough, etc.
Insert stem end of beaters (one at a time)
into the openings in the mixer. Insert the
beater with the gear in the larger of the
two holes. The gear on the beater must
sit below the surface of the mixer
housing. To ease the inserting of the
beaters, a slight twisting motion will aid in
engaging the beater drive tabs. Install the
second beater in the same manner as
above.
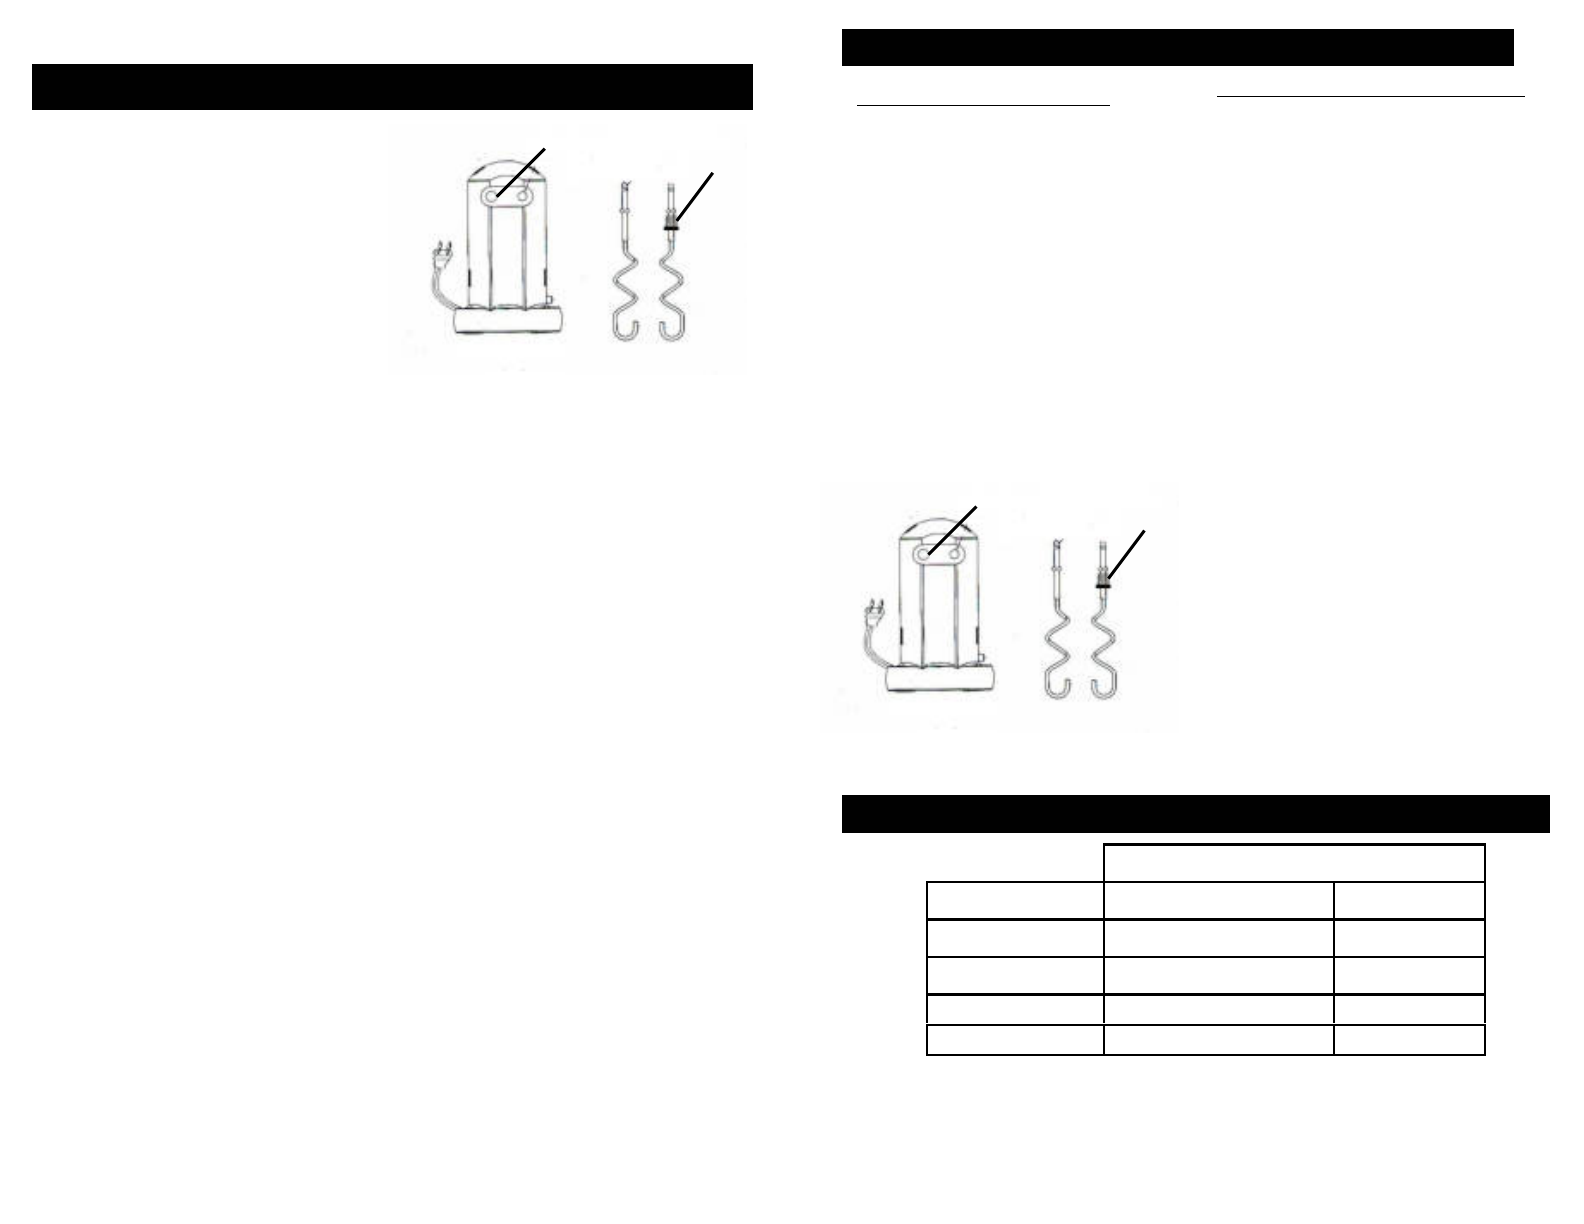
Dough hooks:
Use for light dough. Insert dough hooks
in the same way as beaters above. See
installing instructions for beaters above.
Always use both dough hooks. Never try
to work with one beater and one dough
hook at the same time. Do not use
dough hooks at low speeds as this may
cause motor to overheat. When using
dough hooks for heavy or thick dough,
use only high speed (3) from the
beginning to prevent the motor from
overheating (blocking).
Warning: Never operate the appliance
without all the parts in place. Make sure
that all parts are properly assembled
before turning on the unit.
Bottom View
Large Opening
Gear
4
OPERATING INSTRUCTIONS (cont.)
To Operate the Hand Mixer
• Gently pull the power cord from the
main unit.
Caution: Do not pull with force on the
power cord or you will damage the
rewinding feature and void the warranty.
When rewinding, always hold the plug to
avoid cord whipping.
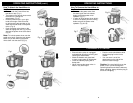
• Before plugging in the unit, fit the
desired attachment required for the
mixing operation to be carried out.
• Insert the beaters or the dough hooks
one at a time by pressing them gently
upwards until they are fully fitted and
you hear a click. Make sure that the
attachment with the gear is inserted
into the larger hole opening. (See
illustration below.)
Bottom View
Large Opening
Gear
To Operate the Hand Mixer (cont.)
• When you have inserted the
attachment that you desire, plug in
the mixer.
• Pick up the mixer and use your thumb
to set the speed selector and the
Hi/Lo range selector to the setting that
you desire.
Warning: The unit is designed for
intermittent use. The maximum operating
time on settings “1-3” in the "Lo" range
is 10 minutes non-stop with beaters,
dough hooks, or whisk. The maximum
operating time on settings “1-3” in the
"Hi" range is 30 seconds non-stop with
beaters, dough hooks, or whisk.
• We suggest that you begin at the
highest speed to prevent the motor
from blocking.
• Ensure that the beaters are
completely free to move in your
mixture.
• Return to "0" setting when you have
finished using the mixer or you wish
to stop.
• To remove the attachments from the
mixer, press the beater release
button. This button only works when
the mixer is on the "0“ speed setting.
• To rewind the power cord, push the
cord rewind button.
Caution: When rewinding, always hold
the plug to avoid cord whipping.
SPEED SETTINGS
HI/LO RANGE SETTINGS
SPEED SELECTOR "LO" "HI"
"0" Off Off
"1" Lowest High-Middle
"2" Low High
"3" Low-Middle Highest