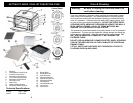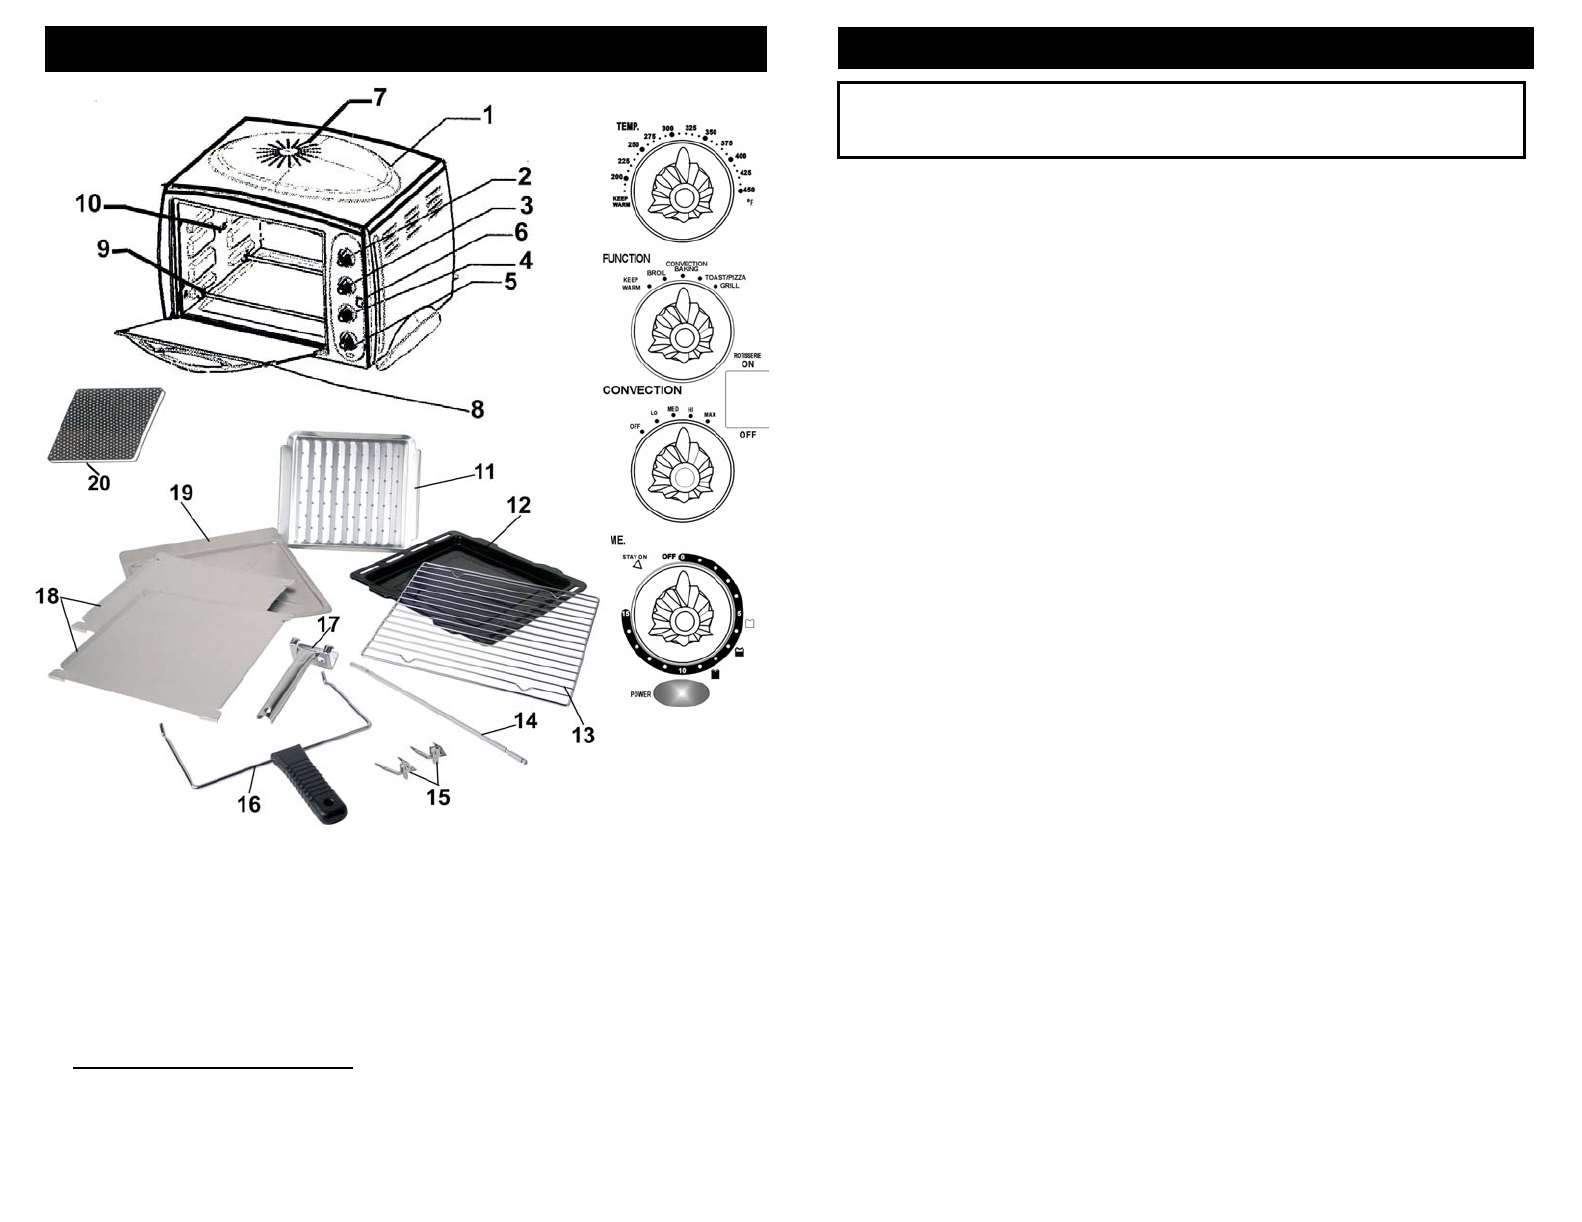
GETTING TO KNOW YOUR JET CONVECTION OVEN
Control Panel
Care & Cleaning
Warning: Be sure to unplug the oven and allow it to
cool before cleaning.
Your oven features a continuous clean coating that automatically cleans
itself during normal operation. Any spattering that occurs while cooking
and comes into contact with the continuous coating is oxidized while the
oven is in operation. If desired, wipe the walls with a damp sponge, cloth
or nylon scouring pad and mild detergent. DO NOT USE STEEL WOOL
SCOURING PADS, ABRASIVE CLEANERS OR SCRAPE THE WALLS
WITH A METAL UTENSIL, AS ALL OF THESE METHODS MAY
DAMAGE THE CONTINUOUS CLEAN COATING.
All accessories should be washed in hot soapy water or can be cleaned in
a dishwasher. The door can be wiped with a damp sponge and wiped dry
with a paper or cloth towel. Clean the outside with a damp sponge. DO
NOT USE AN ABRASIVE CLEANER AS IT MAY DAMAGE THE
EXTERIOR FINISH.
DO NOT USE AN ABRASIVE CLEANER OR STEEL WOOL SCOURING
PAD ON THE BROILER PAN AS IT MAY DAMAGE THE PORCELAIN
ENAMEL FINISH.
LET ALL PARTS AND SURFACES DRY THOROUGHLY PRIOR TO
PLUGGING OVEN IN AND USING.
1. Housing
2. Temperature Control Knob
3. Function Control Knob
4. Convection Control Knob
5. Time Control/On-Off Knob
6. Rotisserie On/Off Switch
7. Convection Fan
8. Glass Door
9. Lower Heating Element
10. Rotisserie Skewer Support
11. Broiler Rack
12. Broiler/Drip Pan
13. Wire Rack (x2)
14. Rotisserie Skewer
15. Skewer Clamps (x2)
16. Rotisserie Handle
17. Rack Handle
18. Cookie Sheets (x2)
19. Crumb Tray
20. Pizza Stone
Technical Specifications
Voltage: 120V., 60Hz.
Power: 1500 Watts
2
11


