


7
Installation instructions
Installing the control panel (CT6551S models only)
1
Remove the supplied clamps from the cooktop and control panel.
2
Feed the cooktop wiring harness up through the control panel cutout.
3
Remove the control panel cover.
4
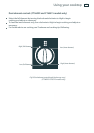
Connect the cooktop wiring harness by aligning the numbers/letters on the harness with those
on the control panel connector block (see Fig. 3 below).
Important!
Leave the plastic wiring card attached for future reference.
5
Clamp the wiring harness.
6
Wire the mains power supply to the control panel
and clamp.
7
Replace the control panel cover.
8
Roll the control panel into the cutout.
9
Secure the control panel and the cooktop using the
clamps provided (see ‘Clamping down the cooktop’
following).
Note: two small clamps are supplied and must be used for clamping down the control panel to
the benchtop. These clamps are to be screwed to the sides of the control panel. Three
clamps are provided for clamping down the cooktop itself (see ‘Clamping down the cooktop’
following).
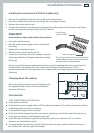
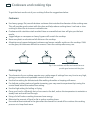
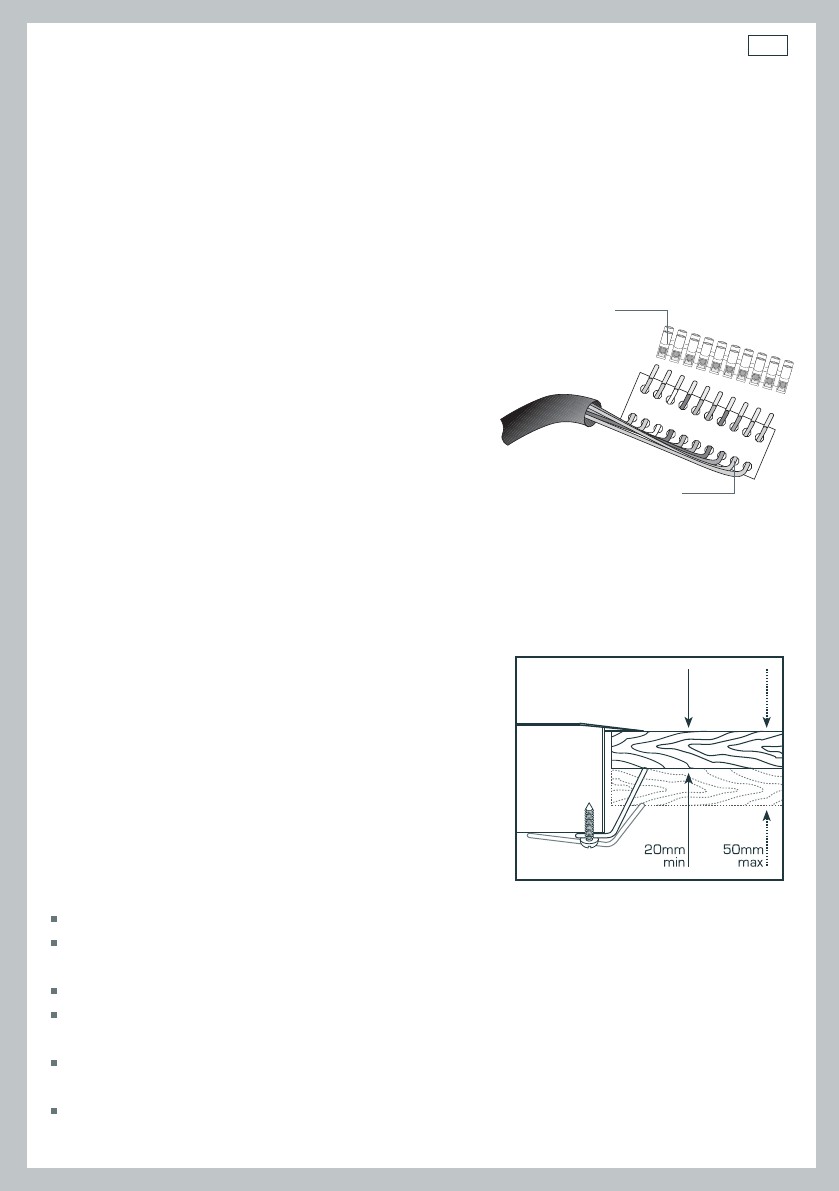
Clamping down the cooktop
Place the cooktop into the cutout and tighten with
the supplied clamps. These will cope with bench
thickness 20-50 mm.
Final checklist
TO BE COMPLETED BY THE INSTALLER
Is the product earthed?
Check that the power supply cable is NOT touching the product. This will ensure that the cable is
not damaged by heat from the product.
Is the product clamped down securely?
Check that all the elements function correctly by switching on all of them and leaving them on
for at least one minute. Are all elements glowing?
Is the ‘Element On’ indicator light functioning when you turn an element on? Turn all the
elements on individually to check.
To check that the ‘Surface Hot’ indicator light functions correctly, switch off all the elements. Is
the ‘Surface Hot’ indicator light functioning?
Fig. 4 Clamping down the cooktop
54PNEEN321
54PNEEN321
Control panel
connector block
Plastic wiring card
Fig. 3 Using the plastic wiring card to align the
numbers/letters on the harness with those on
the control panel connector block.