R
INSTALLATION INSTRUCTIONS
Be sure product is level, securely fastened to the cabinetry and
opens and closes freely. The DishDrawer® must be free to close
with no resistance from the cabinetry.
Be sure the inlet hose to valve connection is tightened a further half
turn after seal contact.
Be sure any knock-outs or plugs in drain connection have been
drilled out and drain connection has been made.
Turn ON the power and water supply. The DishDrawer® should
beep and light up.
Open the drawer(s) and check operation of Wash Program Control
Panel and check the sprayarm(s) are in place and free to rotate.
On the Wash Program Control Panel select Rinse and close the
drawer(s). Start the program by pressing the Start/Pause button.
After the Rinse program has finished, be sure the machine has run
and drained correctly.
Check water supply and drainage connection for leakage.
Repeat for each Drawer.
LEAVE ALL LITERATURE WITH CUSTOMER.
TROUBLE SHOOTING
Excessive water remaining above the filter plate, after the
rinse cycle; check for kinked drain hoses or blocked waste
connection.
No water supply; check water is connected, ON and there is
the specified water pressure.
DishDrawer® does not light up when the tub is opened;
be sure power is connected and is switched ON.
Water around water supply and drainage connections -
check connections, existing plumbing and hoses for leaks.
If a fault occurs, consult the Fault Code Section of the
User Guide.
If unable to resolve, contact your Customer Care Centre.
If you have any questions concerning the installation of this DishDrawer®,
please contact your Fisher & Paykel Authorized Service Agent.
FOR THE UNITED STATES OF AMERICA (USA) & CANADA
Fisher & Paykel Appliances
5900 Skylab Road
Huntington Beach
CA 92647
PHONE TOLL FREE 1888 9 FNP USA
1888 9 367 872
www.usa.fisherpaykel.com
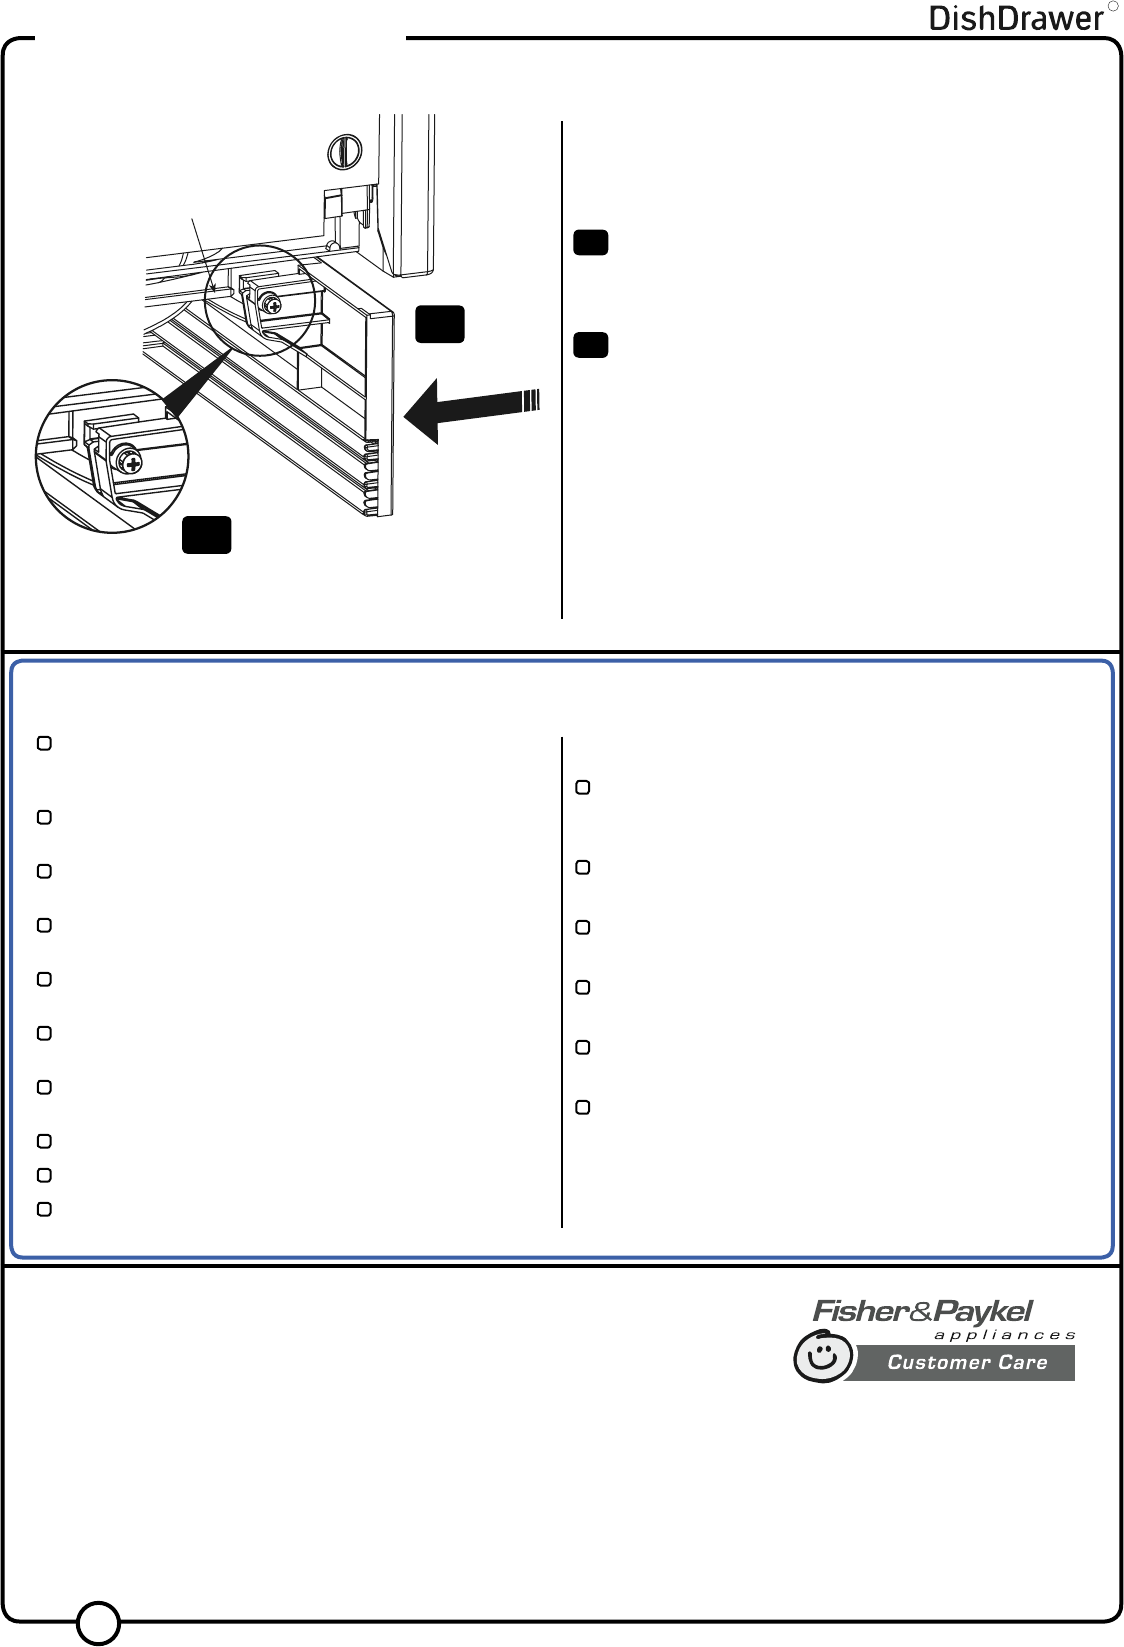
STEP 11: FITTING THE TOE KICK TO THE PRODUCT (DOUBLE MODELS ONLY)
STEP 13: CUSTOMER CARE
12
Important!
DO NOT over tighten screws.
Overtightening will damage the plastic mounting detail.
Partly open bottom drawer. Position Toe Kick behind door and slide
onto the mounting rails on the underside of tub.
Close bottom drawer, check if flush with adjacent cabinetry.
If required open drawer and adjust.
Note: Clearance between Toe Kick and floor must be
15
/
32
” (12mm) minimum.
When Toe Kick is in position, open bottom drawer and gently fasten
the Toe Kick screws, on each side.
STEP 12: FINAL CHECKLIST (DOUBLE AND SINGLE MODELS)
25
25
26
26
Toe kick
mounting rails


