


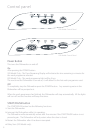
3
To Change the Setup for a hot or cold
water supply
This is only required on a Fisher & Paykel
DW920 model.
1
Press the POWER button to turn the
Dishwasher off.
2
Hold the ECO button for 15 seconds and
the dishwasher will beep. On the time
Display, “H” or “C” will be displayed. “H”
represents Hot water connection and “C”
represents Cold water connection.
3
Press the START/PAUSE button to toggle
between “H” and “C”. Once the appropriate
option is chosen.
4
Press the POWER button. This will save the
option you have chosen.
The hot water supply should ideally be
at a temperature of 60-65°C at the point
of entry to the dishwasher and must not
exceed 75°C.
The water pressure to the dishwasher shall
be no less than 30kPa (4.3psi) and no more
than 960kPa (140psi).
Note: DW920 is set up for connection to
cold water when it leaves the factory.
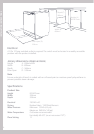
Installation
Once installed, the dishwasher’s rear
levelling feet must be anchored to the
floor to prevent the dishwasher from
tilting forward when the baskets are being
loaded with dishes. Two anchor plates,
with screws, are provided for this purpose.
A template and instructions for locating
the correct position of the anchor plates is
printed on the top cardboard spacer of the
external packaging of the product.
Built-In Installation
Where the dishwasher is installed in an
under bench situation, ensure that bare
wood surrounding the dishwasher is sealed
with an oil based paint or moisture-proof
polyurethane to prevent possible steam
damage.
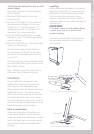
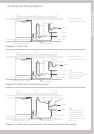
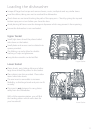
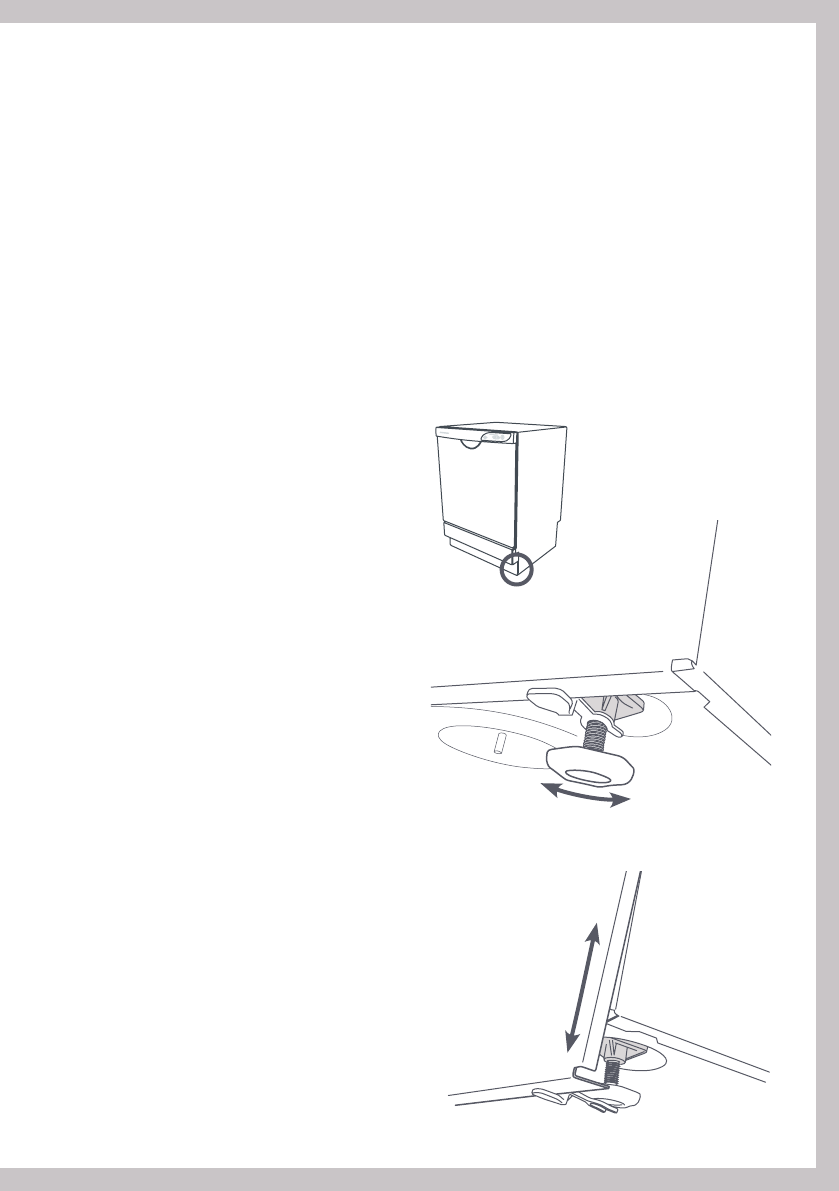
Levelling
Before sliding the dishwasher into position,
adjust the levelling feet to ensure that the
dishwasher is level at the required height.
Check that the door opens and closes
without striking the side of the cabinet. If
necessary, readjust the levelling feet slightly
(see Figure A).
IMPORTANT!
If the door strikes the side of the cabinet,
a poor door seal may result in the
product leaking.
Once the required height is obtained, slide
the service panel down to cover the feet
(see Figure B).
Figure A: Adjusting the levelling feet
Figure B: Fitting the service panel
Adjust height
INSTALLATION INSTRUCTIONS