7
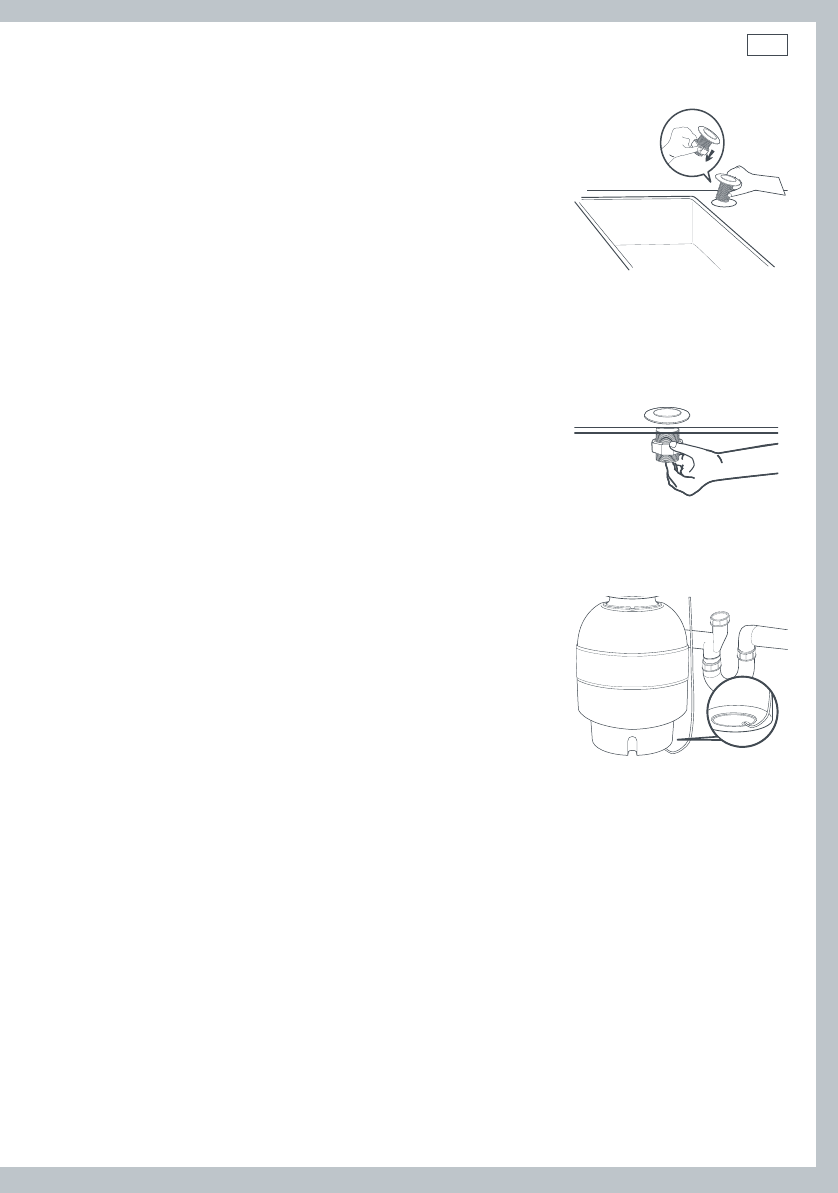
Installing the air-switch (optional)
1
Select a location on the bench top for the air switch to be
positioned (recommended position is near the sink). Mark and
cut a hole, 33mm in diameter, in the bench top.
2
Remove the nut from the thread of the air switch (fig.12).
3
Feed one end of the PVC tubing up through the cutout, from
the underside of the bench top, and attach to the underside of
the push button.
4
Insert the push button into the bench top cut out (fig.12).
Feed the PVC tube through the nut. Screw the nut onto the
thread tightly (fig.13), securing the push button tightly onto
the bench top.
Note:
Do not use a wrench to tighten the nut.
5
Connect the other end of the PVC tubing to the air switch
outlet, located on the underside of the waste disposer (fig.14).
Controlling the waste disposer by a wall
mounted switch
The waste disposer can be controlled by means of a wall
mounted switch rather than the bench mounted air switch
supplied with the product.
Installation instructions
Fig. 12 Fitting the air switch
Fig. 13 Securing to the bench top
Fig. 14 Connecting tube to air
switch outlet
To use an existing wall mounted switch:
1
Connect one end of the PVC tubing to the underside of the air switch button.
2
Connect the other end of the PVC tubing to the air switch outlet on the underside of the waste
disposer (as shown in fig.14).
3
Press the button on the air switch to activate the waste disposer.
4
Whilst the waste disposer is running, disconnect the PVC tubing from the air switch outlet on the
underside of the waste disposer.
5
Turn the waste disposer off using the wall mounted switch. The waste disposer can now be
turned on and off using the wall mounted switch.
4020_Wastedisposal_UG.indd 7 10/22/08 6:21:17 PM


