


6
Installation instructions
1
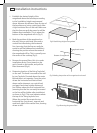
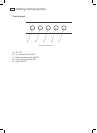
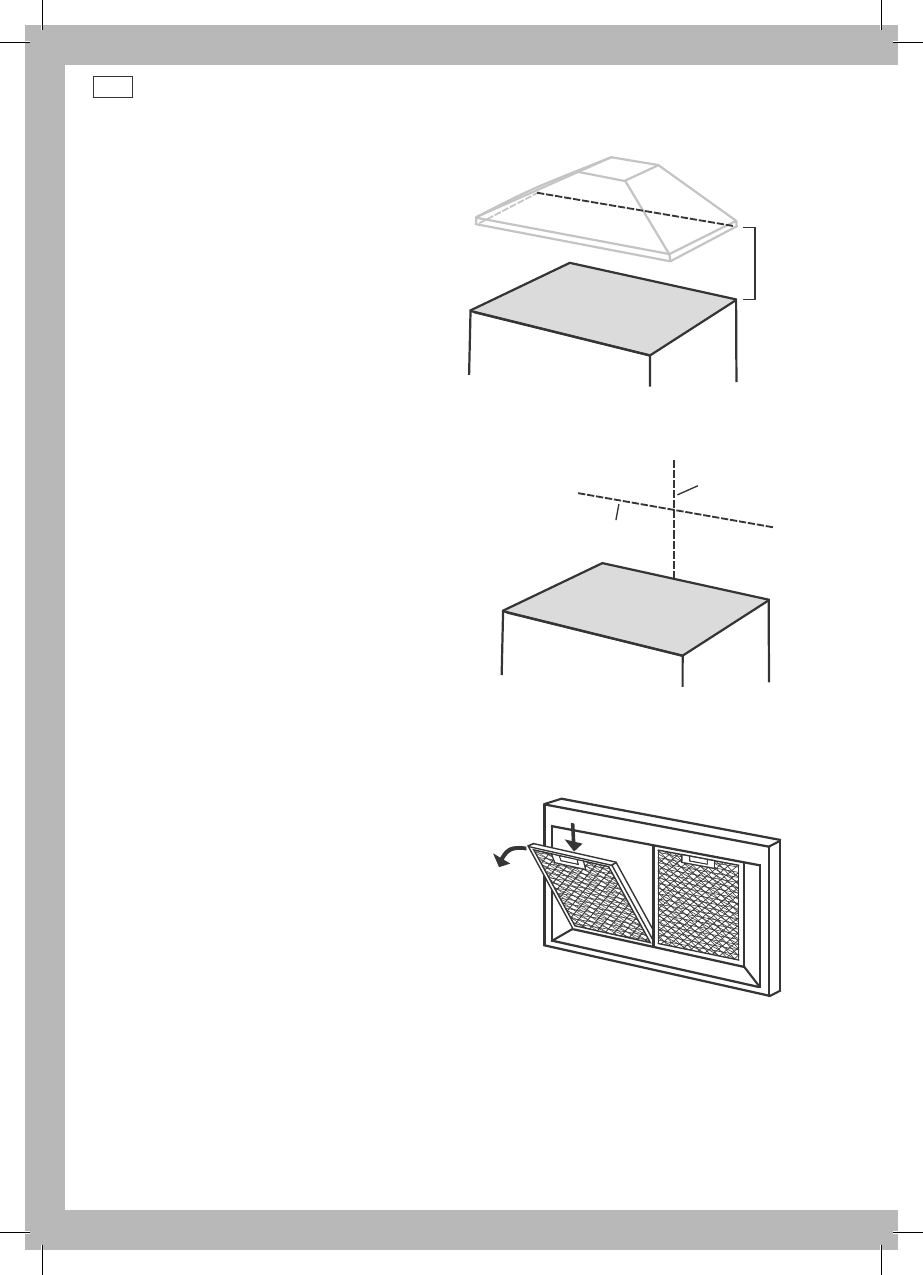
Establish the desired height of the
rangehood above the benchtop according
to the ‘Installation height requirements’
above. Measure this distance from the top of
the benchtop and, using a spirit level, draw
a light horizontal line on the wall. Make sure
that the line can easily be erased or will be
hidden after installation. This is where the
bottom of the rangehood will sit (Fig.2).
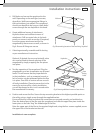
2
Mark the position of the rangehood on
the wall. Using a spirit level, also mark a
vertical line intersecting the horizontal
line, (ensuring that the line can easily be
erased or will be hidden after installation)
showing the position where the centre of
the rangehood will be. This is normally over
the centre of the cooktop (Fig.3).
3
Remove the grease filters (this is to make
installation easier). Press inward on the
catch, found on the handle, and pull the
filter downward (Fig.4).
4
Determine location of the fixing “keyholes”
on the wall. The hood is secured to the wall
by two “keyholes” located above the motor
behind the air exit opening. From the point
where the horizontal and vertical lines
drawn earlier intercept, use a spirit level
and pencil and draw another horizontal
line 290mm above the first horizontal line
(ensuring that the line can easily be erased
or the line will be hidden after installation)
as shown in Fig.5. This now indicates where
the top of the “fixing keyholes” are.
Where the vertical line meets the top
horizontal line (just drawn), measure and
mark both sides of the vertical line, showing
where to drill.
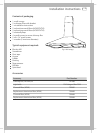
Fig.2 Establishing height of rangehood
60 – 75 cm
Fig.3 Marking the position of the rangehood on the wall
Rangehood centre
Benchtop
Bottom of rangehood
Fig.4 Removing the grease filters