


7
Installation instructions
5
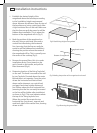
Drill holes and secure the rangehood to the
wall. Depending on the wall type (concrete,
drywall etc) drill/screw appropriate fittings in
the two locations just marked. The rangehood
should now be able to be hung on these bolts/
screws through the two keyholes in the hood.
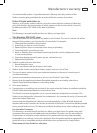
6
Create additional means of attachment.
Keyholes alone are insufficient means of
attachment. Drill two extra holes in the back
panel, put screws in with an anchor (if required)
to ensure proper attachment and fix the
rangehood by these screws as well, as shown in
Fig.6. Ensure all fixings are secure.
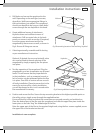
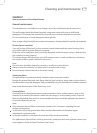
7
If ducting externally, assemble and fit ducting
as per manufacturer’s instruction.
Optional: If desired, the one-way butterfly valve
can now be fitted to the exit opening of the
rangehood by simply snapping the two pieces
into place.
8
Test the operation of the rangehood. Plug the
rangehood in and test its operation on all speed
levels. This will ensure that any imperfections
in the installation, such as unwanted sounds or
lack of suction can be addressed before the flue
is in place. Over 95% of service calls are a result
of faulty installation. Please be aware that in the
event of a service call for a faulty installation,
you will be charged as this is not covered under
the manufacturer’s warranty.
Fig.6 Creating additional means of attachment
Keyholes
Extra
fitting
holes
290 mm
Fig.5 Determining location of the two fixing “keyholes”
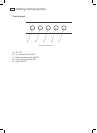
9
Position and secure the flue. Secure the top mounting bracket at the highest possible point on
the ceiling using a single screw through the supplied bracket.
Ensure all ducting is fitted and electrical connections are secured correctly and switched on.
Place the bottom part of the flue onto the rangehood and slide the upper flue piece inside the
lower piece so the tabs “hug” the folded edge of the flue.
Raise the upper part of the flue to the required height and, using the four screws supplied, secure
the upper flue to the bracket on the wall.
Installation is now complete.