


10
Food Network
11
Food Network
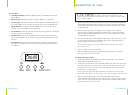
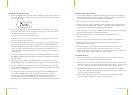
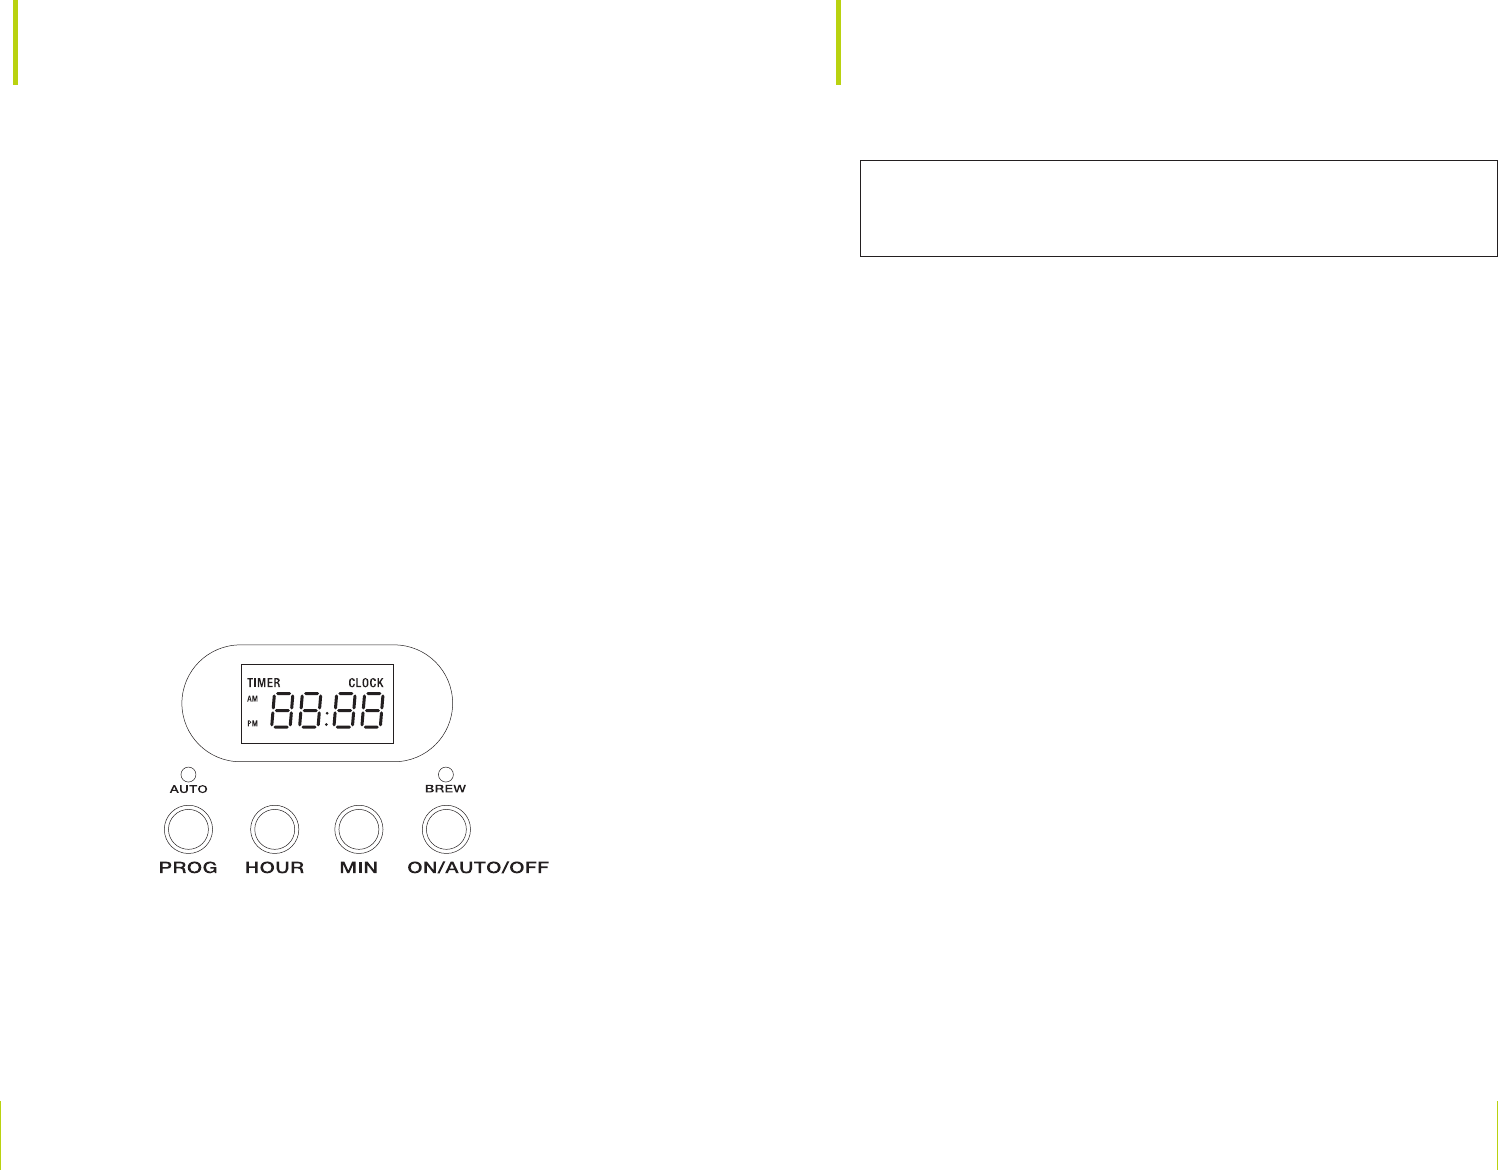
Control Panel
1. LCD Digital Display: Window: Digital clock with AM/PM, Timer and
Clock display.
2. BREW Light: Illuminates when the Coffee Maker is in operation.
3. AUTO Light: Illuminates when the Coffee Maker is in PROG mode and
the Coffee Maker is set to begin brewing at a future programmed time.
4. PROG Button: Press fi rst to set the digital clock’s current time. Press
again to set the AUTO future brewing time.
5. AUTO Button: When the desired AUTO start time appears in the display
window, press the AUTO button.
6. HOUR Button: Advances the HOUR. Press to adjust time in hours for
digital clock display and AUTO brew programming. Hold button to fast
advance.
7. MIN button: Advances the MINUTES. Press to adjust time in minutes
for digital clock display and AUTO brew programming. Hold button to
fast advance.
CAUTION: To protect against electrical shock, do not
immerse the Coffee Maker or allow power cord to come into contact with
water or other liquids.
1. Remove all packing material and labels from the inside and outside of the
Coffee Maker. Place the unit on a fl at, clean surface. Unused cord may be
stored inside the hidden cord storage area in the back of the unit to keep
countertop neat.
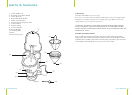
2. Before preparing coffee, thoroughly clean the glass carafe with lid,
measuring scoop and removable fi lter holder in hot, sudsy water. Rinse
and dry. Replace disassembled parts. (See Care & Cleaning Instructions
for a detailed description.)
3. Clean the inside of the Coffee Maker by brewing 2 full carafes of tap water
(see Brewing Coffee Instructions following). Do not add paper fi lter or
ground coffee for this initial cleaning.
Note: At the end of the fi rst cycle, press the OFF button and allow 15 minutes
for the unit to cool.
4. Brew a second carafe of fresh water.
5. Wait an additional 15 minutes to allow heating element to cool before
brewing your fi rst carafe of coffee.
Brewing Coffee Instructions
1. Plug Coffee Maker into a 120V AC electrical wall outlet. The LCD will
fl ash 12:00 AM until the time is set.
2. Using the front tab, lift to open the Coffee Maker lid. Fill carafe with cold
tap water and pour into water reservoir at the back of the unit. The water
level indicator can be easily viewed on the right side of the unit. No less
than 2 cups is recommended.
Note: The amount of brewed coffee will always be less than the amount of water
placed into Coffee Maker, since about 10% is absorbed by coffee grounds and fi lter.
3. Place a basket-shaped paper or reusable nylon fi lter basket in the
removable fi lter holder. Measure 1 heaping scoop of drip or regular grind
coffee for each cup of coffee desired. For stronger or milder coffee, adjust
amount of coffee to suit your taste.
assembly & use