


6
english
GB
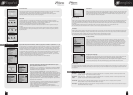
Alarms & Warnings Contd.
8
High Temperature: This alarm will only occur in the hold mode only. Probe the product to determine it is at the correct
temperature. If it is at the correct temperature place in a storage refrigerator or freezer and call your Foster
Authorised Service Company. If the product temperature is above the guidelines check the chill time selected or
the weight of product being chilled does not exceed the specification for the Cabinet.
HP Switch: Causes for this alarm could be:
Does the product temperature exceed 90˚c. Has too much product been placed in the cabinet. Is the airflow
restricted. Does the condenser filter require cleaning. If the problem persists call your Foster Authorised
Service Company.
Power Fail: If the power fails for up to five minutes the unit will re-start on the resumption of the power supply without
affecting the selected cycle. Longer than five minutes and the controller will enter the hold mode. To check the
cycle operation look in the information screen to check the cycle time.
To re-start press and release the dial, the screen will return to the hold screen. Press and hold the dial
for two seconds the display returns to the program selection.
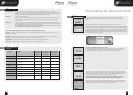
Guide for Blast Chilling
& Freezing
9
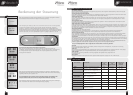
NOTE: All times listed should be used as a guide only, and will depend on type, size and quantity.
There are four main programmes that you will need to use your Blast Chiller or Freezer.
Soft Chill - for the safe chilling of delicate products such as gateaux and patisserie items, and high water content items such as
vegetables, rice and pasta.
Hard Chill- For general purpose chilling. The Hard Chill cycle is ideal for chilling 'standard products' such as meat pies, lasagne,
individually portioned meals etc. Providing surface protection for the later part of the program.
Hard Chill Max- For high density and high fat content products such as meat joints, stews and sous vide.
Shock Freeze- Products to be frozen can be shock frozen to below -18˚c within 240 minutes.
Food Type Includes Blast Chill Time required Time Required to
Programme to Blast Chill Shock Freeze.
required (Minutes) (Minutes)
Meat Beef, pork, lamb, poultry & mince Hard 40 - 90 60 - 240
Fish Fried, poached or baked - haddock, Soft 30 - 90 60 - 240
plaice, salmon, cod fillets etc
Prepared Dishes Stews & casseroles, lasagne, risotto, Hard 50 - 90 90 - 240
shepherds pie
Vegetables & Steamed or roasted veg, rice and Soft 30 - 90 60 - 240
Pulses potatoes etc.
Fruit Stewed and cooked fruits. Soft 60 - 90 60 - 240
Bakery Cakes Hard 30 - 90 70 - 240
Bakery Pastries Hard 60 - 90 50 - 240
Desserts Fruit Based desserts & egg based flans. Soft 30 - 90 70 - 240
Desserts Sponge puddings and dense desserts Hard 30 - 90 70 - 240
such as cheesecake.
31
Español
E
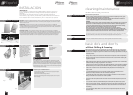
Instrucciones de funcionamiento
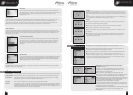
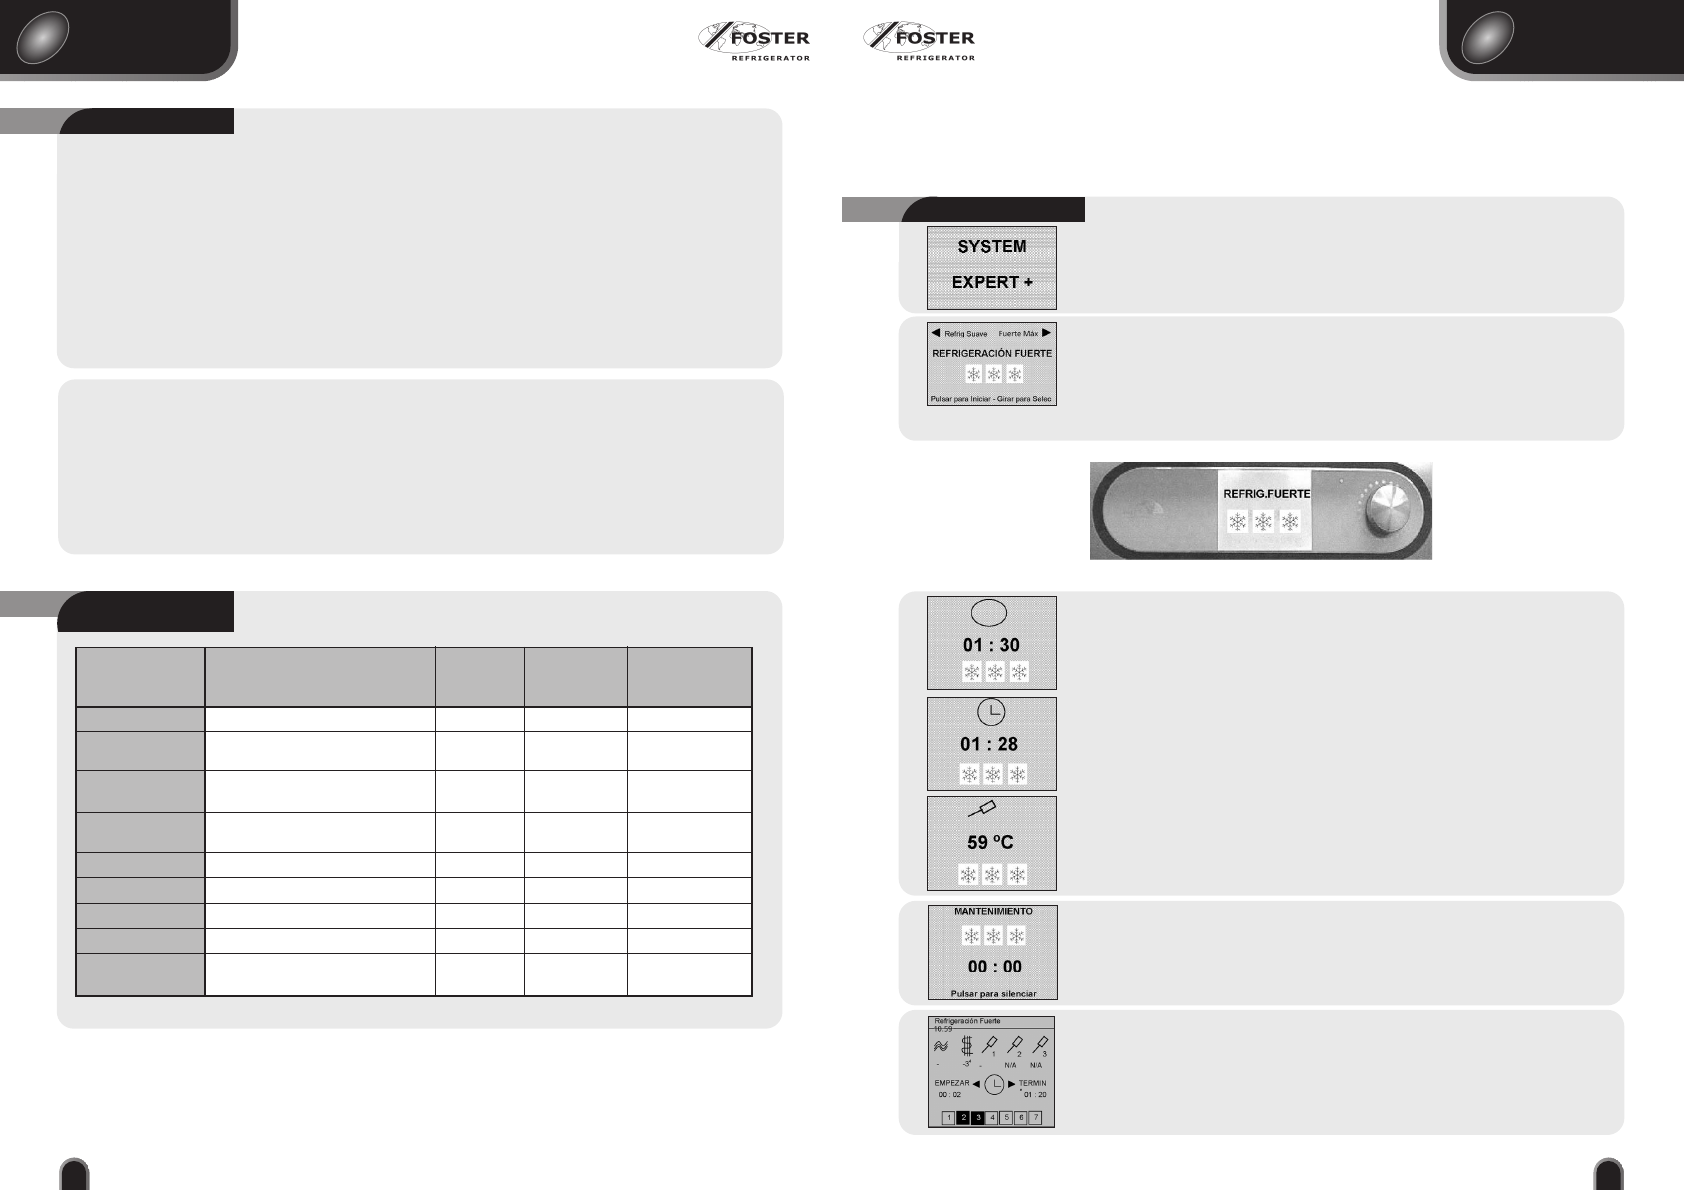
Como conclusión del auto-test, el controlador saltará al último programa que estaba en marcha
(Pre-refrigeración, refrigeración suave, refrigeración fuerte, refrigeración máxima, congelación rápida, Profesional 1,
Profesional 2 o Profesional 3). La disponibilidad de estos depende de cómo haya sido configurado el controlador.
El ejemplo muestra el controlador en modo refrigeración fuerte con los programas previos y siguientes indicados al
final de la pantalla. Para cambiar el programa girar la pantalla, en cualquiera de los dos sentidos, siguiendo el
sentido de las agujas del reloj o en el sentido contrario de las agujas del reloj para seleccionar el tipo de programa
que se requiere. (Para las guías ir a la página 6).
Para iniciar el programa presionar y soltar el dial
Para parar el abatidor durante el funcionamiento, presionar y mantener el indicador
presionado durante dos segundos, la pantalla vuelve al programa de selección.
Para concluir el programa, el controlador hará que el abatidor entre en el Modo Mantenimiento,
como se muestra a la izquierda. Una alarma sonará, presionar y soltar el indicador para cancelar la
alarma. Si la alarma no se cancela el abatidor estará todavía en el Modo Mantenimiento con el
sonido periódico de la alarma. Para cancelar, presionar y soltar el indicador.
Durante el funcionamiento del abatidor, el indicador puede girar para conseguir información del
estado del modo particular de funcionamiento. La pantalla permanecerá durante 10 segundos y
luego volverá a la pantalla de funcionamiento normal automáticamente.
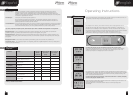
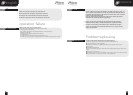
Funcionamiento Estándar
6
Cuando la corriente eléctrica se aplica primero al controlador éste realizará un auto-test de
funcionamiento, durante 3 segundos aproximadamente. Durante este período la pantalla lo
mostrará.
El programa comienza con la pantalla de arriba mostrándolo durante dos minutos. Después de
ésto, la sonda inteligente determina si el ciclo está controlado por el tiempo, mostrado por la
pantalla de la mitad, o por la temperatura como se muestra en la pantalla de abajo