8
Be sure lights are cool before cleaning the hood.
To Clean FiltersTo Clean Filters
To Clean FiltersTo Clean Filters
To Clean Filters
••
••
• The metal grease filters will last forever.
They are made of anodized aluminum
••
••
• It is recommended that the filters be washed at least once a month; they
can be washed by hand or in the dishwasher.
• Drain water through edge holes and let each filter dry thoroughly before
replacing it.
To Remove The Metal Grease FiltersTo Remove The Metal Grease Filters
To Remove The Metal Grease FiltersTo Remove The Metal Grease Filters
To Remove The Metal Grease Filters
• Turn blower and lights off.
• Push simultaneously the two handles S first upwards, then towards the
center and extract the filters Figure 10.
To Replace The Metal Grease FiltersTo Replace The Metal Grease Filters
To Replace The Metal Grease FiltersTo Replace The Metal Grease Filters
To Replace The Metal Grease Filters
• Reverse procedure.
To Replace The Carbon FilterTo Replace The Carbon Filter
To Replace The Carbon FilterTo Replace The Carbon Filter
To Replace The Carbon Filter
• The Carbon Filter must be replaced once a yera in normal use.
• To dismount push the two locks D and extract it from its housing.
To Clean Hood SurfaceTo Clean Hood Surface
To Clean Hood SurfaceTo Clean Hood Surface
To Clean Hood Surface
• For general care, wipe the outside of the stainless steel, white, black or
glass hood with sudsy water or household cleaners such as Fantastic® or
Formula 409
®
, rinse well and dry with clean soft cloth to avoid water marks.
• Wipe and dry brushed stainless steel in the same direction as the grain.
• Do not use abrasive products.
• To remove finger prints and give added shine use spray cleaners such as
Stainless Steel Magic
®
and Shimmer
®
.
Hood CleaningHood Cleaning
Hood CleaningHood Cleaning
Hood Cleaning
NOTE:
Turn blower and lights off. Make sure the lights are cool.Turn blower and lights off. Make sure the lights are cool.
Turn blower and lights off. Make sure the lights are cool.Turn blower and lights off. Make sure the lights are cool.
Turn blower and lights off. Make sure the lights are cool. If new
lights do not operate be sure lights are inserted correctly before calling
service.
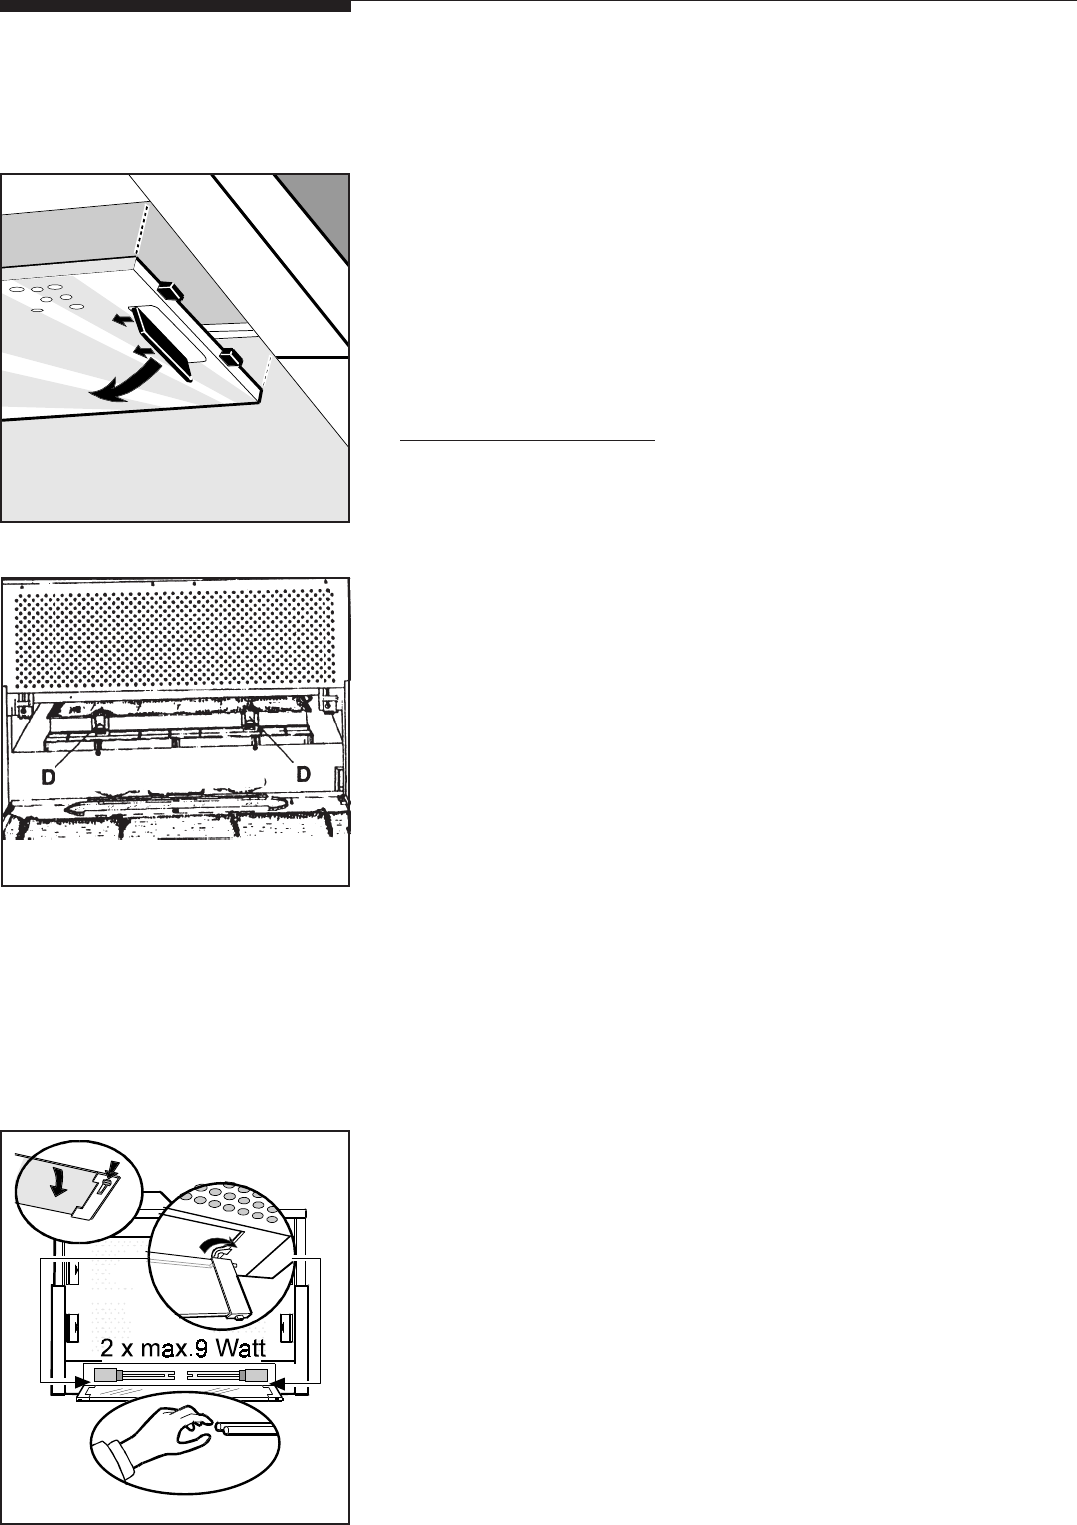
• Remove the light shield
QQ
QQ
Q by pushing simultaneously the two unlocking
buttons
RR
RR
R (Figure 12); for safety reasons make sure to remove the light
shield from its suspension slides
GG
GG
G.
• Pull out fluorescent tube and replace with Philips Type PL-S 9 Watt
maximum.
• Refit the light shield.
Lights replacementLights replacement
Lights replacementLights replacement
Lights replacement
Figure 10Figure 10
Figure 10Figure 10
Figure 10
Figure 12Figure 12
Figure 12Figure 12
Figure 12
RR
RR
R
QQ
QQ
Q
GG
GG
G
Figure 11Figure 11
Figure 11Figure 11
Figure 11


