


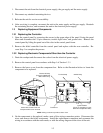
1-7
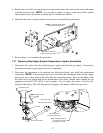
5. Remove the four bolts securing the motor mount to the frame, then remove the motor and mount
assembly from the unit. NOTE: It is possible to replace a motor or the microswitch without
removing the motor and mount assembly, but it is much more difficult.
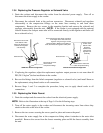
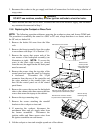
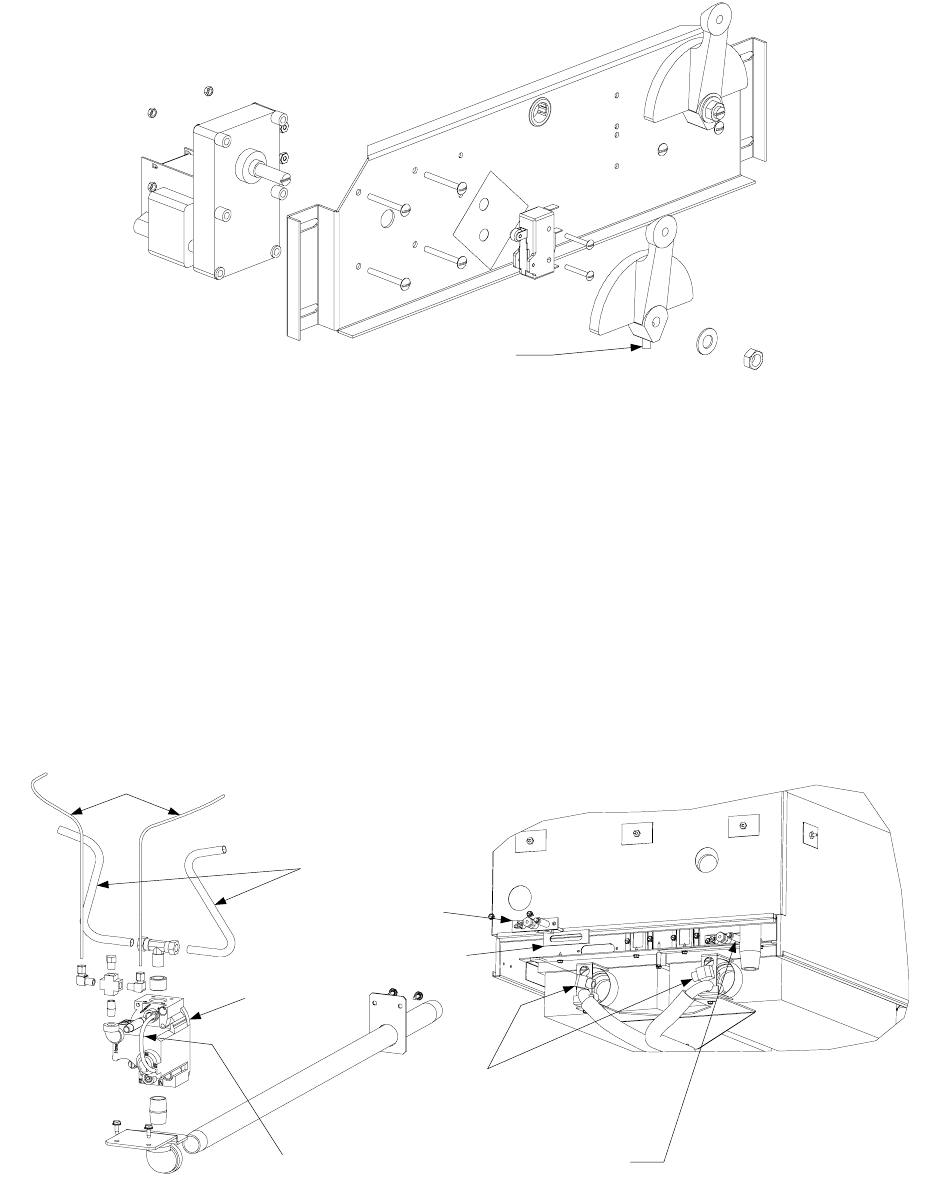
6. Dismount the motor or microswitch as shown below and install the replacement.
Loosen setscrew in
bottom of cam (bell crank)
NOTE: The right motor dismounts
in the same way as the left.
7. Reverse Steps 1-6 to complete the procedure.
1.3.7 Replacing Gas Supply System Components or Ignitor Assemblies
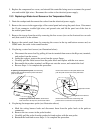
1. Disconnect the cooker from the electrical power supply and from the gas supply. If necessary,
disconnect restraints to gain proper access to components.
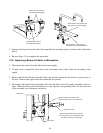
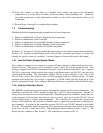
2. Disconnect the component to be replaced (see illustration below) and install the replacement
component. NOTE: If replacing the gas valve, disconnect the enrichment tubes and gas supply
tubes at the valve, then unscrew the valve from the mounting bracket. Recover the fittings from
the failed valve and install them on the replacement valve using a thread sealer suitable for gas
appliances (Loctite™ PST 56765 is one example). Do not apply the sealer to the first two
threads of the fitting. This will help prevent clogging of the burner orifices and gas valve.
Enrichment Tubes
Gas Supply Tubes
Gas Valve
Gas Supply Tubes
connect to Burners here
Gas Valve Vent Tube
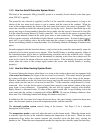
Ignitor Assembly
Ignitor Assembly Gasket
When installing the Ignitor
Assembly, ensure the
spark plug is to the right.