


7-6
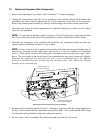
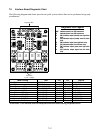
7.6 Replacing Contactor Box Components
1. If replacing a contactor box above the built-in filter system, remove the filter pan and lid from
the unit. Drain the frypots into a Shortening Disposal Unit (SDU) or other appropriate container.
If replacing a contactor box in a non-filter unit, drain the frypot above the box into a Shortening
Disposal Unit (SDU) or other appropriate container.
DANGER
DO NOT drain more than one full frypot into the SDU at one time.
2. Disconnect the fryer from the electrical power supply.
3. Unplug the wiring harnesses from the contactor box to be serviced.
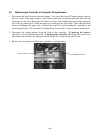
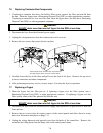
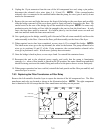
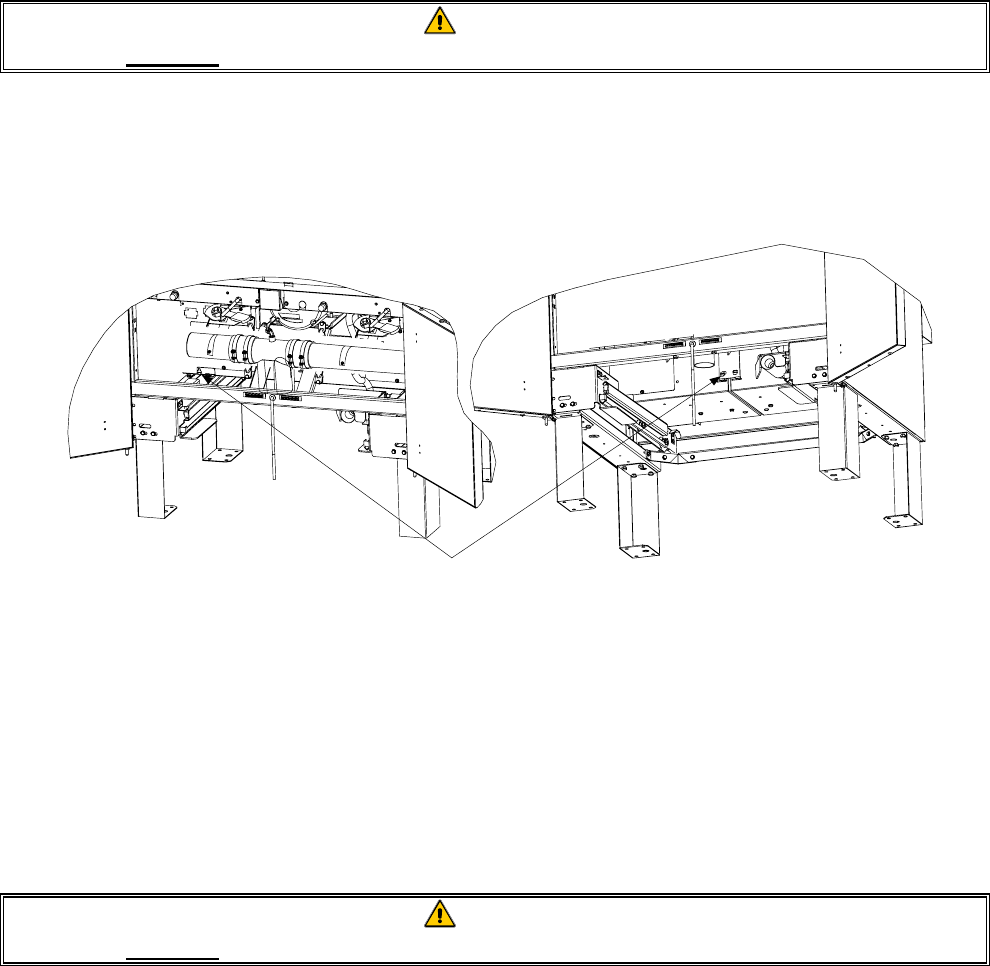
4. Remove the two screws that secure the box in place.
Remove these screws to dismount the left contactor box.
The right contactor box is secured in a similar manner.
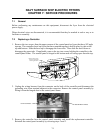
5. Carefully lower the box to the floor and pull it out the front of the fryer. Remove the top cover
to access contactors and other components.
6. After performing necessary service, reverse steps 1-5 to return the fryer to operation.
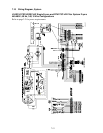
7.7 Replacing a Frypot
1. Drain the frypot into the filter pan or, if replacing a frypot over the filter system, into a
Shortening Disposal Unit (SDU) or other appropriate container. If replacing a frypot over the
filter system, remove the filter pan and lid from the unit.
DANGER
DO NOT drain more than one full frypot into the SDU at one time.
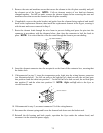
2. Disconnect the fryer from the electrical power supply and reposition it to gain access to both the
front and rear.
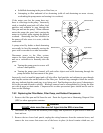
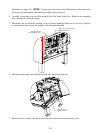
3. Remove the two screws from the upper corners of the control panels and allow them to swing
down (see illustration and photo on page 7-1).
4. Unplug the wiring harnesses and ground wires from the backs of the controllers. Remove the
controllers by lifting them from the hinge slots in the control panel frame.