


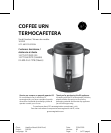

Client: Hamilton Beach (Wal*Mart)
Project: 169199
Language: EN
Date: 23.04.2009
Version: 08
Page: 6 (of 23 pages)
6
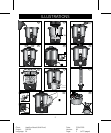
OPERATION
Before first use
• Remove packaging materials, labels and stickers from the coffee urn.
• Clean the coffee urn thoroughly before using for the first time (
Cleaning).
NOTE: To clear the coffee urn of any residue, fill to the maximum level mark on the side
of the tank (6) with fresh water. Run a full brewing cycle. Repeat this procedure at least
once.
Using the coffee urn
Intended use: the coffee urn is intended for brewing coffee and for keeping coffee warm
over an extended period of time.
• Pour desired amount of water into the water tank (6)
(ill.
a
).
NOTE: For the best results, always use cold, fresh tap water.
• The water level can be monitored using the embossed water level markings on the
side of the tank (6). DO NOT OVERFILL THE COFFEE URN
.
• Insert percolator tube (5) in heat well (14)
(ill.
b
).
Attach coffee basket (4) to
percolator tube
(5)
(ill.
b
).
Do not use the urn without having inserted both tube
and basket!
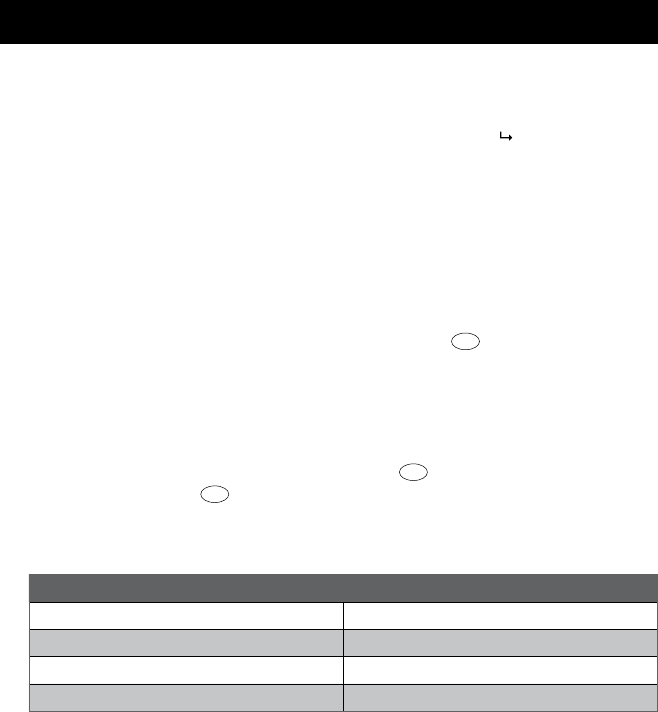
• According to the chart below, measure out desired amount coffee grounds in
relationship to water in tank (6). Amounts can be adjusted according to taste:
Water level Amount of ground coffee
40 cups (10l) 2 - 2½ cups
30 cups
(7.5l) 1¾ - 2 cups
20 cups
(5l) 1 - 1¾ cups
10 cups
(2.5l) ½ cup
• NOTE: We recommend using coffee that has been ground specifically for use in a
percolator-type coffee maker. However, coffee marked “For All Coffee Makers” is
acceptable. If using a coffee grinder and whole beans, percolator coffee should be
a coarse grind. Finely ground coffee may cause the basket to overflow and result in
grounds in coffee. Placing a flattened paper coffee filter in the coffee basket
(4) will
help prevent grounds from flowing into coffee.