Customer Service Troubleshooting Tips
Operating Instructions
Safety InstructionsInstallation InstructionsCustomer Service Troubleshooting Tips Installation Instructions Safety Instructions
Operating Instructions
Customer Service Troubleshooting Tips Installation Instructions Safety Instructions
Operating Instructions
Care and cleaning of the refrigerator.
6
Cleaning the Outside
Keep the outside clean.
Wipe with a clean
cloth lightly dampened with kitchen
appliance wax or mild liquid dish detergent.
Dry and polish with a clean, soft cloth.
Do not wipe the refrigerator with a soiled dish
cloth or wet towel. These may leave a residue
that can erode the paint. Do not use scouring
pads, powdered cleaners, bleach or cleaners
containing bleach because these products can
scratch and weaken the paint finish.
Protect the paint finish.
The finish on the
outside of the refrigerator is a high quality,
baked-on paint finish. With proper care, it
will stay new-looking and rust-free for years.
Apply a coat of kitchen/appliance wax
when the refrigerator is new, and then at
least twice a year.
Cleaning the Inside
To help prevent odors,
leave an open box of
baking soda in the refrigerator.
Unplug the refrigerator before cleaning.
If this
is not practical, wring excess moisture out
of sponge or cloth when cleaning around
the control.
Use warm water and baking soda solution—
about a tablespoon (15 ml) of baking soda
to a quart (1 L) of water. This both cleans
and neutralizes odors. Rinse and wipe dry.
Other parts of the refrigerator—including
door gaskets, fruit and vegetable drawers,
and all plastic parts—can be cleaned the
same way.
Do not wash any plastic refrigerator parts in
the dishwasher.
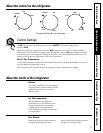
Defrosting
Defrost whenever frost on the wall of the ice tray
compartment becomes 1/4
″
thick. Never use
a sharp or metallic instrument to remove
frost as it may damage the cooling coils.
(A punctured cooling coil will cause serious
problems and void the warranty.) We recommend
using a plastic scraper. Do not use any electrical
device in defrosting your refrigerator.
To defrost,
remove foods and ice trays
from the ice tray compartment. Set the
temperature control dial at
OFF
position.
Defrosting usually takes a few hours.
To defrost faster, keep the door open.
Also, pouring warm (not hot) water on
the frosted part may speed defrosting.
Do not use boiling water—
it may damage
plastic parts.
After defrosting,
empty water from the
drip tray. Wash the drip tray in warm
water. Wipe the ice tray compartment
with a damp cloth. Then turn the
temperature control to the desired
setting and return food and ice trays to
the refrigerator.
NOTE:
If ice buildup is very thick, it may
keep the ice tray compartment door from
opening or closing completely. Don’t try
to force it open; after defrosting, the
door will open and close easily.
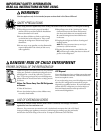
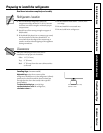
Preparing for Vacation
For long vacations or absences, remove food and unplug the refrigerator. Move the control
to the
OFF
position, and clean the interior with a baking soda solution of one tablespoon
(15 ml) of baking soda to one quart (1 liter) of water. Leave the door open.
Preparing to Move
Secure all loose items such as shelves and ice trays by taping them securely in place to
prevent damage.
Be sure the refrigerator stays in an upright position during moving.