


– 22 –
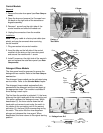
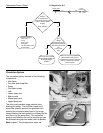
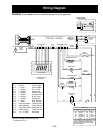
NONO
N
COM
WX
DOOR
INTERLOCK
WR
PX YX
FLOOD
SWITCH
C
WATER VALVE
725-1200
J2-2
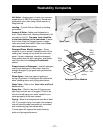
WATER VALVE AND
FLOOD SWITCH
L1 voltage from J2-2
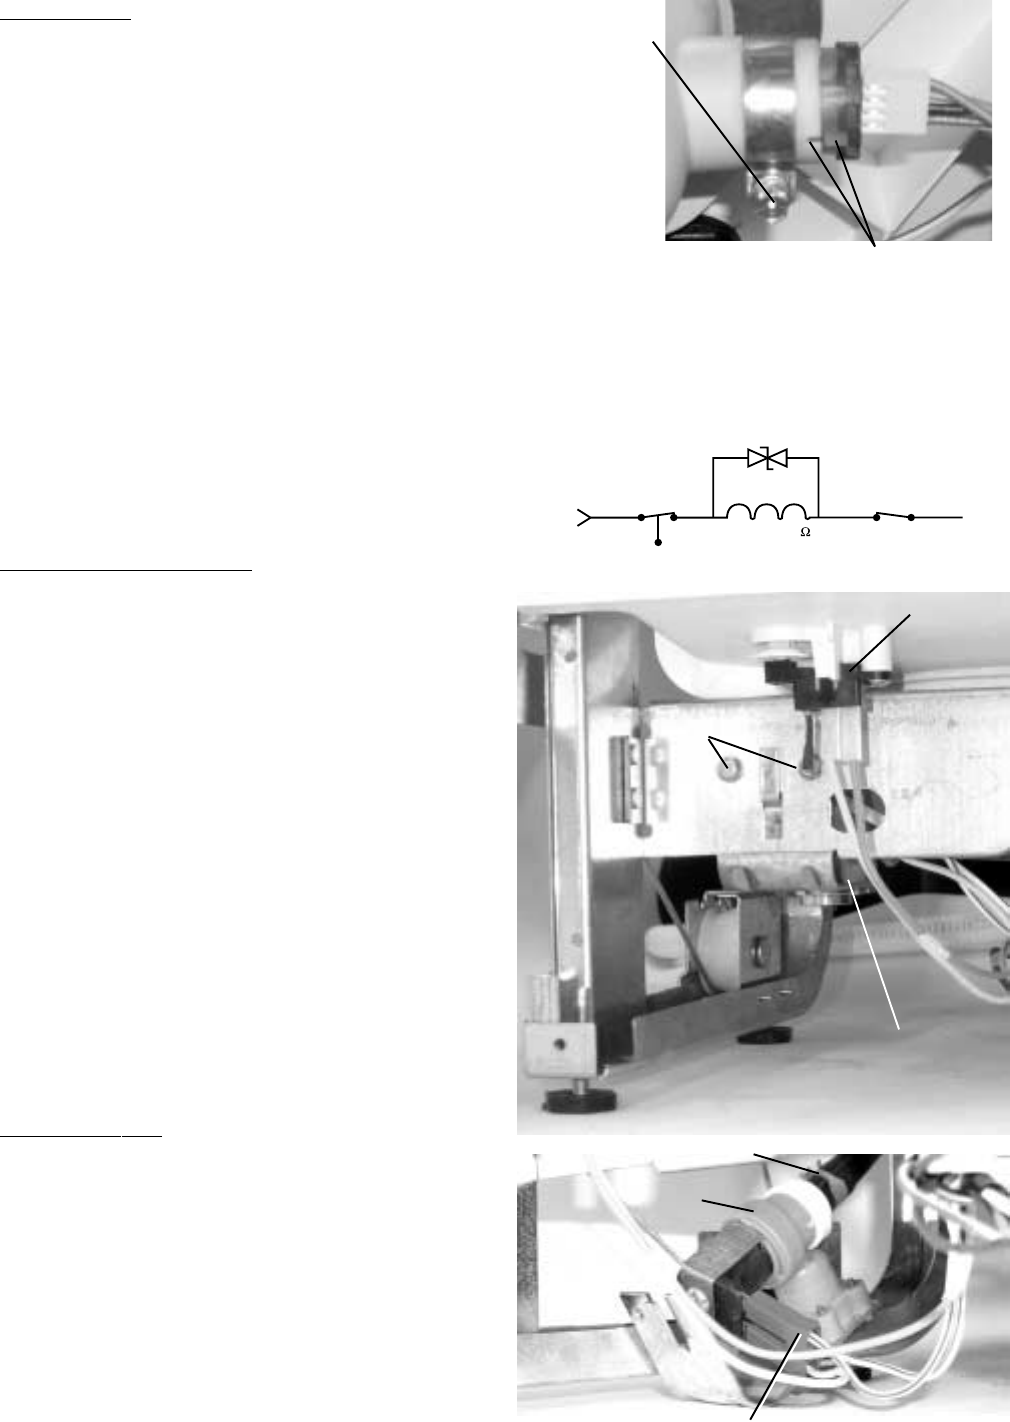
Water Valve and Flood Switch
The water valve is a 120 VAC (L1) solenoid valve
that is switched on/off by the control module. The
flood switch acts as a safety switch only and does
not control normal operation of the water valve.
The flood switch opens the L1 side of the water
valve circuit.
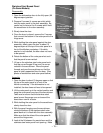
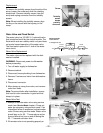
Water Valve Replacement
The water valve can be replaced with the dish-
washer installed.
WARNING: Disconnect power to dishwasher
before proceeding.
1. Turn off water supply to dishwasher.
2. Remove toekick.
3. Disconnect house plumbing from dishwasher.
4. Remove 2 screws and valve from dishwasher
frame.
5. Disconnect connector.
6. Move clamp up, away from valve, and remove
valve from hose.
Note: To prevent leaks after installation, ensure
that hose-to-valve connection is good and that
clamp is in place.
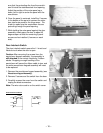
Water Valve Test
1. Attempt to activate water valve using service
mode (see
Service Mode
chapter). Pump out
water as necessary using service mode. If an
intermittent failure is suspected, activate water
valve 5 times using service mode. Water valve
should stay on for 50 - 71 seconds per activa-
tion and should not turn on and off during the
50 - 71 second activation time.
2. If the water valve is not operating properly or
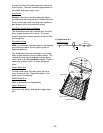
Flood Switch
Screws
Water Valve
Clamp
Water Valve
Connector
Replacement
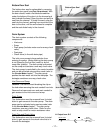
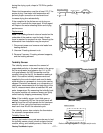
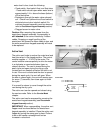
To remove the turbidity sensor from the side of the
sump, loosen the screw and slide the retaining
clamp back. Remove turbidity sensor from the
sump and unplug connector from the turbidity
sensor.
Note: When installing the turbidity sensor, align
the key on the sensor with the keyway on the
sump.
Keyway and Key
Screw
Screw
Turbidity
sensor
shown
partially
removed.