E1
Installation Instructions
22
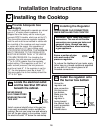
Checking the Igniters
Operation of the electric igniters should
be checked after the cooktop and supply
line have been carefully checked for leaks
and the cooktop has been connected to
the electrical power.
a. Push and turn a burner valve to the LITE
position.
• The burner valve should light when gas
is available to the burner
• Once the burner lights, it should be
turned out of the LITE position.
b. Try each valve separately until all burners
have been checked.
E2
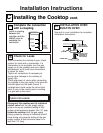
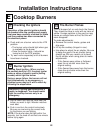
Cooktop Spark Ignition—When you turn
the cooktop knob to LITE, the spark igniter
makes a series of electric sparks (ticking
sounds) which light the burner.
During a power failure, the burners will not
light automatically. In an emergency, a
cooktop burner may be lit with a match by
following the steps below.
WARNING: Lighting gas burners with a
match is dangerous. You should match
light the cooktop burners only in an
emergency.
Burner Ignition
a. Light a match and hold the flame near the
burner you want to light. Wooden matches
work best.
b. Push in and turn the control knob slowly.
Be sure you are turning the correct knob
for the burner you are lighting.
NOTE: If the burner does not light within five
seconds, turn the knob off and wait one minute
before trying again.
E3
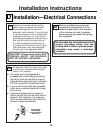
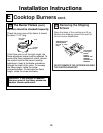
The Burner Flames
Turn all burners full on and check the flames.
They should be blue in color with no trace of
yellow. Foreign particles in the gas line may
cause an orange flame at first, but this will
soon disappear.
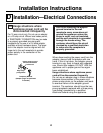
To make adjustments:
a. Remove the control knobs, grates and
drip pans.
b. Lift up the cooktop (hinged in rear).
c. Use pliers to adjust the air shutter. Be sure
to keep the gap in the air shutter facing
straight up. Be very careful not to bend
the air shutter when using pliers to make
adjustments.
– If the flames were yellow or fluttered,
open the air shutter more than the
original setting.
– If the flames blew away from the burner,
close the air shutter more than the
original setting.
Cooktop Burners
E


