


Burners
The holes in the burners of your cooktop must be kept
clean at all times for proper ignition and an even,
unhampered flame.
You should clean the
burners routinely,
especially after bad
spillovers which could
clog these holes.
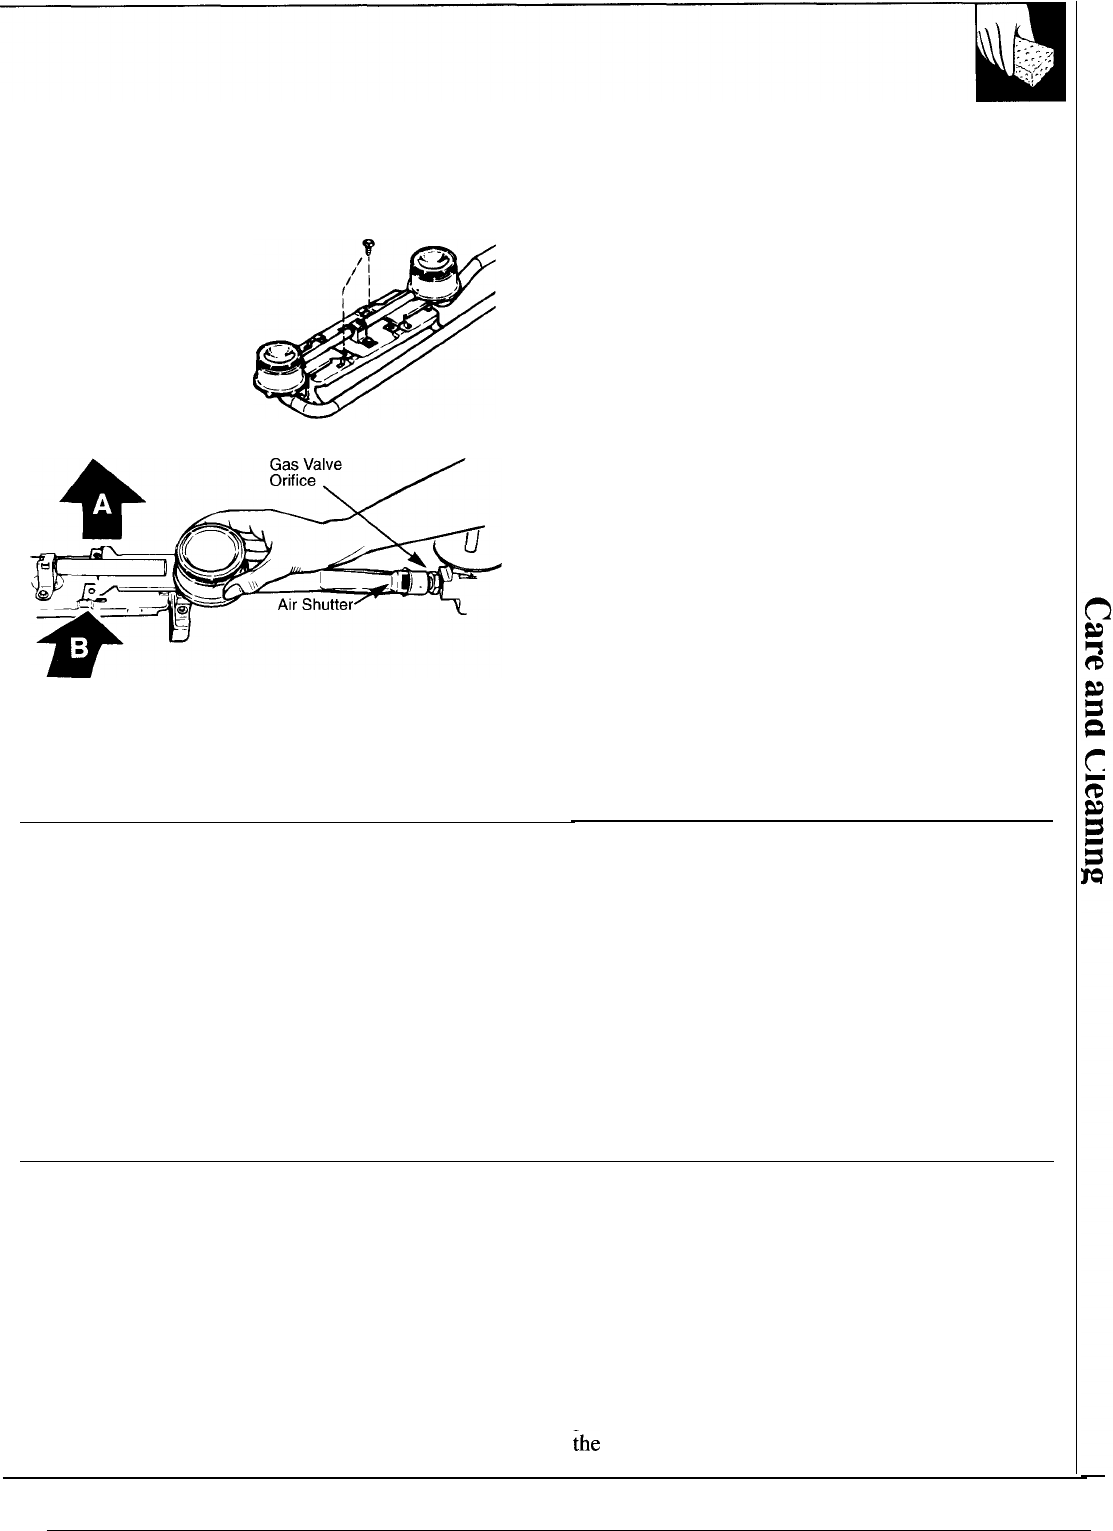
Burners lift out for
cleaning if the screws
are removed.
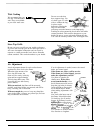
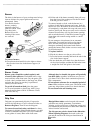
To remove burners:
1. Grasp burner head and tilt it to the right to release
the two tabs from slots in the burner support. (A
and B)
Burner Grates
Burner grates should be washed regularly and,
of course, after spillovers. Wash them in hot, soapy
water and rinse with clean water. Dry the grates with
a cloth—don’t put them back on the range wet. When
replacing the grates, be sure they’re positioned
securely over the burners.
To get rid of burned-on food, place the grates
in a covered container or plastic bag. Add 1/4 cup
ammonia and let them soak for 30 minutes. Wash,
rinse well, and dry.
2. Lift the end of the burner assembly, then pull away
from the front of the cooktop to free the air shutter
from the gas valve orifice.
To remove burned-on food, soak the burners in a
solution of mild liquid detergent and water. Soak the
burners for 20 to 30 minutes. If the food doesn’t rinse
off completely, scrub them with soap and water and a
brush or plastic pad. Do not use steel wool or abrasive
cleansers because they will clog the burner openings
and scratch the burners. If the holes become clogged,
clean them with a small sewing needle or a small
safety pin.
Do not attempt to clean burners in an automatic
dishwasher. Loosened food soil can clog burner
holes, and the strong action of the dishwasher
detergent can damage the burner heads. Before
putting the burners back, shake out excess water and
dry them thoroughly.
To replace burners:
1. Slip the air shutter over the gas valve orifice.
2. Lower the burner assembly and hook the tabs in the
slots in the burner support.
3. Be sure both tabs are in their slots, that the burner
sits level and straight, and that the flash tube forms
a straight line from the igniter to the burner.
Although they’re durable, the grates will gradually
lose their shine, regardless of the best care you can
give them. This is due to their continual exposure to
high temperatures.
Do not operate a burner for an extended period of
time without cookware on the grate. The finish on the
grate may chip without cookware to absorb the heat.
Do not clean in the self-cleaning oven.
Drip Pans
Drip pans can permanently discolor if exposed to
excessively high heat or if soil is allowed to bake on.
Remove the grates. Then lift out the drip pans.
To remove brown food stains, soak them for about
20 minutes in slightly diluted liquid cleanser or a mild
solution of ammonia and water (1/2 cup of ammonia
to one gallon of water). Rinse with clean water.
Blue/gold heat stains can be lessened with a metal
polish but are usually permanent. To minimize
staining, avoid excessive use of high heat setting and
use flat bottom pans that do not extend more than two
inches from the surface unit.
The drip pans may also be cleaned in the dishwasher.
When replacing drip pans, the notch on the rear
pan and the notch on the front pan should meet in
~he
middle.
9