


~PORTANT
SAFETY INSTRUCTIONS
(conl[nued)
●
If you
should have
a
grease fire in the
broi
Ier
ptin,
turn off oven, and keep oven door closed to
contain fire until it burns out.
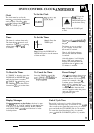
Cleaning Your Range
&
●
Clean only parts listed in the Use
. . .
,“~~.
->’
.“
and Care Guide.
●
Keep
range clean and free of accumulations of
grease or
spillovers,
which may ignite.
Self-Cleaning Oven
●
Be sure to wipe up excess spillage before
self-cleaning operation.
●
Before self-cleaning the oven, remove broiler
pan and other cookware.
●
Do not clean door gasket.
The door gasket is
essential for a good seal. Be careful not to rub,
damage or move it.
●
Do not use oven cleaners. No
commercial oven
cleaner or oven liner of any kind should be used
in or around any part of the oven.
●
If
the
self-cleaning mode malfunctions, turn off
and disconnect power supply.
Have serviced by
a qualified technician.
If You Need Service
●
Read the Problem Solver in the back of
this book.
●
Don’t attempt to repair or replace any part of
your range unless it is specifically recommended
in this book.
All other servicing should be referred
to a qualified technician.
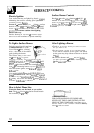
L.P.
Conversion
Your range is shipped from the factory set to
operate only with Natural Gas. If you wish to use
your range with Liquefied Petroleum Gas, you can
have your sales person order an LP Conversion Kit.
SAVE THESE
INSTRUCTIONS
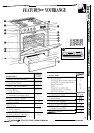
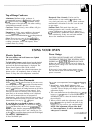
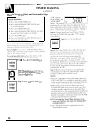
FLOO~G
AND LEVELING
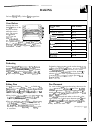
Flooring Under the Range
Your range, like so many other household items,
The
r:trlgc
should
be
ins[allcd
on a l/4-inch-thick
is heavy and can settle into soft floor coverings
shcc[
ot
plywood
(C)r
si rni
I;lr”
mater-itil )
as
foi
lows:
such as cushioned vinyl or carpeting.
When
rnov
i
ng
When
the, floor”
~’overing
end.v
at the
frotlt
of
the
the
runge
on this type of
ftooring,
use
(>tirc,
ond
it is
range,
the
area
thtit
the
range
will rest on
should
be
recommended that these
sinlple
and inexpensive
buill
up with
plyw(~od
to the same level or higher
-
[ban
instructit)ns
be
followed.
lhc
tloor
co}ering.
This wi I I
tillow
the range
to
be
moved
for
clcuning
or servicing.
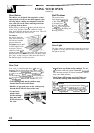
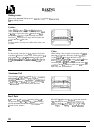
Leveling the Range
Use
a
1 X“ open-end or adjustable wrench to equally
Adjust the
t’our
legs carefully. Level the
rtinge
front to
back out the four legs. The
tlanges (rims) below the
back
find
side to side. The
rtinge
legs must rest on the
sides
of the
cooktop
must be raised
~bove
the top of
tloor. The
rtinge
must not hang
from the countertop.
the countertop. Carefully slide the range into its
installation space. Observe that it is clearing the
countertop. Then place a spirit level or a glass
measuring cup partially filled with water on one
of
the
oven shelves to check for levelness. If using
a
spirit
level, take two
reudings,
with the level placed
diagontilly
t’irst
in one direction and then the other.
6