


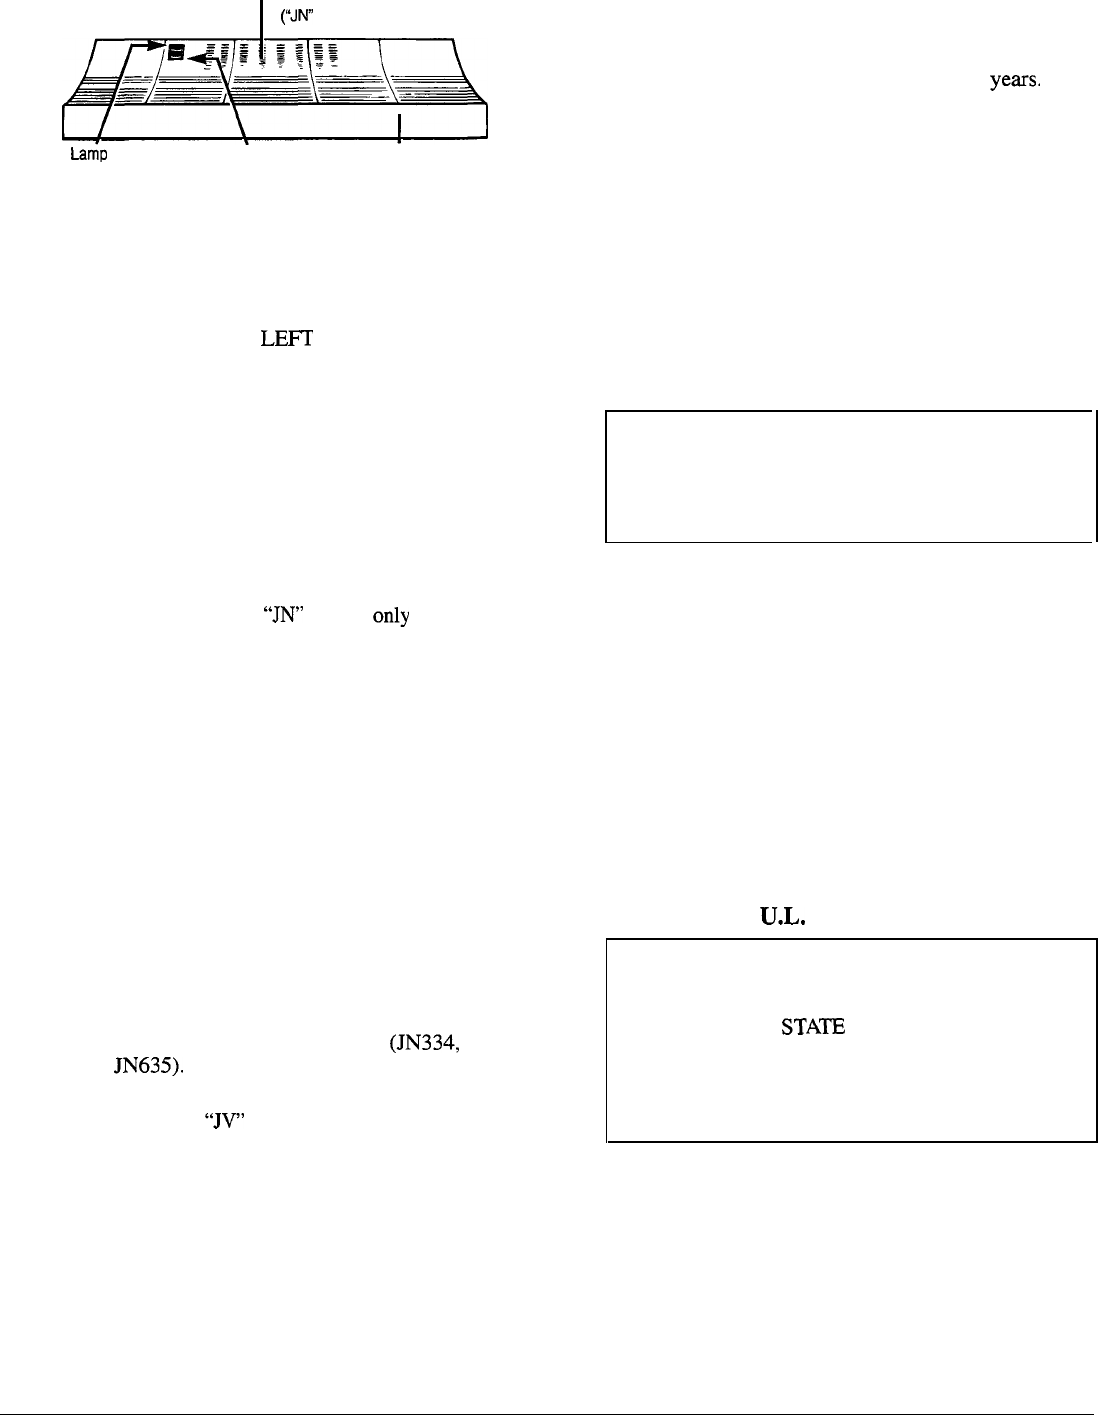
To
Operate
—Vents
(“JN”
models only)
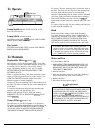
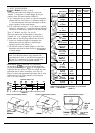
Lamp
switch
Fan switch Trim
Lamp Switch
Models: JN322, JV322 & JV332
Press for OFF and ON.
Lamp Stitch All other models.
CENTER position OFF,
LE~
position NIGHT LIGHT,
RIGHT position BRIGHT LIGHT.
Fan Switch
CENTER position OFF, LEFT position LOW SPEED,
RIGHT position HIGH SPEED.
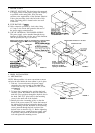
To Maintain
Replaceable Filter
‘6JN”
models
only
The efficiency of your hood depends upon a clean filter.
The frequency of filter replacement depends on the type
of cooking you do; however, with average, normal
usage, replacement should be every 6 to 12 months.
NEVER OPERATE THE HOOD WITHOUT THE
FILTER IN PLACE.
When to replace the filter: The filter has distinct color
stripes of indicating material on the visible surface. It is
TIME TO CHANGE when the stripes have either
blended together or faded completely.
To remove: Turn the retaining clip to release the front of
the filter. The filter will then slip out of the retaining tabs
on the back.
To replace: Slip the back edge into the retaining tabs
and lock in place with the retaining clip.
Replace with genuine GE part: filter part number
WB02X8253 (JN322) or WB02X8254
(JN334,
JN335,
JN634,
JN635).
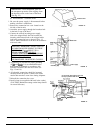
Grease Filter
“JV”
models only
The efficiency of your hood depends on a clean filter.
Frequency of cleaning depends on the type of cooking you
do. BUT GREASE FILTER SHOULD BE CLEANED
AT LEAST ONCE A MONTH. NEVER OPERATE
THE HOOD WITHOUT THE FILTER IN PLACE.
To remove: Turn the retaining clip to release the edge of
the filter. The filter will then slip out of the retaining tabs.
To clean: Soak and then agitate in a hot detergent
solution. Light brushing may be used to remove irnbedded
soil. Rinse, shake and remove moisture before replacing.
With careful handling, the filter will last for
yean.
If
replacement becomes necessary, order the part from your
dealer.
To replace: Slip the edge into the retaining tabs and lock
in place with the retaining clip.
Hood
Clean grease laden surfaces of the hood frequently.
Use warm detergent solution. About 1 tablespoon of
ammonia may be added to the water. TAKE CARE TO
NOT COME IN CONTACT WITH FILTERS AND
OTHER NON-ENAMELED SURFACES. The hood
shell can be washed, rinsed and dried with a soft cloth.
CAUTION: Be certain when cleaning the hood
surfaces you do not touch the lamp bulb with moist
hands or cloth. A warm or hot lamp bulb may break
if touched with a moist surface. ALWAYS let lamp
cool COMPLETELY before cleaning around it.
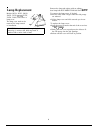
Motor and Fan
To Clean Motor and Fan
1. DISCONNECT THE HOOD POWER SUPPLY AT
THE HOUSEHOLD DISTRIBUTION PANEL BY
REMOVING THE FUSE OR SWITCHING OFF
THE CIRCUIT BREAKER.
2. Remove the filter.
3. Wipe the fan blade and motor with cloth, dampened
only in
ammonia and warm water solution.
4. Replace the filter.
5. Reconnect the hood power supply.
U.L. Requirement
WARNING: THE ELECTRICAL WIRING AND
FAN MOTOR IN THIS RANGE HOOD ARE NOT
INTENDED FOR USE WITH, OR PROVIDED
WITH A SOLID
STA~
SPEED CONTROL. ANY
SUCH ALTERATION FROM ORIGINAL
FACTORY WIRING CONCEPT COULD RESULT
IN DAMAGE TO THE UNIT AND/OR CREATE
AN ELECTRICAL SAFETY HAZARD.
3
.