


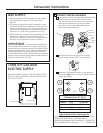
CONVERT SURFACE BURNERS (cont.)
Replace the gaskets, burner bases and electrodes.
Install the two screws in each burner base. Do not
overtighten. The maximum torque is 10 inch pounds.
Push the igniters all the way down into the burner
head.
Install the burner heads, burner caps and grates in
their original burner positions.
E
D
1
Conversion Instructions
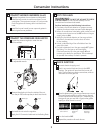
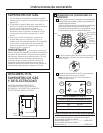
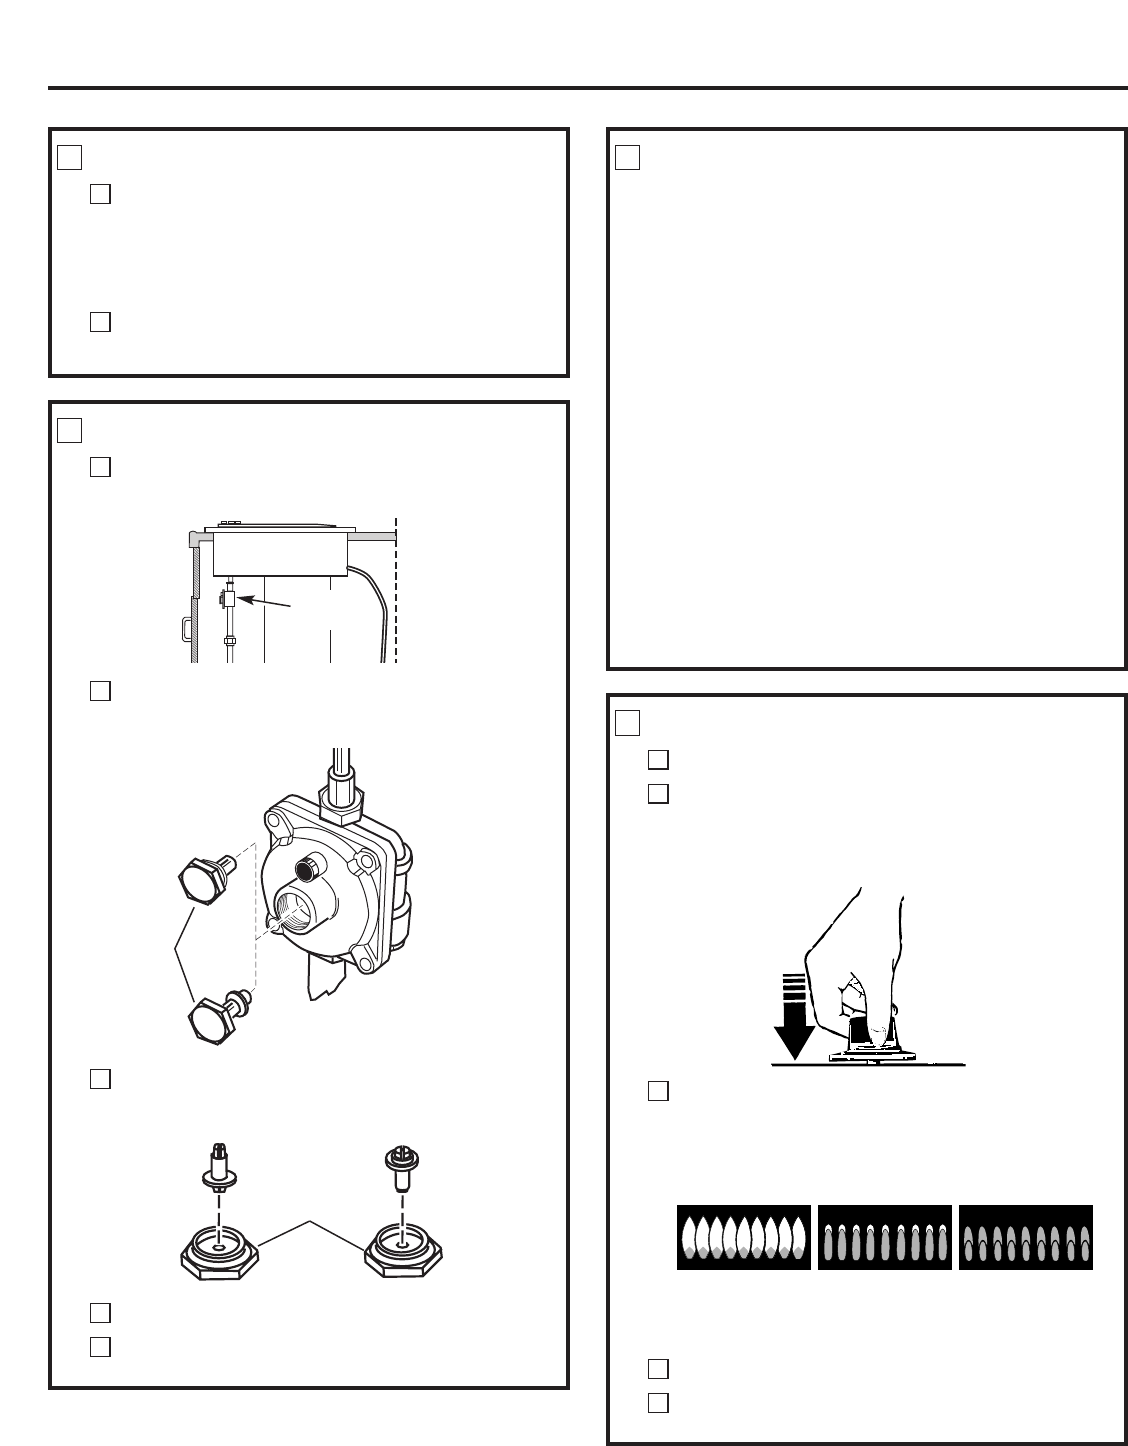
CONVERT THE PRESSURE REGULATOR
Locate the pressure regulator under the rear
of the cooktop.
A
2
Remove the nut from the pressure regulator with
an adjustable wrench.
B
Remove the plastic pin from the inside of the nut,
turn the pin 180° and snap the pin back into the nut.
C
Natural gas
LP gas
Nut
Natural gas LP gas
Nut
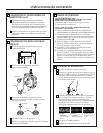
TEST FOR LEAKS
WARNING:DO NOT USE A FLAME TO CHECK
FOR GAS LEAKS! Do not use the cooktop until all
connections have been leak tested.
Perform leak test per the following instructions:
1. Purchase a liquid leak detector or prepare a soap
solution of one part water, one part liquid detergent.
2. When all connections have been made, make sure all
cooktop controls are turned to OFF and turn the gas
supply valve to ON.
3. Apply the liquid leak detector or the soap solution
around all connections from the shut-off valve
to the cooktop.
4. A leak is identified by a flow of bubbles from the
area of the leak.
5. If a leak is detected, turn the gas supply off. Tighten
the fitting. Turn the gas on and test again.
If the leak persists, turn the gas supply off and
contact your dealer for assistance. Do not attempt
to operate the cooktop if a leak is present.
3
3
Pressure
regulator
Re-install the nut onto the regulator.
Apply the LP Conversion label next to the Rating Plate.
E
D
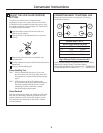
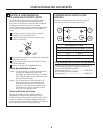
CHECK IGNITION
Connect electrical supply cord.
Push in one control knob and turn to the LITE
position. The igniter will spark and the burner will
light. The first test may require some time, while air
is flushed out of the gas line.
B
A
4
Check to determine if your burner flames are normal.
If burner flames look like A, call for service. Normal
burner flames should look like B or C, depending on
the type of gas you use. With LP gas, some yellow
tipping on outer cones is normal.
C
Turn the knob to OFF.
Repeat the procedure for each burner.
E
D
A–Yellow flames
Call for service
B–Yellow tips
Normal for
LP gas
C–Soft blue flames
Normal for
natural gas