


10
Consumer Support Troubleshooting Tips
Operating
Instructions
Safety Instructions
Installation
Instructions
Care and Cleaning
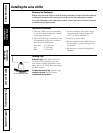
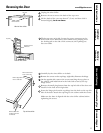
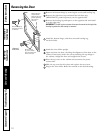
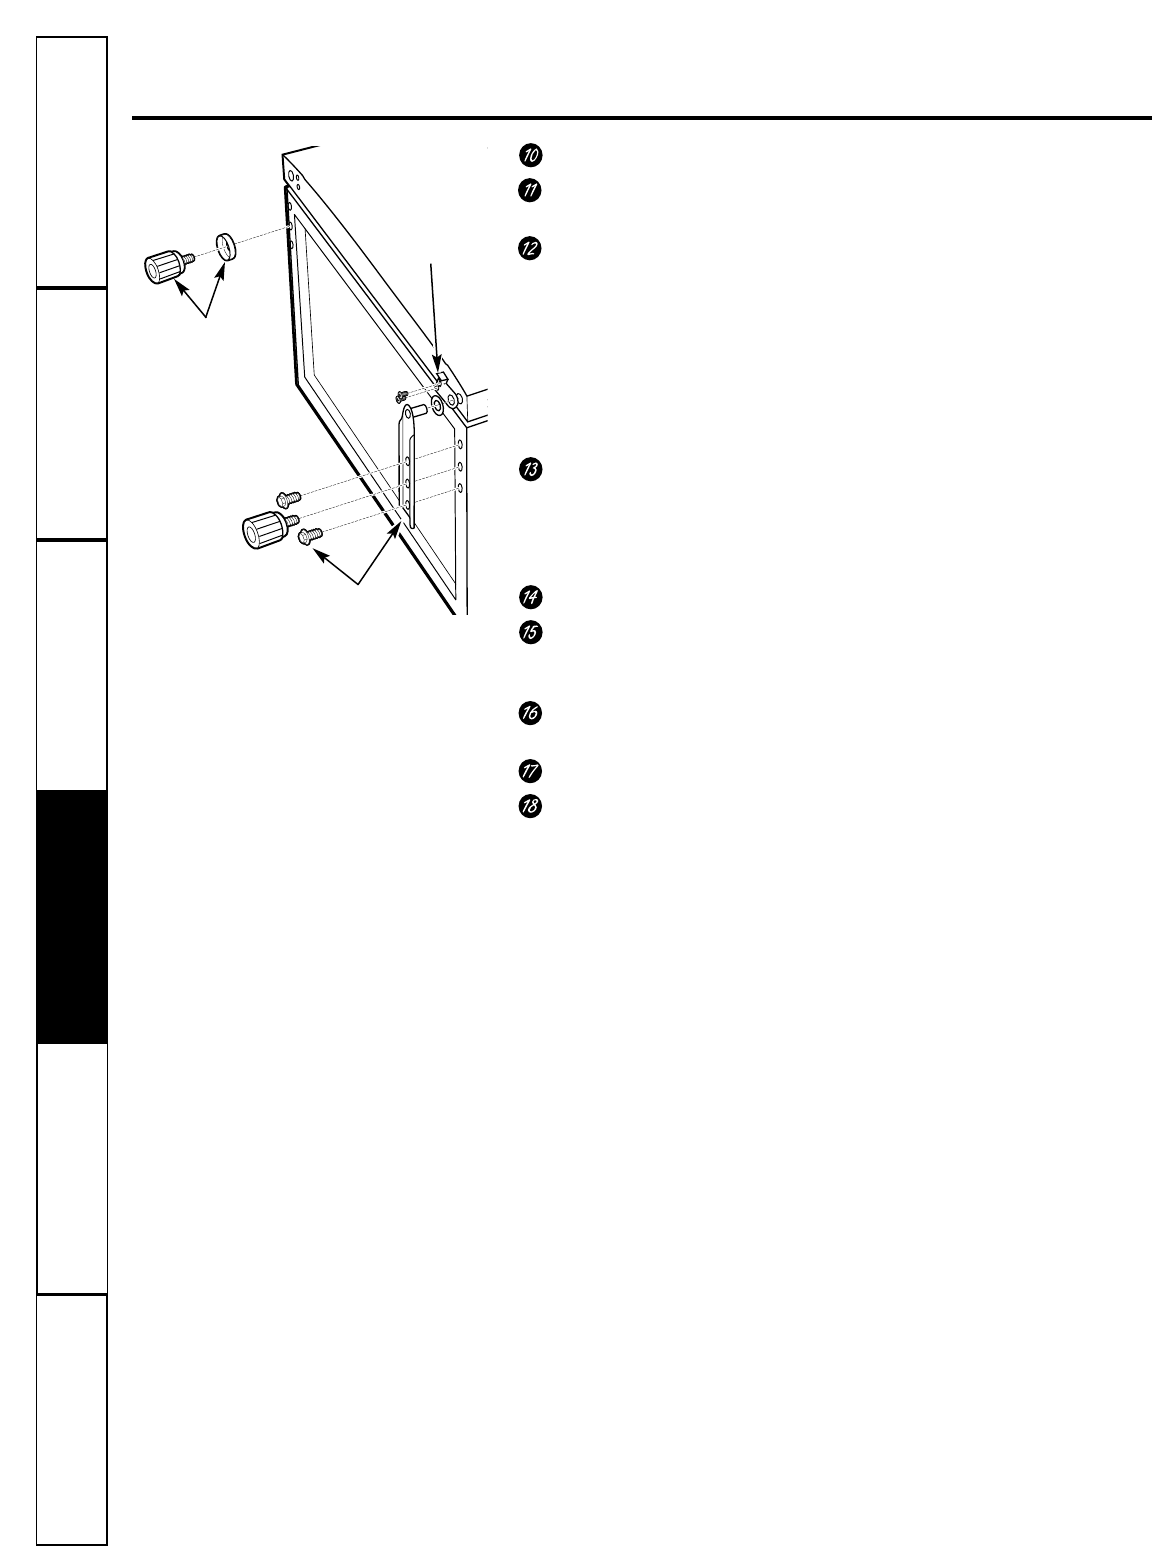
Reversing the Door.
Remove the bottom hinge by removing the screws and leveling leg.
Remove the right door stop and install the left door stop
(WR13X10274), packed separately, on the opposite side.
Remove the leveling leg and spacer on the opposite side and install
it on the right side.
IMPORTANT: The left leg has a spacer that must be moved to the right side
leveling leg when the door swing is reversed.
Install the bottom hinge, with the screws and leveling leg,
on the left side.
Stand the wine chiller upright.
Open and close the door, checking the alignment of the door to the
cabinet. If necessary, loosen the screws attaching the top hinge to
the cabinet, realign the door and retighten the screws.
Place the top cover on the cabinet and reconnect the power
connections.
Slide the top cover back in place and replace the two screws.
Plug in the wine chiller. Reset the controls to the desired setting.
Remove leveling
leg, screws, bottom
hinge and washer, and
move to other side
Remove leveling leg
and spacer and move
to other side
Bottom of
wine chiller
Remove right door
stop and screws.
Install left door stop
(packed separately)
and screws on
other side