


15
Installation Instructions
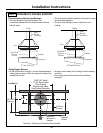
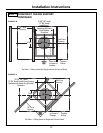
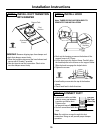
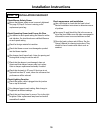
STEP 5 INSTALL DUCT TRANSITION
WITH DAMPER
IMPORTANT: Remove shipping tape from damper and
check that damper moves freely.
• Place the transition piece over the hood exhaust and
secure with 4 Screws C provided.
• Use duct tape to seal the connection. Check to be
sure the damper moves freely.
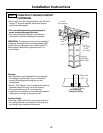
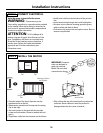
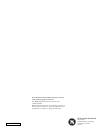
STEP 6 INSTALL HOOD
Note: THREE PEOPLE ARE REQUIRED TO
COMPLETE THIS INSTALLATION!
• Back out the hanging screws on the bottom of the
support frame to a 1/4" gap.
• Lift the hood up to the support frame. Carefully align
the hood keyhole to the screws on the support frame.
Slide the hood to engage the keyhole slots.
• Tighten the screws.
Slide Duct
Collar Down
to Cover Gap
Duct
Transition
Bumper Pads
Attachment
Screws
Attachment
Keyholes
1/4" Gap
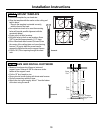
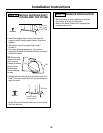
Install
2 Safety
Screws
Screws C
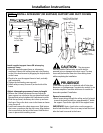
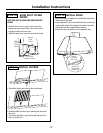
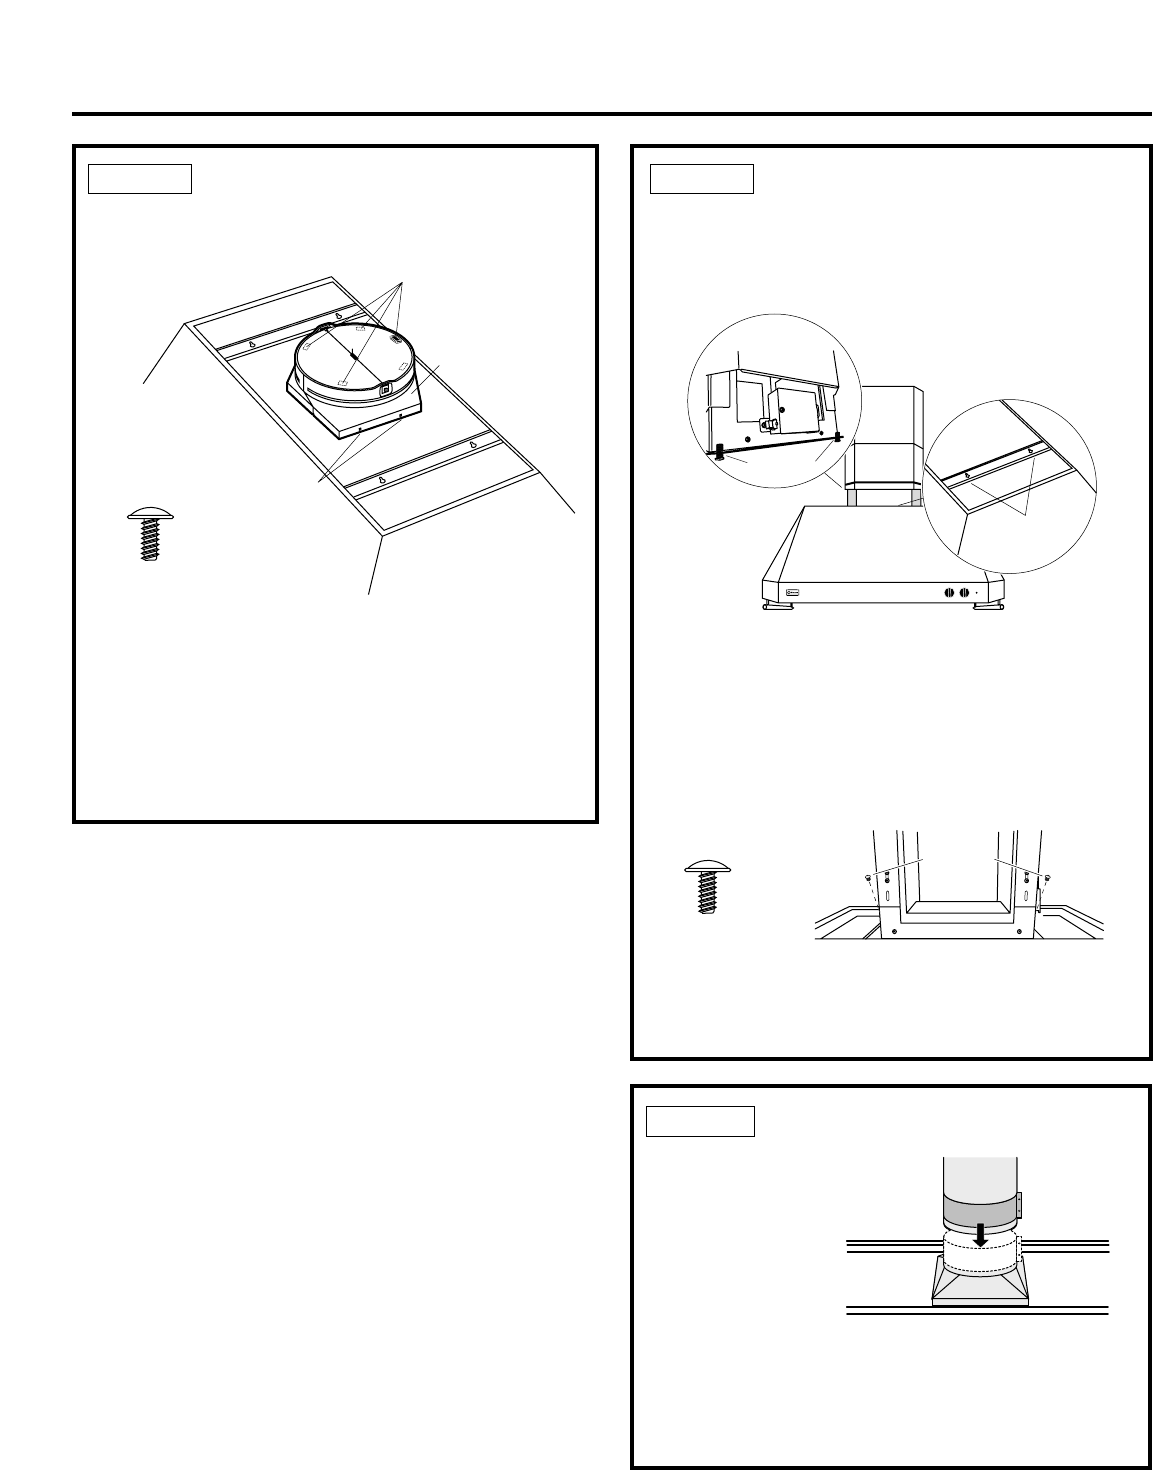
STEP 7 CONNECT DUCT
• Loosen duct collar and slide
down to cover gap between
transition and house duct.
Tighten collar
screws and tape all joints.
• Seal all connections with duct
tape.
Note: Do not drive screws through this duct
connection. Doing so will prevent proper damper
operation.
Screws C
• Install safety screws into the top of the hood as
shown.
• Check hood level in both directions.
Slide Duct
Collar Down
to Cover Gap