


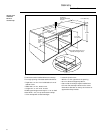
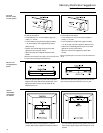


Cabinetry Modification Suggestions
Built-In Ovens
12
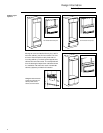
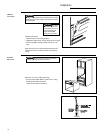
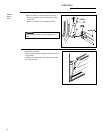
Cut and
secure cleats
to filler panel
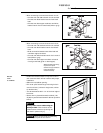
Secure rail
to appearance
panel
Secure
assembled
filler panel
to cabinet
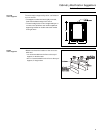
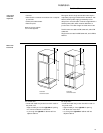
• Place filler panel in proper position. To attain
proper relationship to adjacent drawers and doors
you may need to space the filler panel out from the
cabinet face/edges using drawer bumpers or other
spacers.
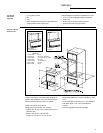
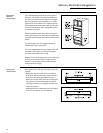
For the bottom filler panel:
• Cut 2 cleats out of 3/4" thick material, approxi-
mately 1-1/4" wide.
• Cut the cleats to a length leaving approximately
1/2" at the top of the filler panel to attach the rail.
• Position the outside edge and bottom of the cleat
against the corner pencil marks.
• Secure the cleat to the appearance panel with
screws.
Note:
If appearance panel is very narrow, cleats can be attached to
the rail.
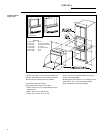
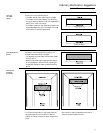
For the top filler panel:
• Cut 2 cleats out of 3/4" thick material, approxi-
mately 1-1/4" wide.
• Cut the cleats to a length leaving approximately
1/2" at the bottom of the appearance panel to
attach the rail.
• Position the outside edge and top of the cleat
against the corner pencil marks.
• Secure the cleat to the appearance panel with
screws.
Note:
The screws should be long enough to secure the cleats to the
filler panel without penetrating the appearance side.
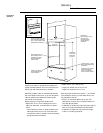
• Place rail against cleats and flush with the outside
edges of the cleats. Secure with wood screws. If the
appearance panel is very narrow, cleats can be
attached to the rail.
Note:
The screws should be long enough to secure rail to the filler
panel without penetrating the finished face of the filler panel.