7
10
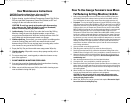
How To Use George Foreman’s Lean Mean
Fat Reducing Grilling Machine/ Griddle
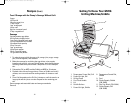
1. Before using this appliance for the first time, wipe the Grilling Plates and
the Griddle Surface with a damp cloth to remove all dust. Wash the Drip
Tray and Spatulas in warm, soapy water. Rinse thoroughly and wipe dry.
2. To preheat: Turn the left hand Temperature Control Dial (Grill) and the right
hand Temperature Control Dial (Griddle) to OFF. Plug the cord into a 120V AC
outlet then close the Lid on the Grilling side of the unit. If you are using the
Grilling surface, turn the Temperature Control Dial on the Grill side to MIN,
MED or MAX, according to your cooking needs and allow it to preheat until
the power light goes off. If you are using the Griddle surface, turn the
Temperature Control Dial on the Griddle side to MIN, MED or MAX, accord-
ing to your cooking needs and allow it to preheat until the power light goes
off. Since each side of the Grill/Griddle has independent controls and heat-
ing elements, you may use each side at a different temperature, or set each
side to the same temperature, if preferred. Note that when the elements are
heating, the Power On Lights illuminate. They will remain ON until the set
temperature has been reached then cycle on and off as the set tempera-
ture is being maintained.
3. Use a pot holder to carefully open the Lid.
4. Slide the grease catching Drip Tray under the front of the unit.
5. Carefully place the items to be cooked on the bottom Grilling Plate or the
Griddle Surface.If using the Grill, use a pot holder to carefully close the Lid.
6. Allow the food to cook for the desired time. (Consult the recipe section at
the back of this book for some suggestions). Do not leave appliance unat-
tended during use!
7. After the desired amount of time, the food should be done.
8. If using the Grill, use a pot holder to carefully open the Lid.
9. Remove the food using the Plastic Spatula provided. Be sure to always use
either plastic or wooden utensils so as not to scratch the non-stick surface.
Never use metal tongs, forks or knives as these can damage the coating on
the cooking plates.
10. When finished, turn Temperature Control Dials to OFF. Disconnect the plug
from the wall outlet and let the appliance cool completely.
CAUTION: To avoid any sparks at the outlet while disconnecting plug,
make sure the "Power-On Lights" are off (not illuminated) before discon-
necting the plug from the outlet.
11. When cool, the Drip Tray may be removed and emptied. Be sure the liquid
has cooled before removing Drip Tray.
User Maintenance Instructions
CAUTION: To avoid accidental burns, allow your Grilling
Machine/Griddle to cool thoroughly before cleaning.
1. Before cleaning, turn the left hand Temperature Control Dial (Grill) to
OFF, the right hand Temperature Control Dial (Griddle) to OFF and
unplug from the wall outlet and allow to cool.
CAUTION: To avoid any sparks at the outlet while disconnecting
plug, make sure the "Power On Lights" are off (not illuminated)
before disconnecting the plug from the outlet.
2. Inside cleaning: Place the Drip Tray under the front of the Grilling
Machine. Using the specially designed spatula, scrape off any
excess fat and food particles. Wipe the cooking surfaces of the Grill
and Griddle with absorbent paper towels or a sponge.
3. Stubborn build-up: If necessary, use a non-metallic scrubbing pad to
clean the Cooking Plate and a stiff, non-metallic brush to clean
between the grill ribs. Do not use steel wool, scouring pads, or abra-
sive cleaners on any part of the Grill/Griddle.
4. Empty the Drip Tray and clean with warm soapy water. Wipe dry.
5. Outside cleaning: Wipe with a warm, damp sponge and dry with a
soft, dry cloth.
6. Do not use steel wool, scouring pads, or abrasive cleaners on any
part of the appliance.
7. DO NOT IMMERSE IN WATER OR OTHER LIQUID.
8. Any servicing requiring disassembly other than the above cleaning
must be performed by a qualified electrician.
9. Make sure to hold the top cover (Lid) by hand while cleaning to pre-
vent accidental closing and injury.
GF20G_IB_26-11-03 11/26/03 6:07 PM Page 13


