


Installation
312786G 7
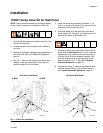
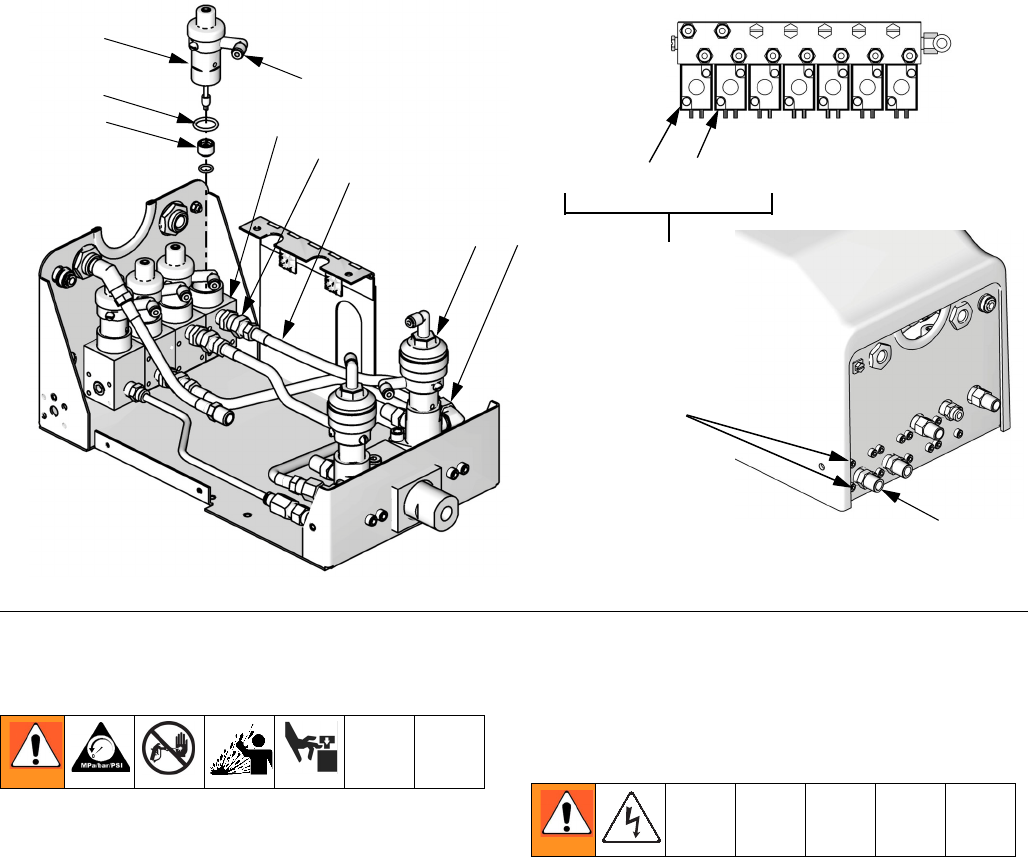
15V202 Third Flush Valve Kit for RoboMix
1. Shut off the air and fluid supply to the ProMix 2KS.
2. Relieve pressure. See your ProMix 2KS Operation
Manual.
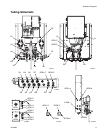
3. See F
IG
. 8. Remove the plug (A) from the air flush
valve (AFV). Install an o-ring (6) in this port.
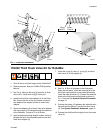
4. Install the third flush valve adapter (3) in the Robo-
Mix. Ensure that the o-ring (6) remains in place to
seal between the adapter and the air flush valve
adapter.
5. Secure the adapter (3) to the air flush valve adapter
with four screws (10) inserted through the side wall
of the RoboMix. Torque to 70 in-lb (8 N•m).
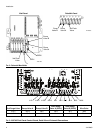
6. Apply thread sealant and install the check valve (4)
through the back of the RoboMix and into the third
flush valve adapter (3).
7. Install the o-ring (2), seat (1), o-ring (6), and third
flush valve (5) in the adapter (3).
8. See F
IG
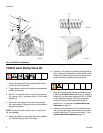
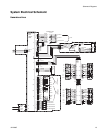
. 8. Shut off all power to the fluid panel.
Open the fluid panel. Install the solenoid (8) in the
third flush valve position on the solenoid manifold.
Install the tube connector (9). Connect the solenoid
wires to the fluid panel control board as shown in
F
IG
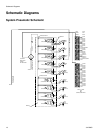
. 3. Also see the System Electrical Schematic
on page 13.
9. Connect the tubing (13) between the solenoid mani-
fold and the tube fitting (T) on the third flush valve
(5). See System Pneumatic Schematic, page 10.
10. Connect the third flush fluid supply line to the check
valve (4).
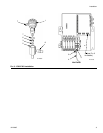
F
IG
. 7: 15V822 Kit Installation
TI13045a
TI12655a
Dump
Valve A
Dump
Valve B
TI13047a
4
11
9
1
10
2
3
6
5
8
T
V