


6
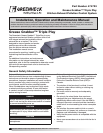
Grease Grabber Triple Play Kitchen Exhaust Pollution Control System
Filter Replacement
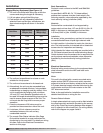
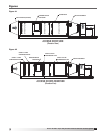
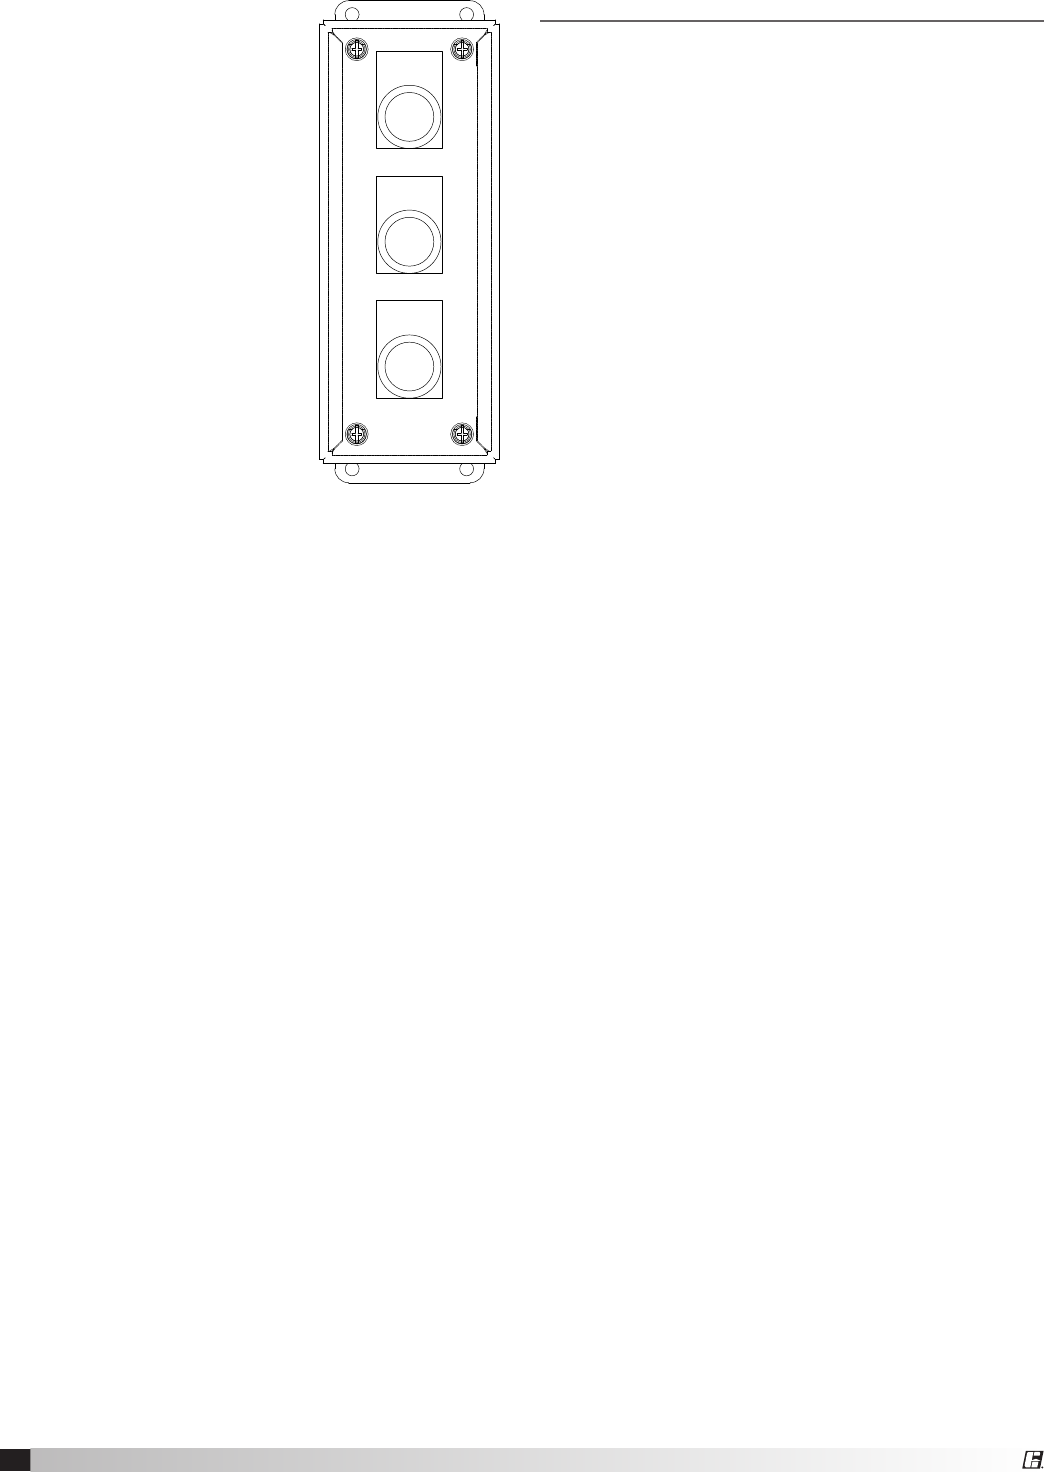
Determine which stage(s) of
filter needs replacing as shown
by lighted LED(s) located
on the face panel of the
remote Filter Status Indicator
Enclosure.
1. Have the correct type and
quantity of filters available
at the unit.
2. Turn off and lockout
power to the fan.
3. Open the appropriate
access door(s) and
remove the filter pressure
plate(s).
4. Remove the spent filter(s)
by sliding them out of
the housing access door
opening.
5. Replace with the proper
new filter(s) making sure
direction of airflow is
correct.
6. Replace filter compression plate(s).
7. Close and latch access door(s).
8. Turn on power to the fan.
9. Proper filter disposal is important to the
environment. Refer to local landfill codes.
Carbon Panel Replacement
Unlike particulate filters, technology has yet to
develop a cost-friendly method of determining when
the carbon panels need replacing. So, the industry
standard is the human sniff test. As the carbon begins
to lose its effectiveness, odor breakthrough gradually
occurs and odor concentration increases. Based on a
variety of cooking applications/installations, life of the
carbon panels can range from a few months to one
year. Replace carbon panels when odor breakthrough
is first noticed. When replacing carbon panels,
follow the instructions in the Operation section, Filter
Replacement, Steps 2-10. There is no particular
direction of airflow for carbon panels.
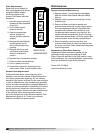
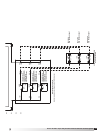
R
R
R
CHANGE
PRE FILTER
CHANGE
BAG FILTER
CHANGE
RIGID FILTER
REMOTE FILTER
STATUS INDICATOR
R
R
R
CHANGE
PRE FILTER
CHANGE
BAG FILTER
CHANGE
RIGID FILTER
REMOTE FILTER
STATUS INDICATOR
Maintenance
Regular Scheduled Maintenance
1. Replace stage 1, 2 and 3 filter(s) immediately
after the remote Filter Status Indicator LED(s)
light up.
2. Replace carbon panels at the first sign of odor
breakthrough.
3. Remove all filters and carbon panels and
pressure wash/clean the housing interior yearly.
Only use degreasers that are compatible with
painted metal surfaces. Use caution so as to
not damage static pressure tips, tubing or fire
system nozzles and detectors. Dry the housing
interior and replace Stage 1-4 filters, replace filter
pressure plates, close and latch access doors.
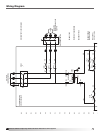
4. Remove/open fan scroll access door and
pressure wash/clean all internal surfaces of the
fan every 6 months. Check sheave-belt alignment
and belt tightness.
Replacement Filter/Parts Ordering
Replacement filters and carbon panels can be
obtained through any source offering UL 900,
Class 1 filters as specified in the Filter section under
Filter Installation. As a recommendation, replacement
filters are available through AirScrubbers Inc.
Phone: 919-718-5818
www.airscrubbersinc.com