


5
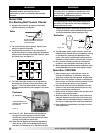
Model CW/CWB • Centrifugal Sidewall Exhaust Fans
®
Model CWB
Pre-Starting Belt Tension Checks
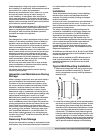
8. Always loosen tension enough to install belts
without stretching, see gure 9.
9. For units with two groove pulleys, adjust so the
tension is equal in both belts.
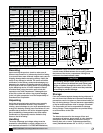
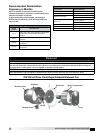
10. If adjustments are made, it is very important to
check the pulleys for proper alignment. Misaligned
pulleys lead to excessive belt wear vibration, noise
and power loss, see gure 10.
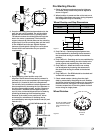
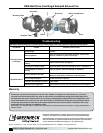
11. For CWB units: Belt tension can be adjusted by
loosening four fasteners on the drive frame, see
gure 11. The motor plate slides on the slotted
adjusting arms and drive frame angles in the same
manner.
12a. Sizes 071-161: Belts should be tensioned just
enough to prevent slippage at full load. Belts
should have a slight bow on the slack side while
running at full load (see gure 12a).
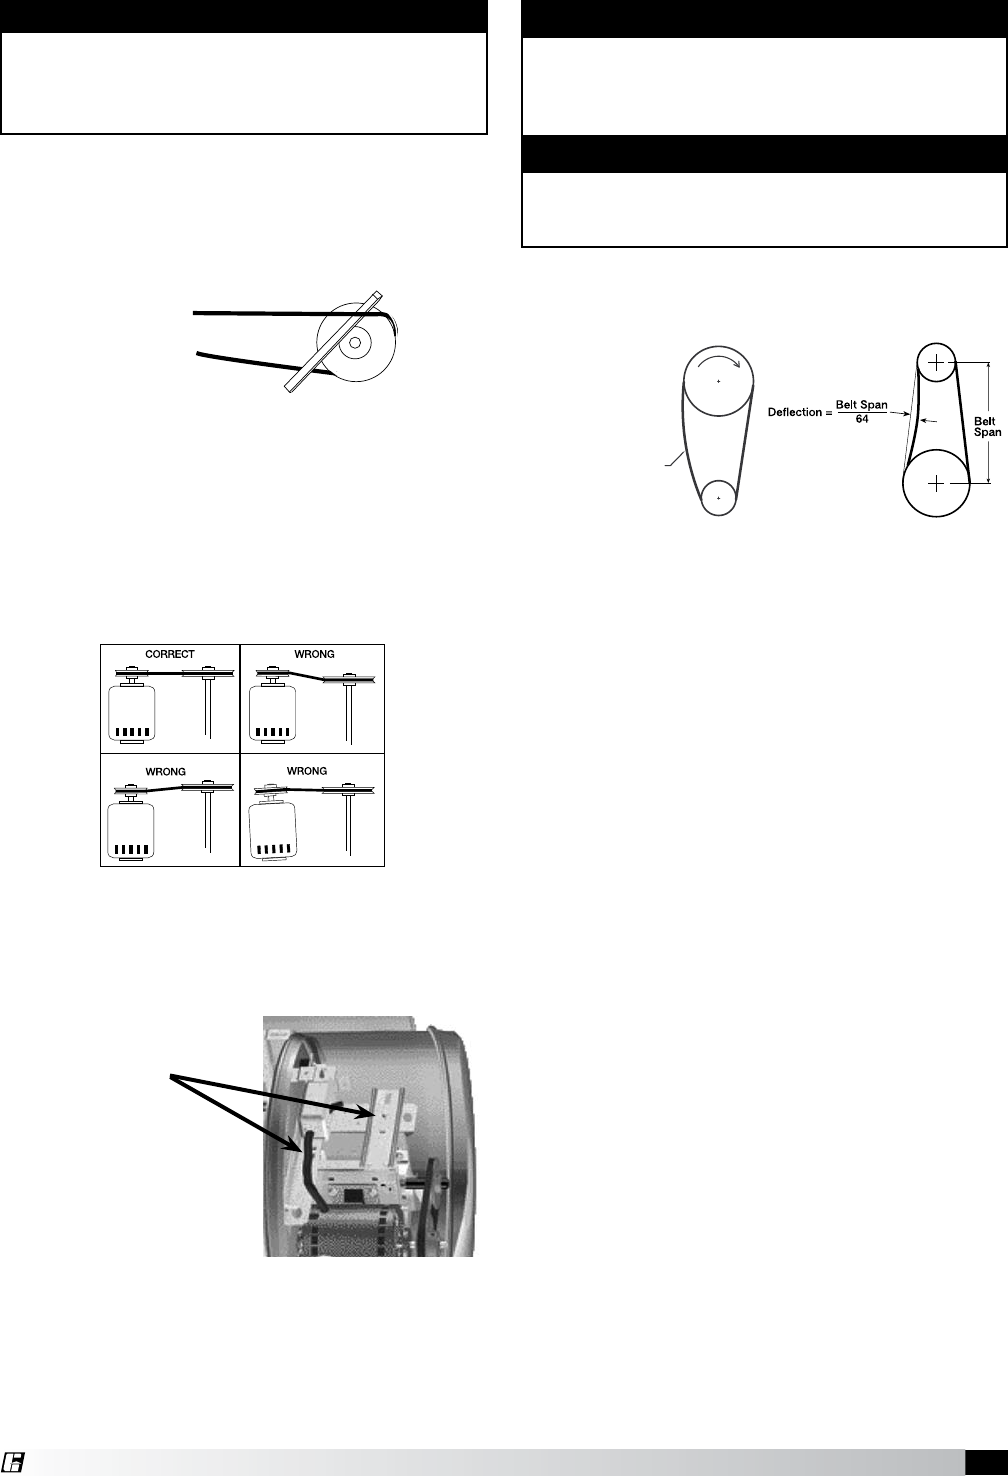
12b. Sizes 180-540: Belt tension should be adjusted to
allow 1/64 in. (0.397 mm) of deection per inch of
belt span. For example, a 15 in. (381 mm) belt span
should have 15/64 in. (0.234 mm) (or about 1/4 in.
(6 mm)) of deection with moderate thumb pressure
at mid-point between pulleys (see gure 12b).
13. The adjustable motor pulley is factory set for the
RPM specied. Speed can be increased by closing
or decreased by opening the adjustable motor
pulley. Two groove variable pitch pulleys must be
adjusted an equal number of turns open or closed.
14. Any increase in speed represents a substantial
increase in the horsepower required by the unit.
15. Motor amperage should always be checked to avoid
serious damage to the motor when speed is varied.
Operation: CW/CWB
1. Before starting up or operating fan, check all
fasteners for tightness. In particular, check the
setscrews in wheel hub (and pulleys, if applicable).
2. While in the OFF position or before connecting the
fan to power, turn the fan wheel by hand to be sure
it is not striking the venturi or any obstacle.
3. Start the fan and shut it off immediately to check
rotation of the wheel with directional arrow in the
motor compartment, see gure 8.
4. When the fan is started, observe the operation and
check for any unusual noises.
5. With the system in full operation and all ductwork
attached, measure current input to the motor and
compare with the nameplate rating to determine if
the motor is operating under safe load conditions.
6. Keep inlets and approaches to fan clean and free
from obstruction.
WARNING
Correct direction of wheel rotation is critical.
Reversed rotation will result in poor air
performance, motor overloading and possible
burnout.
WARNING
The fan has been checked for mechanical noises at
the factory prior to shipment. If mechanical noise
should develop, suggested corrective actions are
offered in the Troubleshooting section.
IMPORTANT
Over tightening will cause excessive bearing wear
and noise. Too little tension will cause slippage at
startup and uneven wear.
Figure 10
Do not force belt(s). Forcing the
belt(s) will break the cords and
cause belt failure
.
Belts
Figure 9
Slack
Side
Deflection
Figure 12a Figure 12b
Fasteners
(4) *Fasteners
*Identical fasteners on
opposing side must also
be loosened.
Figure 11