


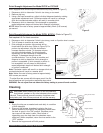

Drink Strength Adjustment
Tools Required: #2 Phillips Screwdriver
Warning: Risk of Electric Shock! Always turn
off power to machine while servicing or
making internal adjustments to machine.
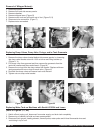
1. Dispense a drink to determine if drink is too
strong or too weak.
2. Turn off power to machine at power switch.
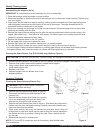
3. Remove upper front splash cover below
dispense heads in front of machine.
4. Using a flat head screwdriver, adjust individual
dispense heads by rotating appropriate
adjustment knob. Turn on power to machine and
dispense a drink to determine if drink
strength is acceptable. If drink is not
acceptable, turn off power to machine
and repeat adjustment steps until
desired drink strength is achieved.
Note: Clockwise rotation will result in a
stronger drink and counterclockwise will result
in a weaker drink.
Note: Water flow rate is factory preset at
approximately 0.80 ounces per second.
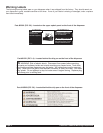
Figure B
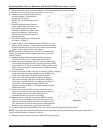
Thermostat Adjustment
NOTE: The thermostat range is approximately 160°F to 200°F. The tank temperature is factory set at 180°F,
making the beverage temperature slightly lower than 180°F.
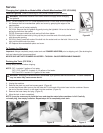
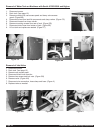
1. Unplug machine.
2. Remove the drip tray.
3. Remove the upper splash panel on the front of the machine by removing the four Phillips head screws.
4. Locate the thermostat adjustment dial on the control board(s).
5. To adjust the temperature of the water being dispensed, turn the adjustment dial on the large* control
board. (Turn clockwise to increase the water temperature or counterclockwise to decrease the water
temperature)
NOTE: It will take time for the water tank temperature to reach its adjusted temperature setpoint.
CAUTION: Do not force the adjustment dial beyond its 270° of rotation or damage to the control board may occur.
*NOTE: PIC 4, 5, and 6 have a second controller. The temperature dial on the right hand board is not active on
this board.
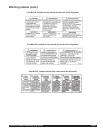
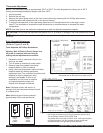
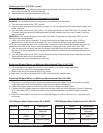
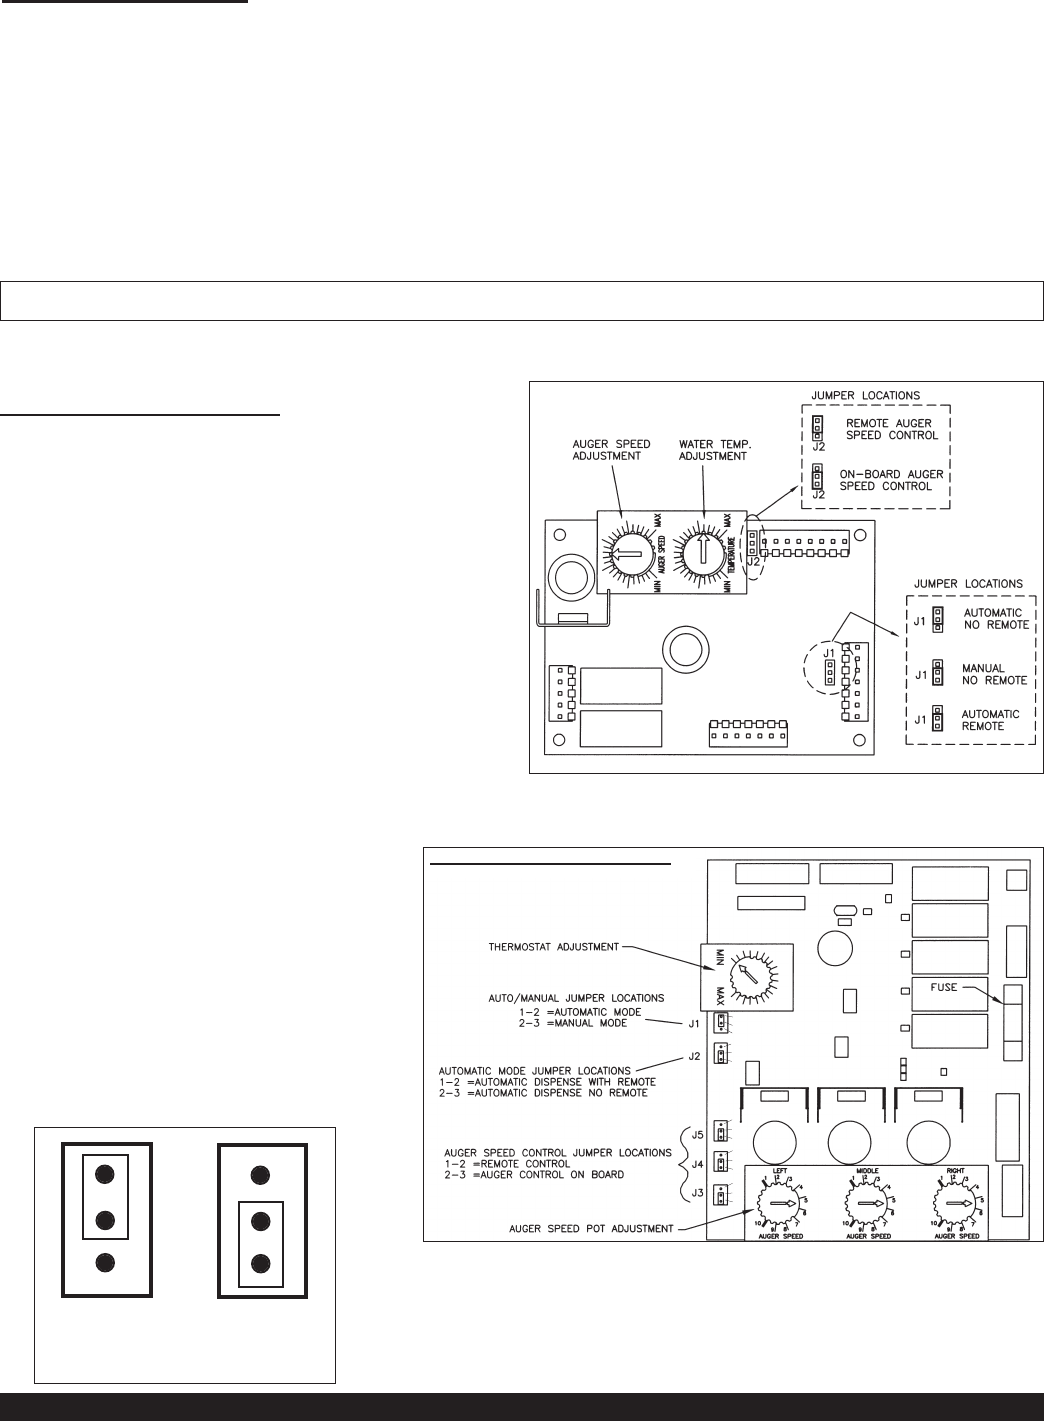
CONTROL BOARD FOR PIC2/3/4/5/6
One controller used for PIC2, PIC3.
One (Fig A) controller and one (Fig B) controller used for PIC4.
Two controllers used for PIC43, PIC5, PIC6.
Thermostat dial is not used on PIC43, PIC5, PIC6 right controller.
On Right Controller: Left dial operates #4 head, middle dial
operates #5 head, and right dial operates #6 head.
Figure A
Operates PIC and right head on PIC4.
Thermostat dial on this board is not used on PIC4.
(Refer to Figure A and B)
Page 6 Crathco® Powdered Beverage Dispensers
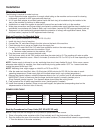
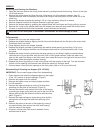
PIC 1 and PIC 4 (Right Head)
Control Board
1
Remote
Auger
Jumper
Position
On-Board
Auger
Jumper
Position
2
3
1
2
3
1
2
3
1
2
3
1
2
3
ƽ